Guided Configuration - Test Repositories
The Guided Configuration screen allows an Administrator to configure LiveCompare for its first use, and to maintain an essential set of LiveCompare resources. LiveCompare displays the screen when an Administrator signs in to LiveCompare. Administrators can also access it using the  tool button in the Dashboard screen, or the
  tool button in the LiveCompare studio.
Test Repositories allow LiveCompare to connect to the following testing tools.
The Test Repositories tab lists the Test Repositories defined on the LiveCompare server and allows you to create, maintain and test them.
Create a Test Repository
To create a Test Repository, click  to display the Test Repository dialog. Complete the fields as follows:
| Field | What to do |
|---|---|
| Name | Enter a unique name that will identify the Test Repository. |
| Description | Enter a description for the Test Repository. |
| Type | Select the type of Test Repository to create, then complete the remaining screen fields as described in the sections below. |
For ALM
LiveCompare supports ALM versions 11 and above. Note that ALM 12.50 requires Patch Level 1.
Before creating your first HP ALM Test Repository, follow these steps:
-
Sign in to HP ALM at least once from your LiveCompare server machine to download the appropriate HP ALM client components.
-
Click
 to display the LiveCompare studio.
 -
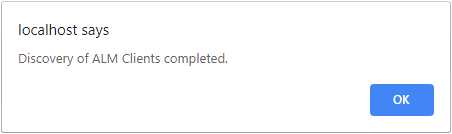
Select the Administration > Test Repositories folder in the LiveCompare hierarchy and choose Discover ALM Clients from the context menu. Click OK to close the following message box:
| Field | What to do |
|---|---|
| Client | Select one of the discovered ALM clients. Each client is identified by the hostname of the machine from which the client components were downloaded. |
| Url | Enter the URL used to access HP ALM. |
| Project |
Enter the name of the HP ALM project to which to connect. |
| Domain | Enter the HP ALM domain. |
| Username | Enter the HP ALM username to use for the connection (required). |
| Password | Enter the HP ALM password to use for the connection (required). |
| API Key | Enter the HP ALM 15 API key to be used for API key-based authentication. If an API Key and API Secret are specified, these are used for the connection instead of any supplied username and password. If an API key is required, you must enter it every time you change the ALM Test Repository settings. |
| API Secret | Enter the HP ALM 15 API secret to be used for API key-based authentication. If an API Key and API Secret are specified, these are used for the connection instead of any supplied username and password. If an API secret is required, you must enter it every time you change the ALM Test Repository settings. |
| Requirement Type | This value is used to set the RequirementType attribute of ALM requirements. |
| Requirement Author | This value is used to set the Author attribute of ALM requirements. |
Click Save to create the Test Repository.
For Azure DevOps
| Field | What to do |
|---|---|
| Url | Enter the URL user to access Azure DevOps. |
| Project | Enter the name of the Azure DevOps project to which to connect. |
| Team | Enter the name of the Azure DevOps team to use for the connection. |
| Personal Access Token | Paste in your Azure DevOps personal access token. |
Click Save to create the Test Repository.
For Certify
| Field | What to do |
|---|---|
| Project | Enter the name of the Certify project to which to connect. |
| External Data Source | Select a SQL Server External Data Source which connects to a Certify database. The External Data Source should be configured to read a small table in the database, for example, CertifyVersion. |
Click Save to create the Test Repository.
For Excel
An Excel Test Repository stores test assets that have exported to an Excel worksheet. The Excel worksheet should include columns that store a test case ID, a test case name, and one or more columns that will be used by the Search Test Repository action to find matching tokens.
Before you create an Excel Test repository, the worksheet containing the test data should be used to create an Excel External Data Source. The first row in the worksheet should contain heading descriptions, for example Test Case ID, Test Case Name… The additional rows should contain test assets.
When creating an Excel Test Repository, columns are referred by the character identifiers in their headings, for example, A, B, C... The letter format should be used in LiveCompare even if Excel has been configured to display numeric identifiers for the column headings.
| Field | What to do |
|---|---|
| External Data Source | Select an Excel External Data Source containing a set of test assets. The test assets should include a test case ID column, a test case name column, and one or more columns that will be used by the Search Test Repository action to find matching tokens. |
| Test Case Id Column | Enter the character identifier of the column that stores the test case ID, for example, A. |
| Test Case Name Column | Enter the character identifier of the column that stores the test case name, for example, B. |
| Test Case Path Column | Enter the character identifier of the column that stores the test case path, for example, C. |
| Search Columns | Enter a comma-separated list of the column identifiers to be used by the Search Test Repository action to find matching tokens, for example, D,E. Note that there should be no spaces after each comma. |
Click Save to create the Test Repository.
For qTest
LiveCompare supports qTest versions 10.0.1 and above.
| Field | What to do |
|---|---|
| Url | Enter the URL used to access qTest. |
| Project | Enter the name of the qTest project to which to connect. |
| Username | Enter the qTest username to use for the connection (required). |
| Password | Enter the qTest password to use for the connection (required). |
Click Save to create the Test Repository.
The qTest user account you use for the connection requires at least the following permissions:
| Category | Permissions | LiveCompare actions |
|---|---|---|
| Project Settings | Manage Field Settings |
Create Test Requirements
|
| Project | Create Releases | Create Test Execution |
| Requirements and Test Design Tree | Create Modules | Create Test Requirements |
| Requirement | Create Requirements | Create Test Requirements |
| Requirement | View Requirements | Create Test Requirements |
| Test Design | View Test Cases | |
| Test Execution | Create Test Suites | Create Test Execution |
| Test Execution | View Test Suites | Create Test Execution |
| Test Execution | Create Test Runs | Create Test Execution |
| Test Execution | View Test Runs | Create Test Execution |
For SAP Solution Manager
LiveCompare supports SAP Solution Manager 7.2.
| Field | What to do |
|---|---|
| Url | Enter the URL used to access SAP Solution Manager, including the port number, for example, http://myserver.example.com:50000. |
| Client | Enter the SAP Solution Manager client number (required). |
| Solution | Enter the name of the SAP Solution Manager solution to which to connect, for example, MainSolution. |
| Branch | Enter the SAP Solution Manager branch to which to connect, for example, Maintenance. |
| Username | Enter the SAP username to use for the connection (required). |
| Password | Enter the SAP password to use for the connection (required). |
| RFC Destination | Select the RFC Destination for the appropriate SAP Solution Manager system. |
Click Save to create the Test Repository.
For Tosca
LiveCompare supports Tosca versions 12.2 and above. LiveCompare supports both managed and unmanaged Tosca workspaces. A managed workspace is one that is derived from a Tosca Server Repository workspace. See here for details.
-
LiveCompare connects to managed workspaces using a Client ID and Client Secret. To obtain these, create a token for the Admin account in Tosca’s User Administration > Account screen.
-
LiveCompare connects to unmanaged workspaces using a username and password.
Tosca Test Repositories support the following integration methods.
Cloud
If you use the Cloud integration method, LiveCompare connects to a Tosca Cloud server using a Client ID and Client Secret.
| Field | What to do |
|---|---|
| Tosca API Type | Select Cloud. |
| Url | Enter the URL used to access the Tosca Cloud server. |
| Space | Enter the Tosca Cloud server space to use for the connection. |
| Client ID | Enter the Tosca Cloud Client ID to use for the connection. |
| Client Secret | Enter the Tosca Cloud Client ID to use for the connection. |
| Scope | The OAuth scope that belongs to your Tosca Cloud Client ID. In almost all cases, the OAuth scope will be tta. |
| Workstates | A comma-separated list of workstates to be searched for by the Search Test Repository action if you set its Use Cache property to false, for example, COMPLETED. If you leave this field blank, the following workstates are searched for by the Search Test Repository action: PLANNED, COMPLETED, IN_WORK. |
Local
If you use the Local integration method LiveCompare connects directly to Tosca Commander installed on the LiveCompare server. This provides a performance improvement over the Rest integration method described below. LiveCompare only supports Local Tosca integration for Tosca versions 2023.x.
To use the Local integration method, carry out the following steps to apply a Tosca license to the LiveCompare account on the LiveCompare server. You should perform these steps only once. They aren’t necessary if you licensed Tosca Commander while signed in to the LiveCompare server using the LiveCompare account.
-
On the LiveCompare server the Tosca Commander app in the Windows Start menu and select Open file location from the context menu.
-
Select Tosca Commander in the Start menu folder, hold down the Shift key and select Run as a different user from the context menu.
-
In the Run as a different user dialog, enter the username and password for the LiveCompare account. The username should have the format .\<account name>.
-
Use the Tosca License screens to apply a Tosca license to the LiveCompare account.
| Field | What to do |
|---|---|
| Tosca Api Type | Select Local. |
| Tosca Workspace Type | Select either Managed or Unmanaged. |
| Client ID | The Tosca Client ID to use for the connection (required for managed workspaces). |
| Client Secret | The Tosca Client Secret to use for the connection (required for managed workspaces). |
| Username | The Tosca username to use for the connection (required for unmanaged workspaces). |
| Password | The Tosca password to use for the connection (required for unmanaged workspaces). |
| Tosca Local Workspace | Select the Tosca workspace to connect to. |
| Workstates | Enter a comma-separated list of workstates to be searched for by the Search Test Repository action, if you set its Use Cache property to false, for example COMPLETED. If you leave this field blank, the following workstates are searched for by the Search Test Repository action: PLANNED, COMPLETED, IN_WORK. |
| Configuration | Enter the node path of the Tosca configuration object to be used by the Execute Test Cases action when executing test cases, for example /Execution/Configurations/Any. The node path may be found in Tosca’s Execution tab. |
| Search Methods | The search methods to be used by the Search Test Repository action when searching the Tosca Test Repository. |
Rest
If you use the Rest integration method, LiveCompare connects to the specified URL using a REST API.
| Field | What to do |
|---|---|
| Tosca Api Type | Select Rest. |
| Tosca Workspace Type | Select either Managed or Unmanaged. |
| Client ID | The Tosca Client ID to use for the connection (required for managed workspaces). |
| Client Secret | The Tosca Client Secret to use for the connection (required for managed workspaces). |
| Username | The Tosca username to use for the connection (required for unmanaged workspaces). |
| Password | The Tosca password to use for the connection (required for unmanaged workspaces). |
| Url | Enter the URL used to access Tosca, for example, http://<server name>:<port number>/rest. |
| Workspace | The name of the Tosca workspace to connect to. |
| Workstates | Enter a comma-separated list of workstates to be searched for by the Search Test Repository action, for example COMPLETED. If you leave this field blank, the following workstates are searched for by the Search Test Repository action: PLANNED, COMPLETED, IN_WORK. |
| Configuration | Enter the node path of the Tosca configuration object to be used by the Execute Test Cases action when executing test cases, for example /Execution/Configurations/Any. The node path may be found in Tosca’s Execution tab. |
| Search Methods | The search methods to be used by the Search Test Repository action when searching the Tosca Test Repository. |
Click Save to create the Test Repository.
Tosca Test Repository search methods
For Xray
Xray is a test management add-on for Jira that allows you to export Jira test assets to Microsoft Excel. Xray supports modular tests, where the steps of a test are references to other tests. To create an Xray Test Repository, follow these steps:
-
Use Xray to export Jira data to an Excel spreadsheet.
-
Create an Excel External Data Source.
-
Fill out the following fields:
| Field | Description |
|---|---|
| External Data Source | An Excel External Data Source containing Jira test assets you have exported using Xray. In LiveCompare’s impact analysis apps and workflows, the Search Test Repository action searches the External Data Source to find matches for most-at-risk objects. |
| Test Case Id Column | The character identifier of the column that stores the test case ID, for example, B. |
| Test Case Name Column | The character identifier of the column that stores the test case name, for example, F. |
| Test Case Path Column (optional) | The character identifier of the column that stores the test case path, for example, AH. |
| Test Steps Column | The character identifier of the column that stores the test steps path, for example, AG. |
Test a Test Repository connection
To test a Test Repository connection, click the  icon in the Actions column for the corresponding row in the Test Repositories tab.
Edit a Test Repository
To edit a Test Repository, click the  icon in the Actions column for the corresponding row in the Test Repositories tab. The Test Repository dialog is displayed. Modify the fields as required and click Save to save your changes.
Delete a Test Repository
To delete a Test Repository, click the  icon in the Actions column for the corresponding row in the Test Repositories tab. Note that when a Test Repository is deleted, it is removed from all Resource Groups of which it is a member.