User Profiles
A User Profile grants users specific permissions in a given project, such as the permissions to create a test case or to execute a Test Run.
You can add and modify profiles to suit your needs. Additionally, qTest Manager provides the following editable User Profiles out-of-the-box:
-
Business Analyst: Gives a user the ability to assign requirements, and work with all functions except project settings, test execution and test case assignments, and automation schedules. This profile is meant for your business analysts who set overarching goals.
-
Developer: Gives a user access to all functions, except project settings, any object assignments, editing test logs executed by others, and automation schedules. This profile is meant for the developers creating your software.
-
Project Admin: Gives a user all abilities in your qTest instance. This profile can manage Project Settings within a given project, as well as the ability to invite other users to the project and grant them permissions. You can assign more than one Project Admin to a project.
-
Project Manager: Gives a user access to all project settings, without the ability to change Recycle Bin settings or modify test logs for tests run by other users.
-
Quality Assurance: Gives a user access to all functions in Manager, Launch, and Sessions, without the ability to adjust the settings for a project.
-
Sessions Project Admin: Gives a user access to all Sessions functions, as well as the ability to manage project settings, except for the Recycle Bin.
-
Sessions User: Gives a user access to view and work in Sessions, with the ability to create, update, view, or delete sessions.
Available permissions
View the dropdowns in this section to see the associated permissions. Check the box next to the applicable setting to grant the user profile that permission.
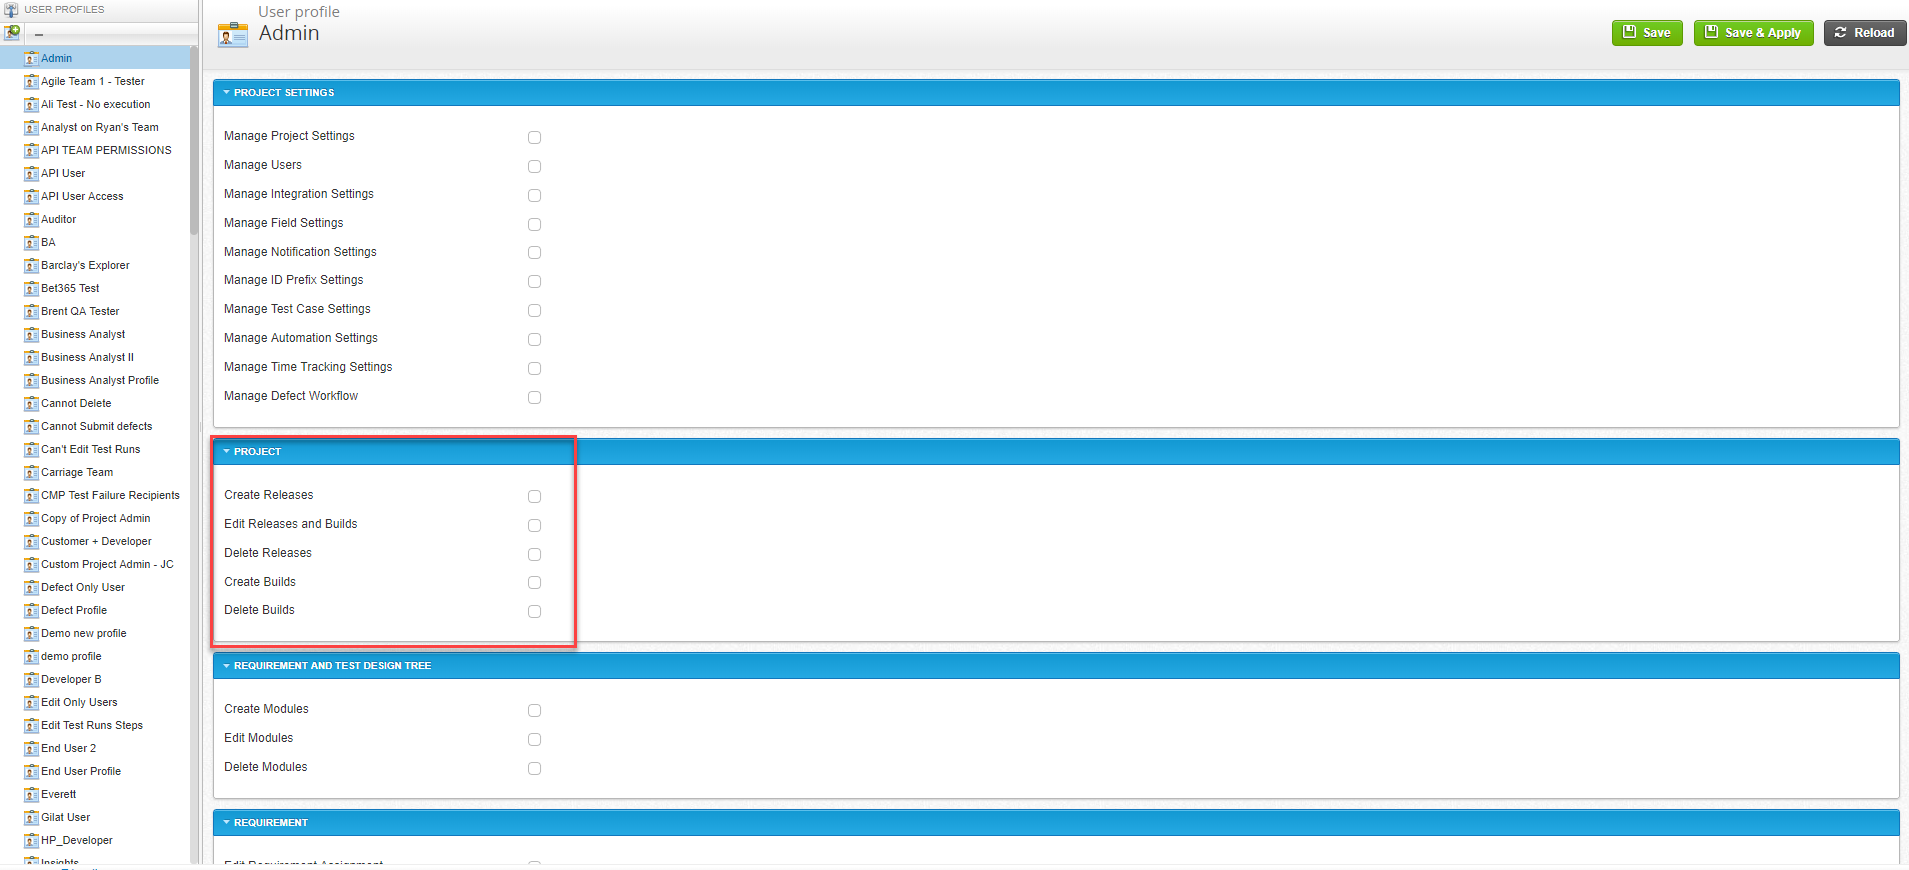
This section allows you to grant a user permissions to manage settings within a project.
The following user permissions are turned on after you select the checkbox next to it:
-
Manage Project Settings: The ability to adjust settings per project.
-
Manage Users: The ability to add or remove users from the project.
-
Manage Integration Settings: The ability to update project Integration Settings.
-
Manage Field Settings: The ability to update project Field Settings.
-
Manage Notification Settings: The ability to update project Notification Settings.
-
Manage ID Prefix Settings: The ability to update project ID Prefix Settings.
-
Manage Test Case Settings: The ability to update project Test Case Settings.
-
Manage Test Execution Settings: The ability to update project Test Execution Settings.
-
Manage Automation Settings: The ability to update project Automation Settings.
-
Manage Time Tracking Settings: The ability to update project Time Tracking Settings.
-
Manage Defect Workflow: The ability to update project Defect Workflow Settings.
-
Manage Recycle Bin Settings: The ability to permanently delete objects from the recycle bin.
This section allows you to grant user permissions to create a test plan with releases and builds in a project.
The following user permissions are turned on after you select the checkbox next to it:
-
Create Releases: The ability to create new releases.
-
Edit Releases and Builds: The ability to edit existing releases and builds.
-
Delete Releases: The ability to delete releases.
-
Create Builds: The ability to create new builds.
-
Delete Builds: The ability to delete builds.
This section allows you to grant user permissions to work with modules in the project tree.
The following user permissions are turned on after you select the checkbox next to it:
-
Create Modules: The ability to create new modules in the project tree.
-
Edit Modules: The ability to edit existing modules in the project tree.
-
Delete Modules: The ability to delete modules from the project tree.
This section allows you to grant user permissions to work with requirements.
The following user permissions are turned on after you select the checkbox next to it:
-
Edit Requirement Assignment: The ability to edit who a requirement is assigned to.
-
Create Requirements: The ability to create a new a requirement.
-
Edit Requirements: The ability to edit existing requirements.
-
Delete Requirements: The ability to delete existing requirements.
-
View Requirements: The ability to view existing requirements.
- Export Requirement Reports: The ability to export a requirement report.
-
Import Requirements: The ability to import requirements from an Excel document.
-
Vera Integration Actions: Assign this ability to the Vera service account you add to start approving requirements in Vera.
This section allows you to grant user permissions to work in the Test Design tab.
The following user permissions are turned on after you select the checkbox next to it:
-
Edit Test Case Assignment: The ability to edit who a test case is assigned to.
-
Create Test Cases: The ability to create a new a test case.
-
Edit Test Cases: The ability to edit existing test cases.
-
Delete Test Cases: The ability to delete existing test cases.
-
View Test Cases: The ability to view existing test cases.
- Export Test Case Reports: The ability to export a test case report.
-
Import Test Cases: The ability to import test cases from an Excel document.
-
Approve Test Cases: The ability to approve test cases that are ready for test execution. If you don't use version approval in your testing, you can give this permission to all testers to keep everything running smoothly.
This section allows you to grant user permissions to work with test runs.
The following user permissions are turned on after you select the checkbox next to it:
-
Edit Test Execution Assignment: The ability to edit who a test run is assigned to.
-
Create Test Cycles: The ability to create a new test cycle.
-
Edit Test Cycles: The ability to edit an existing test cycle.
-
Delete Test Cycles: The ability to delete an existing test cycle.
-
View Test Cycles: The ability to view test cycles.
-
Create Test Suites: The ability to create new test suites.
-
Edit Test Suites: The ability to edit existing test suites.
-
Delete Test Suites: The ability to delete an existing test suite.
-
View Test Suites: The ability to view test suites.
-
Create Test Runs: The ability to create new test runs.
-
Edit Test Runs: The ability to edit existing test runs.
-
Delete Test Runs: The ability to delete existing test runs.
-
Execute Test Runs: The ability to execute a test run.
-
Execute Test Runs with Quick Run: The ability to use Quick Run to execute a test run.
-
Modify Test Logs (executed by self): The ability to edit the logs of tests you ran.
-
Modify Test Logs (executed by others): The ability to edit the logs of tests run by other users.
-
View Test Runs: The ability to view test runs.
-
Export Test Runs: The ability to export test execution reports.
This section allows you to grant user permissions to work with automation schedules.
The following user permissions are turned on after you select the checkbox next to it:
-
Create Schedules: The ability to create automation schedules.
-
Update Schedules: The ability to change existing automation schedules.
-
Delete Schedules: The ability to delete automation schedules.
-
View Schedules: The ability to view existing automation schedules.
This section allows you to grant user permissions to work with defects.
The following user permissions are turned on after you select the checkbox next to it:
-
Create Defects: The ability to create, import, and submit new defects.
-
Edit Defects: The ability to edit existing defects.
-
View Defects: The ability to view defects.
-
Export Defects List: The ability to export defects to an Excel doc.
-
Vera Integration Actions: Assign this ability to the Vera service account you add to start approving defects in Vera.
This section allows you to grant user permissions to work in the Sessions satellite application.
The following user permissions are turned on after you select the checkbox next to it:
-
Create Session: The ability to record a new session on both Web Explorer and Desktop Explorer. Explorer creates a session in qTest Sessions and Manager.
-
Update Session: The ability to record a planned session that was already created in qTest Sessions.
-
View Session: The ability to access qTest Sessions. This is only applicable to qTest Sessions. This option has no impact on Web Explorer or Desktop Explorer functionality.
-
Delete Session. The ability to delete sessions. This is only applicable to qTest Sessions. This option has no impact on Web Explorer or Desktop Explorer functionality.
Create and Modify User Profiles
qTest Manager provides several user profiles out of the box. You can continue to use those as-in or modify them to suit your needs. You can also create a new User Profile by following these steps.
-
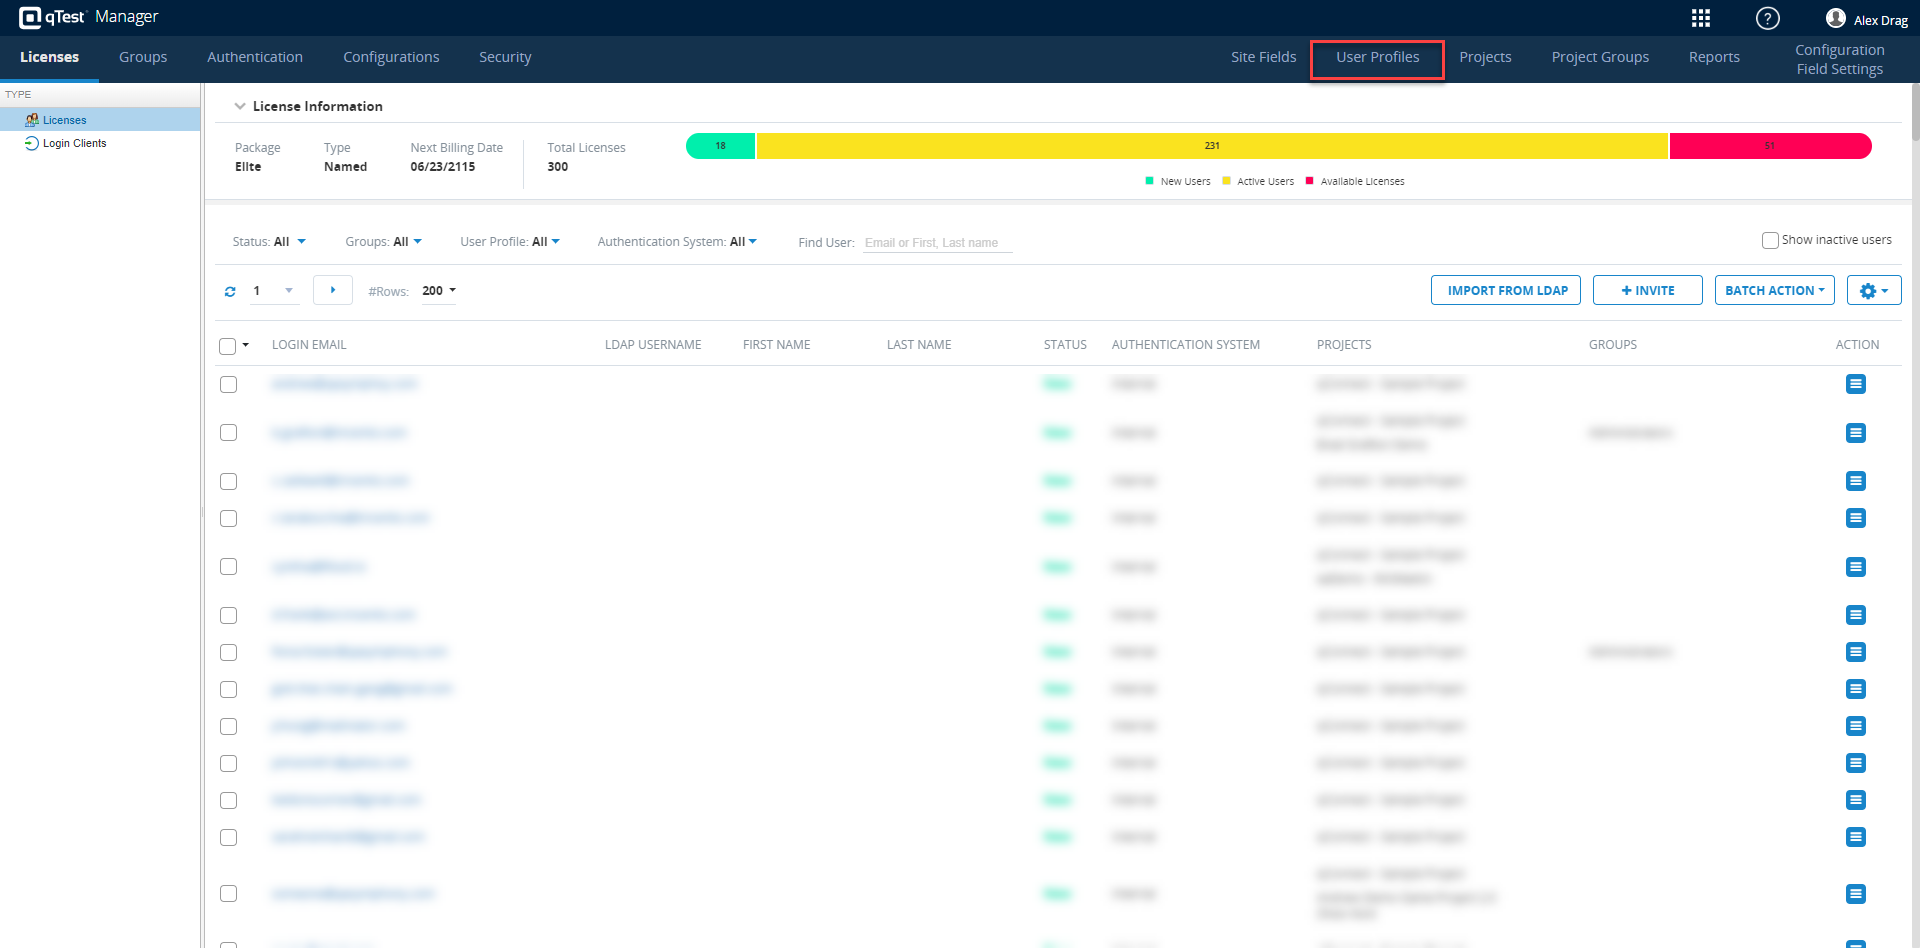
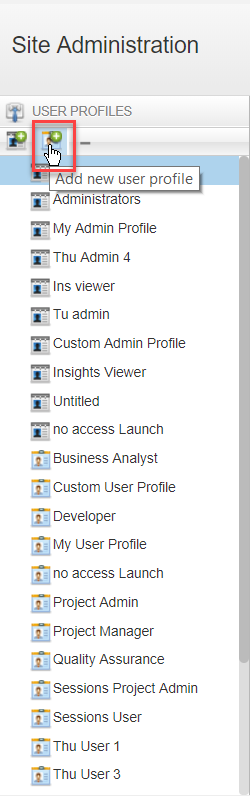
Hover your cursor over your username, and select Administration from the drop-down menu. The Site Administration page displays.
-
Select the User Profiles tab.
-
In the navigation panel, select the Add New User Profile icon.
-
The User Profile page displays. Enter the User Profile name in the top field.
-
Select all the check boxes in the Project field, allowing the user to create releases, edit Releases and Builds, delete Releases, create Builds, and delete Builds.
-
Select Save.
Assign Default User Profile to User
You can put your User Profiles to use by assigning users a default User Profile or assigning users an Admin Profile in Licenses - Users.
You can assign a user a default User Profile so that they are automatically assigned certain project permissions when they're added to a project. To do so, follow these steps:
-
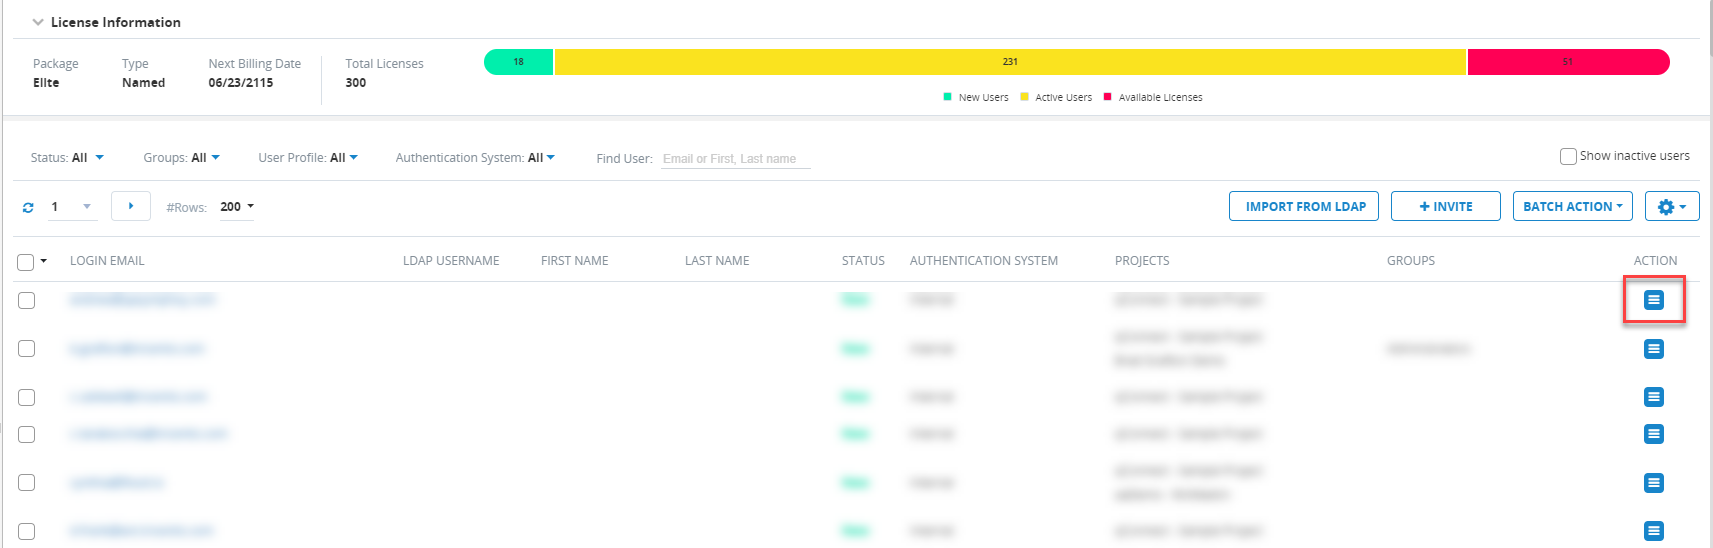
In Site Administration, select the Licenses tab.
-
In the Licenses table, locate the user you wish to act upon. Select the Action icon for that user.
-
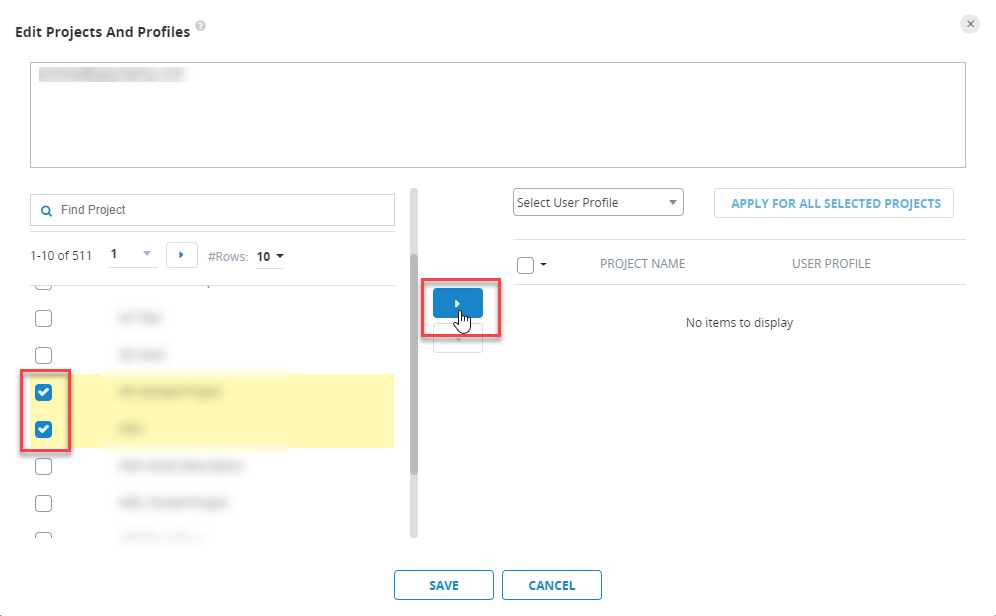
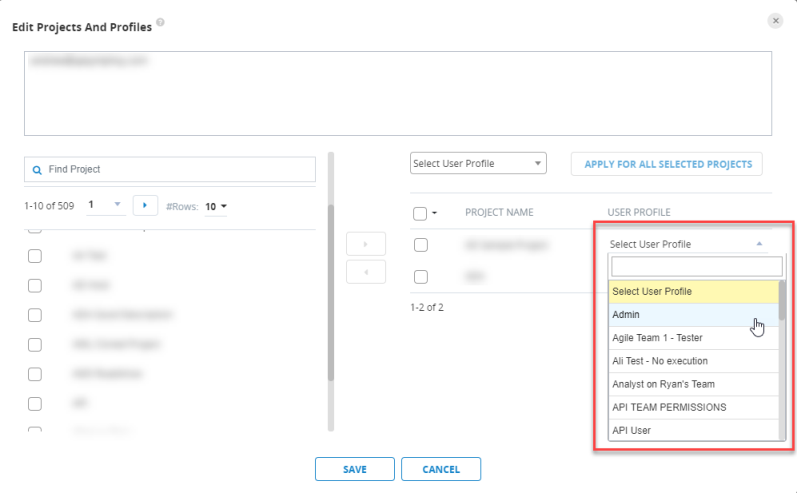
In the Action drop-down menu, select Edit Projects and Profiles. A dialog displays.
-
In the Edit Project and Profiles dialog, select the projects in which you would like to assign or change your users' User Profiles. To do so, select the check boxes next to the projects and then select the right-arrow icon.
From here, you can either select one User Profile for all projects or choose individual User Profiles for individual Projects.
Select One User Profile for Multiple Projects
To select one User Profile for multiple Projects, follow these steps:
-
Select the check boxes next to the Projects.
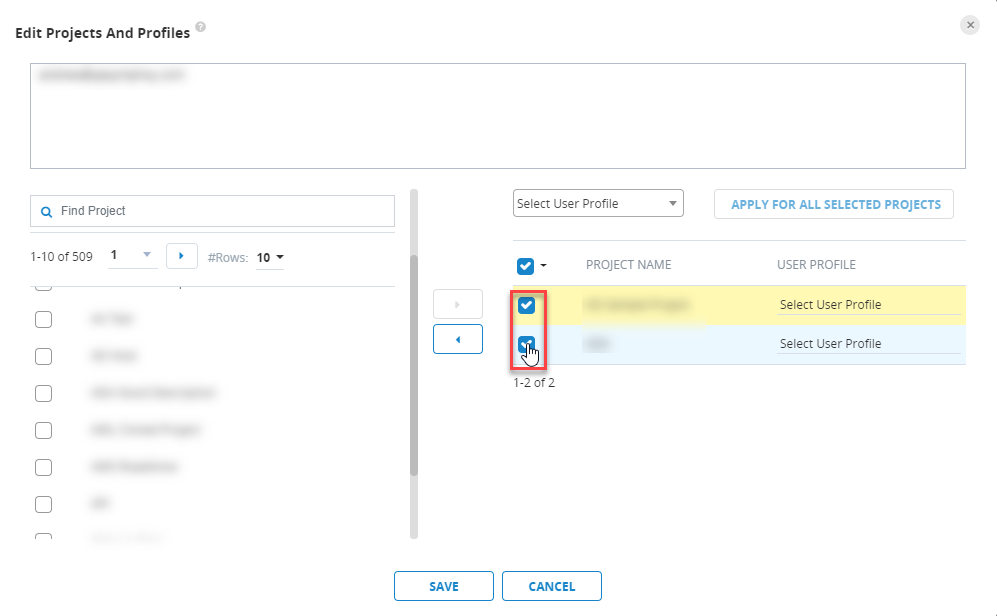
-
Search for and select your chosen User Profiles in the Select User Profile drop-down menu.
-
Select Save.
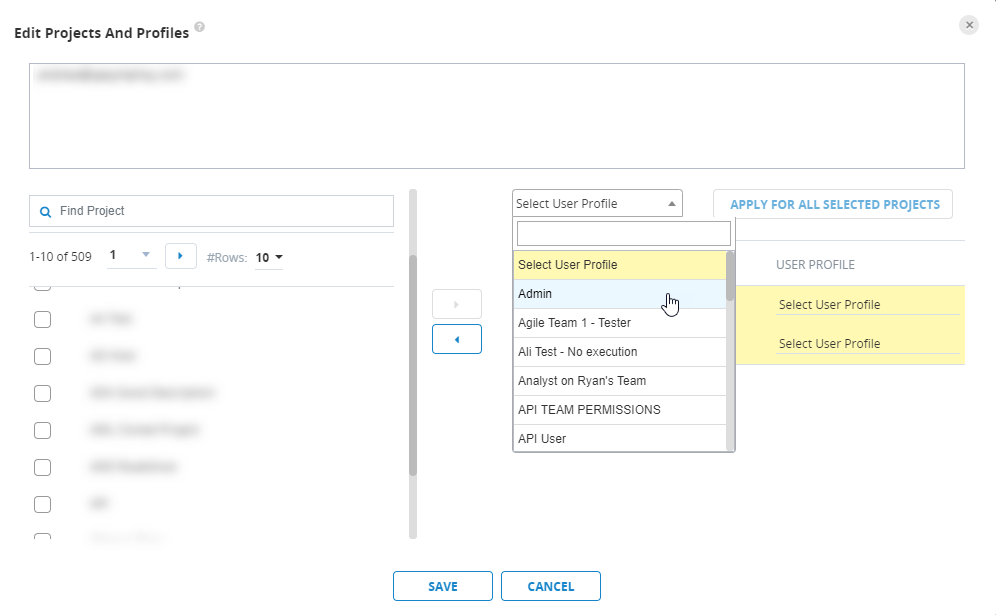
Select Individual User Profiles for Individual Projects
Perhaps you want a user to have different User Profiles within different Projects. To set this up, follow these steps:
-
Select the Select User Profile drop-down menu associated with the Project you wish to act upon.
-
Choose the User Profile that you want that user to have in that specific Project.

-
Repeat steps 1-2 for all other Projects you wish to act upon.
-
Select Save.
Delete User Profile
To remove a User Profile, perform the following steps:
-
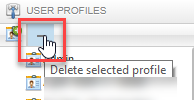
In Site Administration, select the User Profiles tab.
-
In the navigation panel, select the User Profile you want to remove.
-
Select the Delete selected profile icon.
Notes
-
You cannot remove the “Administrators” Admin profile and the “Project Admin” User Profile, as qTest Manager business rules depend on these two default profiles.
-
You cannot remove a profile that is currently assigned to a user. To remove this profile, you must first remove the profile from any users.
Bulk Assign User Profiles
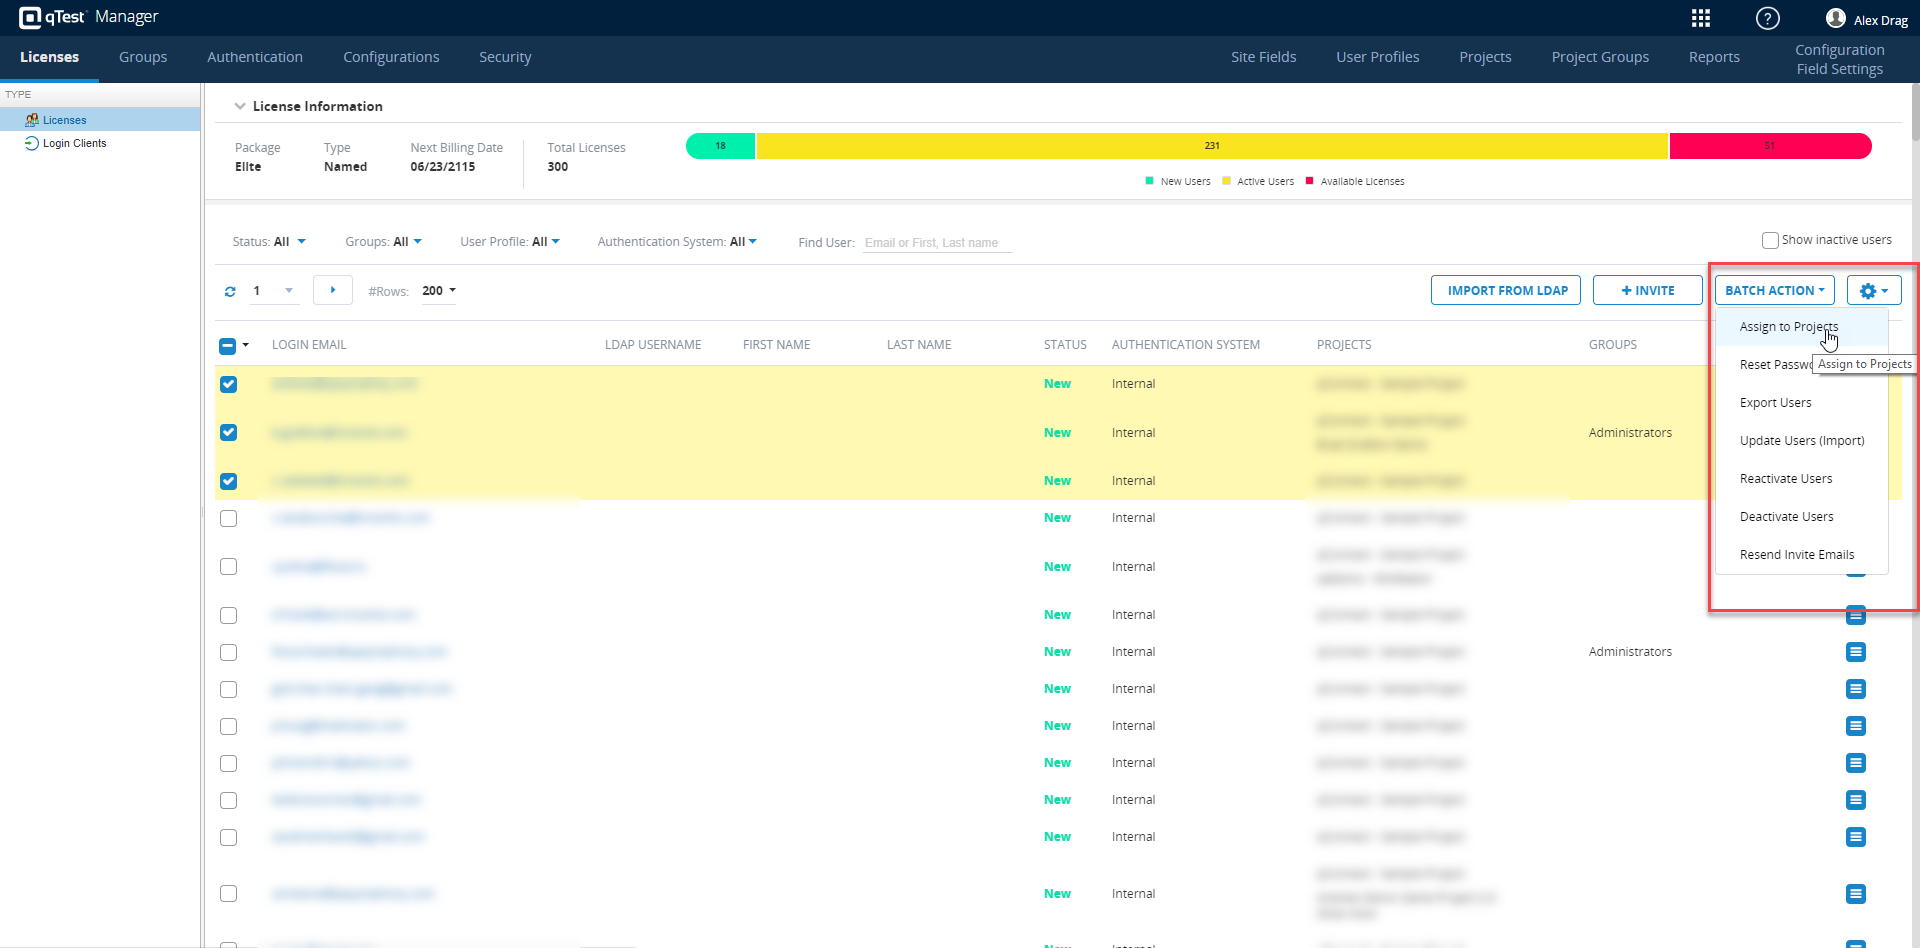
If you would like to both add a user (or more than one user) to multiple projects and assign User Profiles for those projects at once, you can do so from within the Licenses tab. To do so, follow these steps:
-
Select the check boxes next to the users you want to batch assign Projects and Profiles.
-
Select the Batch Action icon, and choose Assign to Projects from the drop-down menu.
-
In the Add Users to Projects dialog, select the projects that you wish to add your users to by selecting the check boxes next to the projects.
-
Select the right-arrow icon.
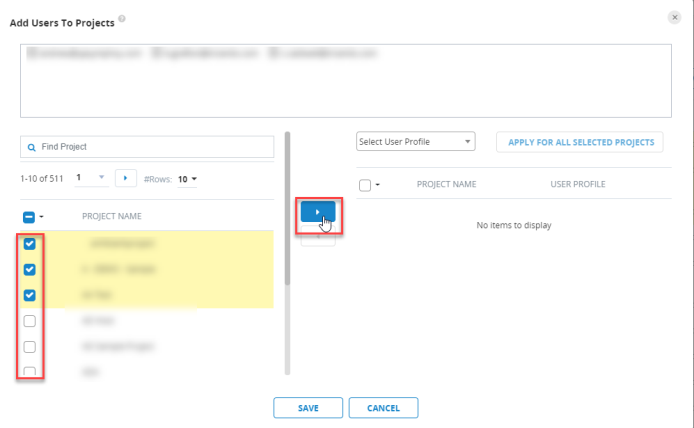
- From here, you can either select one User Profile for all projects or choose individual User Profiles for individual Projects.
Select One User Profile for Your Selected Users Across Multiple Selected Projects
If you want to make sure that all of your selected users have the same User Profile in all of your selected Projects, follow these steps:
-
In the Add Users to Projects dialog, select the check boxes next to the projects you have already selected.
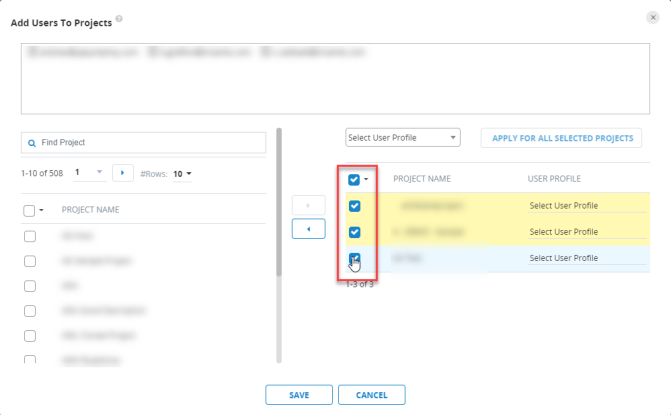
-
Next to the Apply for All Selected Projects icon, select the User Profile that you want to assign from the Select User Profile drop-down menu.
-
Select Save.
Choose Individual User Profiles for Individual Projects for All Selected Users
If you want to select certain User Profiles for Certain Projects across your all of your selected users, follow these steps:
-
For each Project, select the Select User Profile drop-down menu.
-
Select the User Profile that you want all of your selected users to have in each individual Project.
-
Select Save.