Configure LiveCompare and SAP for ChaRM integration
Configuring LiveCompare for ChaRM integration involves creating the components that an /ICORP/CHARM_003 table entry requires, and then populating the table. The steps are described below.
Create an HTTP connection to LiveCompare
The first step is to create an HTTP connection from the ChaRM system to the LiveCompare server on which your workflow will run. The two systems must be accessible to each other over the network.
-
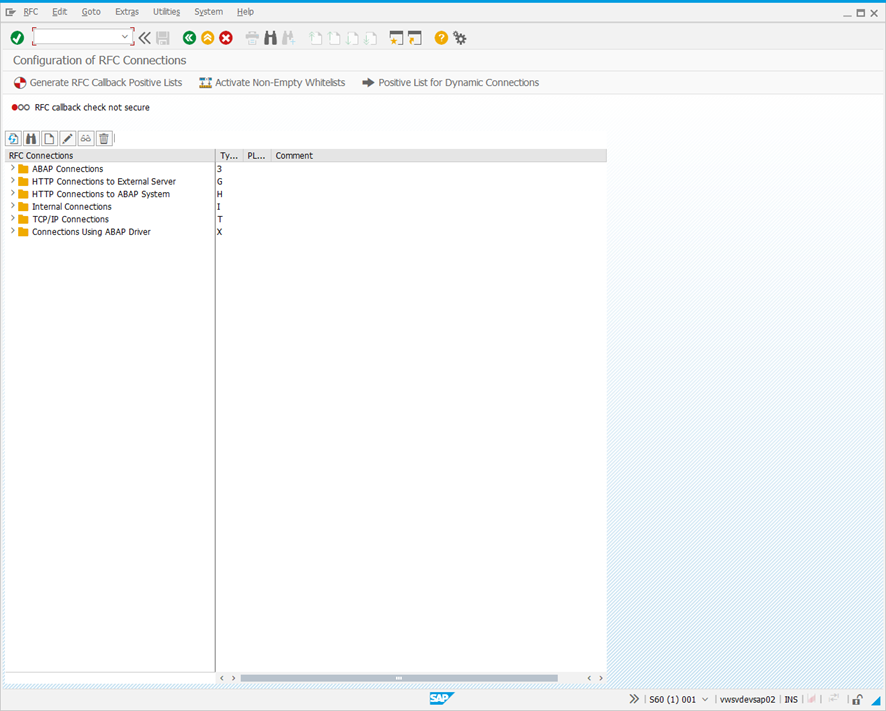
Sign in to the ChaRM system using SAPGUI and run transaction SM59 to display the Configuration of RFC Connections screen.
-
Select HTTP Connections to External Server in the RFC Connections hierarchy, and click
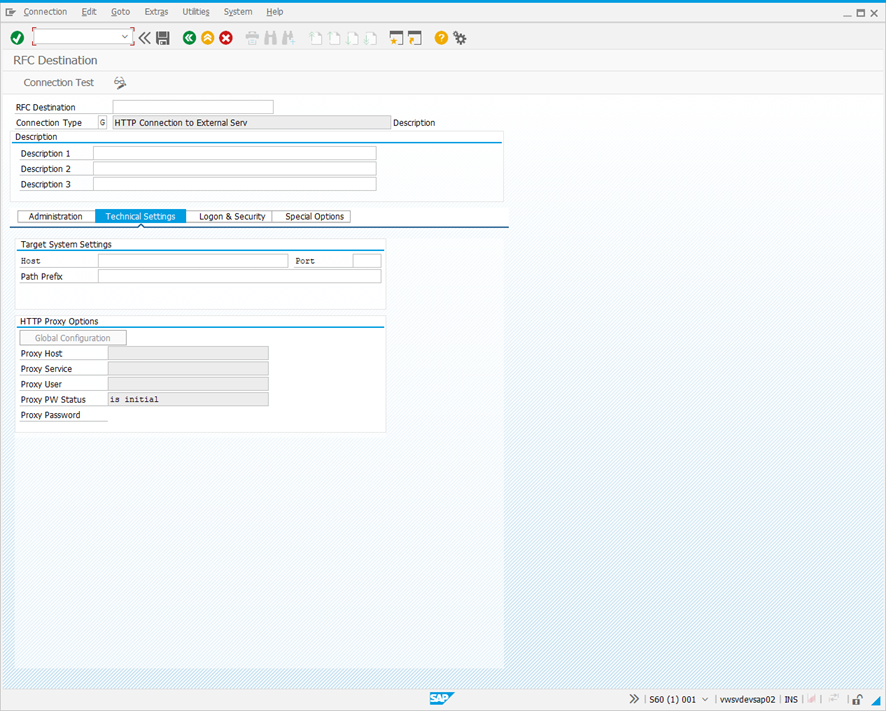
 . The RFC Destination screen is displayed.
-
Complete the screen fields as follows.
| Field | Description |
|---|---|
| RFC Destination |
Enter a name that identifies the LiveCompare server that will be used run a LiveCompare workflow invoked from ChaRM in the format LC_<LiveCompare Server Name>_<Identifier>. The ChaRM should have network access to the LiveCompare server. Example: LC_ MYLCSERVER_001. |
| Description1 |
Enter a description for the connection. Example: SAP connection to LiveCompare server MYLCSERVER. |
| Host |
Enter the hostname of the LiveCompare server. Example: mylcserver.tricentis.com. |
| Path Prefix | Enter /livecompare/studio/api/version.lcrs. |
-
Click
 to save the connection.
 -
The /livecompare/studio/api/version.lcrs endpoint returns the version of LiveCompare installed on the LiveCompare server. Click
 to test the connection. The Connection Test HTTP Destination screen is displayed.
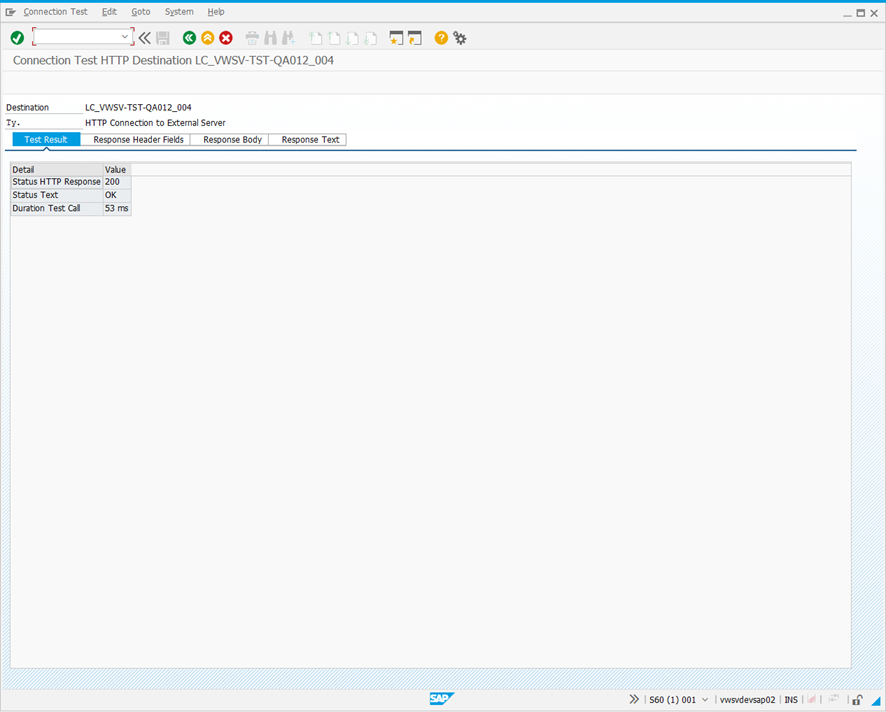
If the connection test was successful, the Status Text field in the Test Result tab should be set to OK, and the Response Text tab should include a version string, for example {"version":"2025.2.1.327"}.
-
Change the Path Prefix field to /livecompare/studio/api/run.lcrs. This endpoint will be used to run the LiveCompare workflow using a REST API call.
-
Click
 to save the connection.
 -
Copy the RFC Destination field value and paste it into a new text document in the following format.
RFCDEST: <Copied value>
The text document will be used to store the field values that will be added to the /ICORP/CHARM_003 table.
Register a workflow as a REST API
The next step is to register the workflow to be called from ChaRM as a REST API.
-
Sign in to the LiveCompare server referenced in the Host field above as a LiveCompare Editor.
-
Identify the top-level workflow to be called from ChaRM.
-
The workflow and workspace names shouldn't include any spaces.
-
The workflow’s input parameters and output dataset to be used when registering it as a REST API shouldn't include any spaces.
-
The workflow should include a String parameter named RequestId (or similar) which will store the change request ID passed to it from ChaRM.
-
The workflow should include a terminal Table dataset named Result (or similar) which stores the report URL that will be passed to ChaRM.
-
-
Select the workflow in LiveCompare hierarchy and choose Register as REST API from the context menu to start the Register Workflow as REST API Wizard. The following dialog is displayed.

-
Select the RequestId (or similar) parameter and click Next. The following screen is displayed.

-
Confirm that the Result (or similar) Table dataset is selected and click Next. The following screen is displayed.

-
Enter a description for the REST API and click Next. The following screen is displayed.

-
Confirm your entries and click Finish to register the workflow as a REST API.
-
Add the following entry to the text document that will be used to populate the /ICORP/CHARM_003 table.
WORKFLOW_ID: <Workspace name>/<Workflow name>
Create an authorization token for the REST API
The next step is to create an authorization token for the REST API.
-
Sign in to LiveCompare as an administrator and click
 to go to the LiveCompare studio.
 -
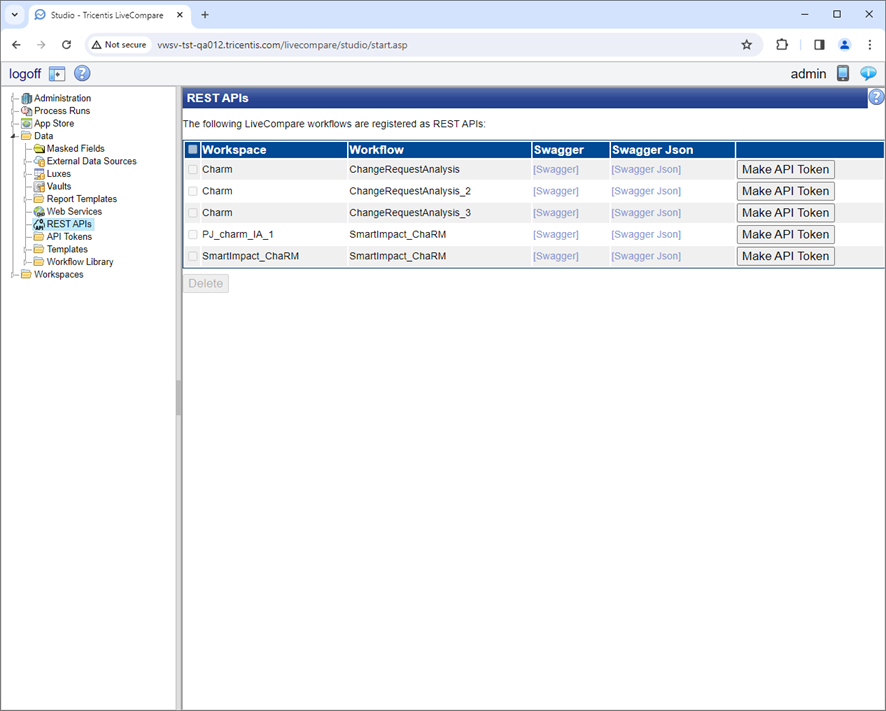
Select the Data > API Tokens folder in the LiveCompare hierarchy. The following screen is displayed.
-
Use the Workspace and Workflow columns to identify the workflow registered as a REST API, and click its Make API token button. The following screen is displayed.
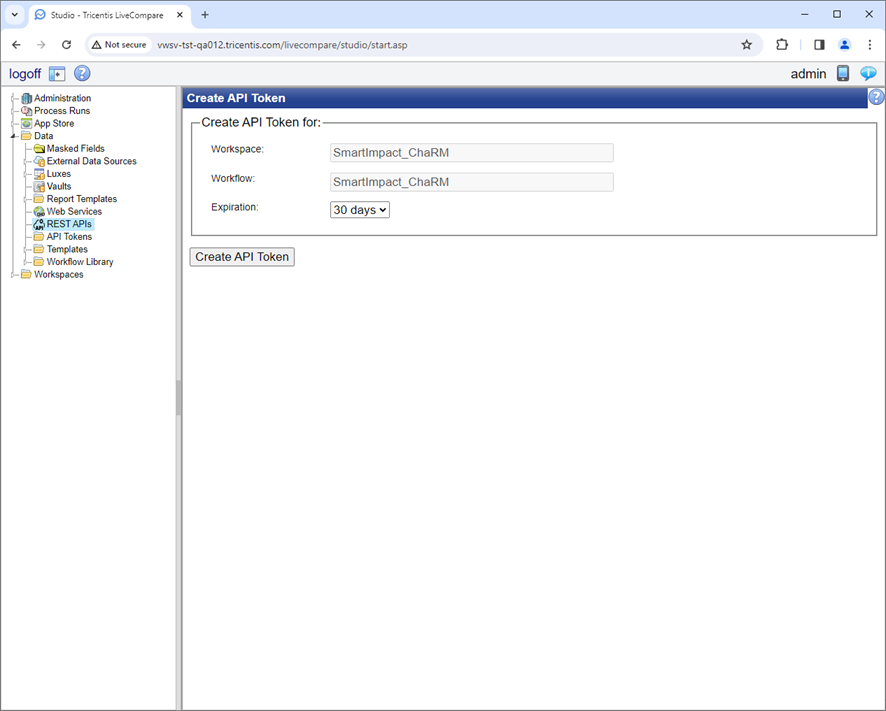
-
Select ’90 Days’ in the Expiration field and click Create API Token. The following screen is displayed.
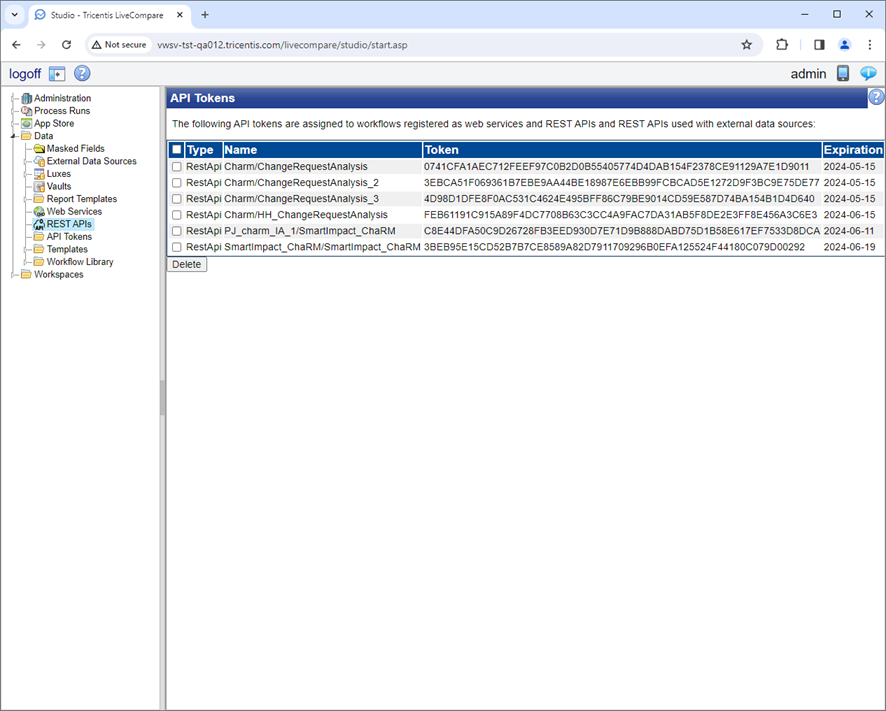
-
Copy the REST API’s Token value. Add the following entry to the text document that will be used to populate the /ICORP/CHARM_003 table.
AUTH_TOKEN: <Copied value>
Identify ChaRM action profiles
The next step to identify the ChaRM action profiles that will trigger the execution of LiveCompare workflows.
-
Sign in to your ChaRM system using SAPUI, and run transaction CRMC_ACTION_CONF. The Conditions for Actions screen is displayed.
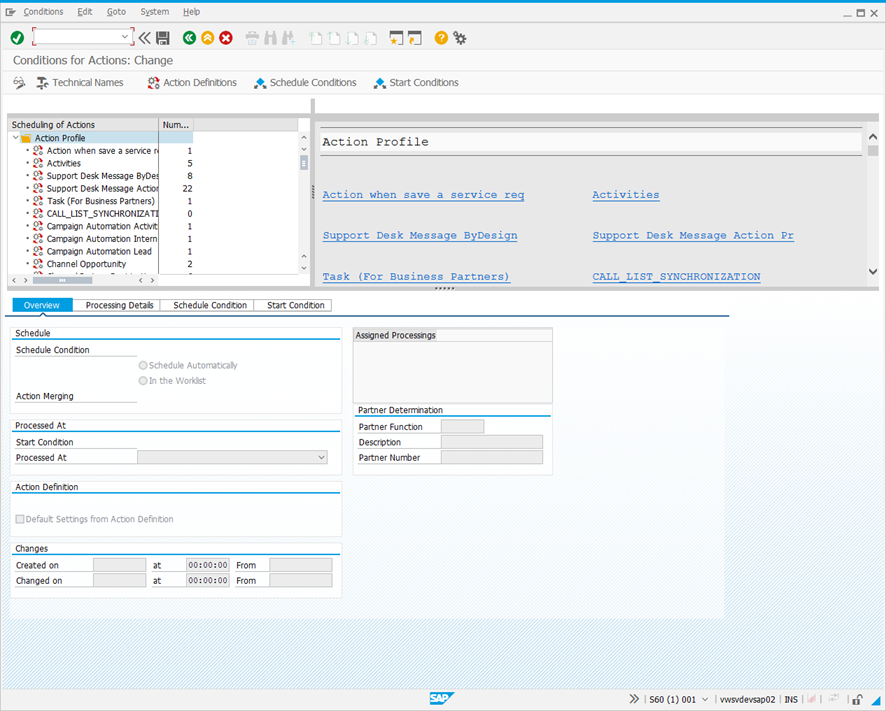
-
The top left-hand pane list each of the available action profiles, and the number of actions each profile contains. Click Technical Names to display each action’s technical name rather than its description.
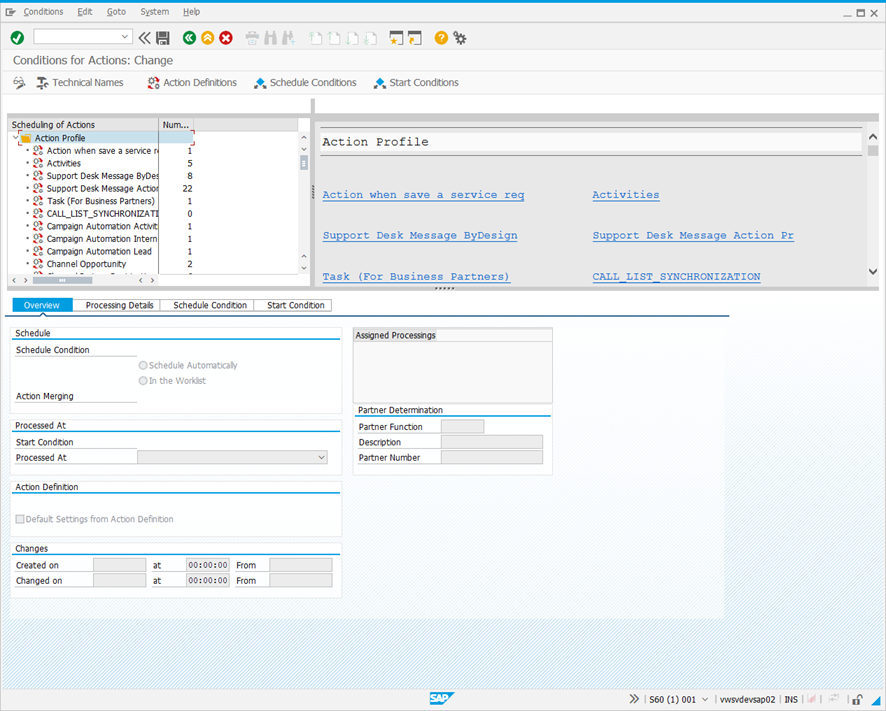
The action profiles to configure depend on the ChaRM activities you wish to track. Here are some examples.
| Technical name | Description | Notes |
|---|---|---|
| SMMJ_ACTIONS | Action Profile: Validated Correction / Development | Shown as a Normal Change Request in ChaRM. |
| SMCR_ACTIONS | Action Profile: Request for Change (CRM Web UI) | Shown as a Request for Change in ChaRM. |
-
Take a note of the action profile you wish to modify.
-
Copy the first part of its technical name (the text before the underscore) to the clipboard. Add the following entry to the text document that will be used to populate the /ICORP/CHARM_003 table.
PROCESSTYPE: <Copied value>
A LiveCompare workflow may be triggered from ChaRM in two ways.
-
When a ChaRM document moves between two states (for example, from In Development to To Be Tested).
-
When an option is selected from the ChaRM Actions menu.
Next: Identify when a ChaRM document moves between two states