Use the interactive diagram
The interactive diagram helps you configure your Service Ports in the OSV Web UI. You can use it to easily define the connections between your application under test, your OSV Service Port, and your real service.
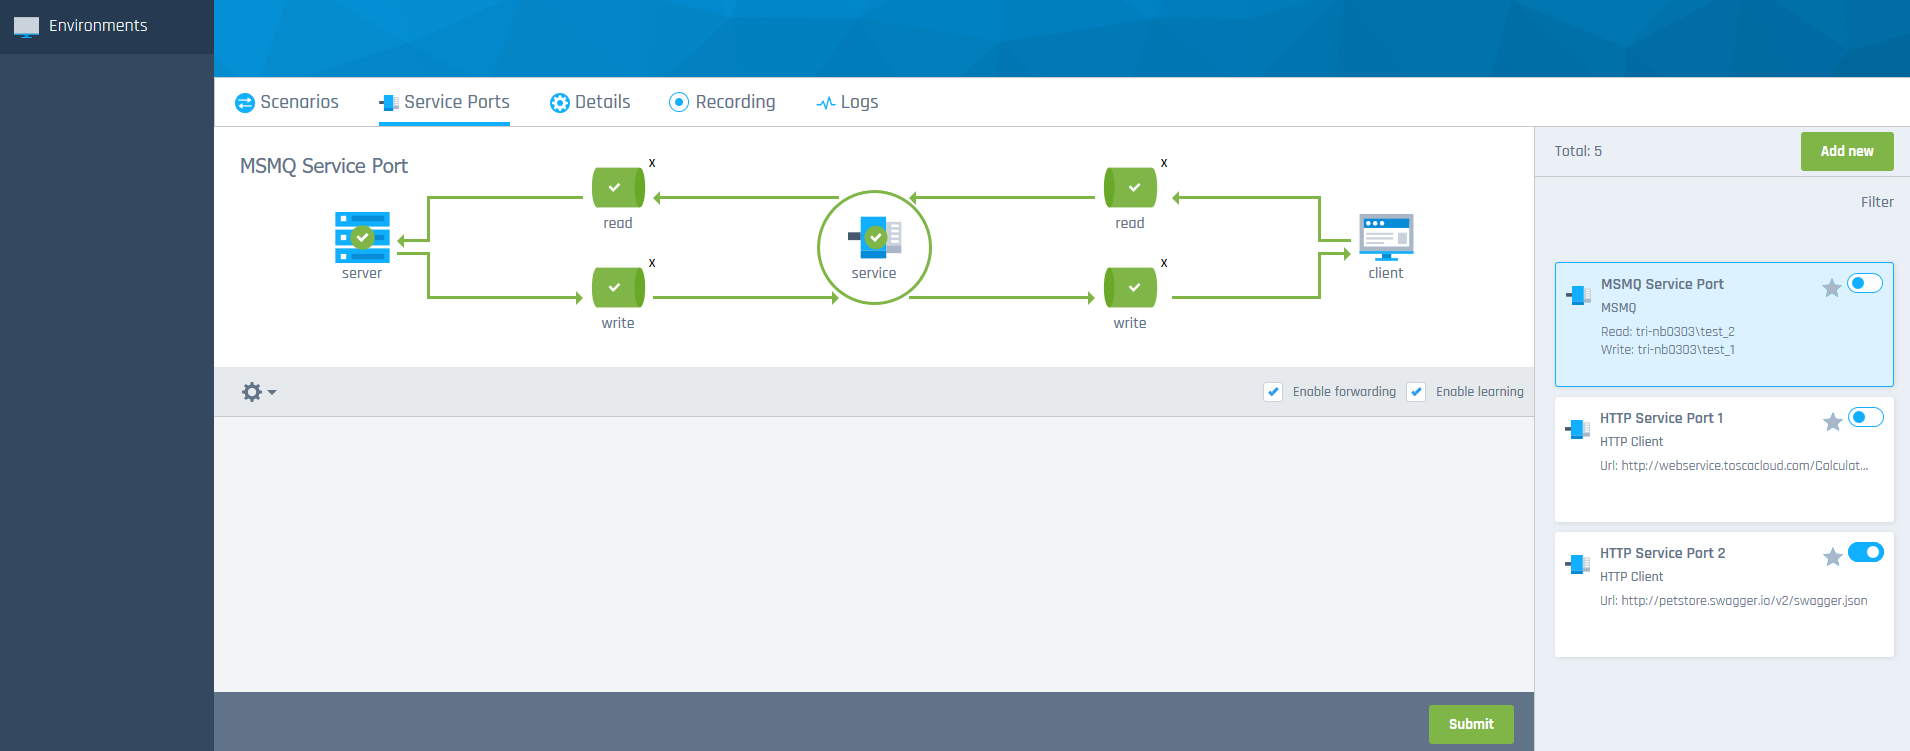
Diagram for Service Port configuration
Enter data via the diagram
To define your Service Port connection details, you have to enter data such as an IP address, port, or URL. Which data you have to enter exactly, depends on your Service Port technology.
For instance, for an HTTP Service Port you can just enter an IP address for the server and a URL for the client. For a Java Message Service (JMS) Service Port like ActiveMQ, you have to define ports, hosts, and queue names for the read and the write connections.
To enter data, click on the ![]() plus icon in a specific area of the diagram and enter your data in the fields below.
plus icon in a specific area of the diagram and enter your data in the fields below.
To delete data, click on the X in the top right corner of a specific area in the diagram.
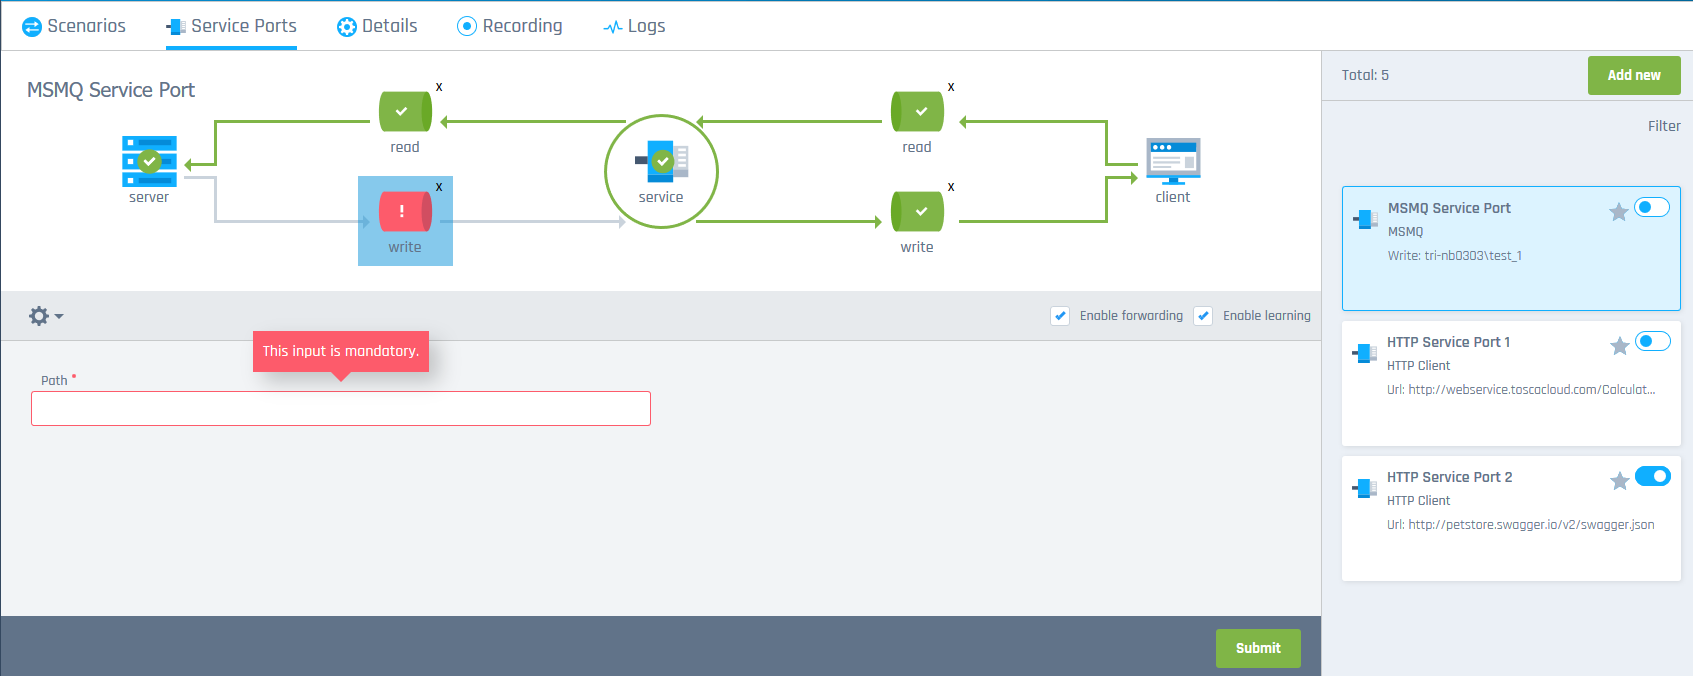
Diagram colors
The diagram colors indicate if you have already entered any data and whether the data you entered is valid or not.
-
Gray: you haven't entered any data in an area yet. Enter data to continue.
-
Blue: you have made changes in an area. If you provided all mandatory data, you can click save to save your changes.
-
Green: the data you have entered in an area is valid. Click save to save your changes in this area and continue.
-
Red: data is invalid or missing in an area. You must enter valid data before you can save your changes and continue.
For detailed information on how to configure the data fields, see chapter "Configure Service Ports".
Missing mandatory data
Once you have entered all mandatory data for your Service Port correctly, you can use it to run Scenarios.
What's next?
Now that you are familiar with the interactive diagram, you can use it to configure your Service Ports.