Create a single-user workspace
Your work environment in Tosca is called a workspace. It's where you plan, create, and run your tests.
This topic explains how to create a single-user workspace for environments where only one person needs access to test assets and data.
You're part of a team that needs access to the same test assets and data? Then you have to create multi-user workspaces instead.
Create your workspace
To create a single-user workspace, follow these steps:
-
On the Tosca Commander start screen, select Create new.
-
This opens the create workspace window. Perform the following actions:
-
Select None (creates single user workspace) from the Select type of Repository dropdown.
-
Configure the new workspace:
-
|
Option |
Description |
|---|---|
|
Create new workspace in |
Define where Tosca saves the workspace. By default, Tosca creates all new workspaces in the workspace directory path C:\Tosca_Projects\Tosca_Workspaces. |
|
Select name for new workspace |
Enter a unique name for the workspace. Make sure it meets the following requirements:
|
|
Use workspace template |
Select this option to import the Standard subset or any other subset into the new workspace. |
|
Create slim workspace |
This option isn't available for single-user workspaces. |
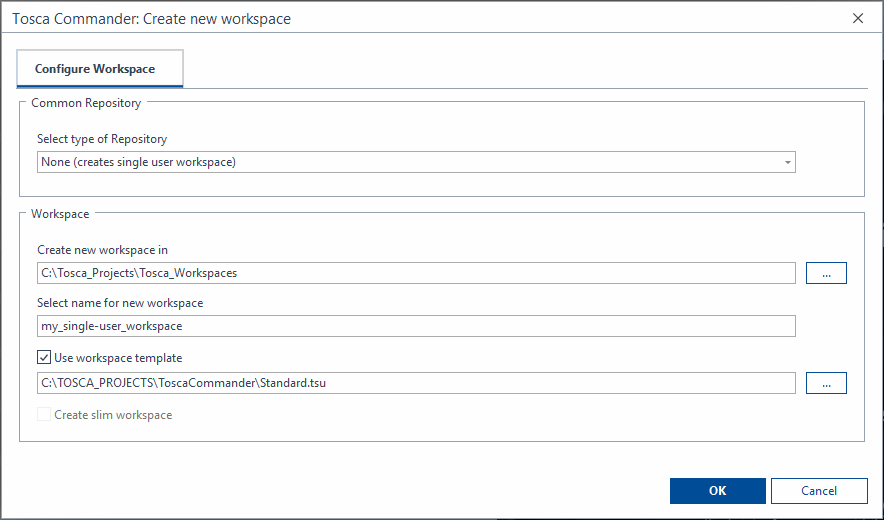
Create a new single-user workspace
-
Select OK to create the workspace.
Create workspaces via command line
If you want to automate your workspace setup or simply prefer to work without GUI, you can also use TCShell to create workspaces from the command line. For details, check out the following TCShell help sections:
What's next
Now that it's ready, get to know your workspace. Alternatively, you can dive a little deeper with the guided tour or our first steps tutorial.