Step 3 - Match Tables
In this step, the Vital Checks: File to Database Wizard automatically matches the tables and fields of source and target based on their names.
-
To match tables, the Wizard looks for target tables whose names are either an exact match to the source table name or at least contain the source table name. The target table name can consist of more characters than the source table name, but not fewer.
If there are several target tables that contain the source table name, the Wizard prioritizes them by length: shortest path first. For example, to match a table named person, the Wizard will choose a target table called DWperson over a target table named DW_person.
-
To match columns, the Wizard initially looks for an exact match. If there is no exact match, the Wizard uses the closest match. For instance, if you have a source column named Example, a target column named EXample and another target column named EXAMPLE, the Wizard matches the source column Example with the target column EXample.
You can also match your tables manually or you can match your tables with external mapping files. Use an external mapping file if you have to enter a large number of matches.
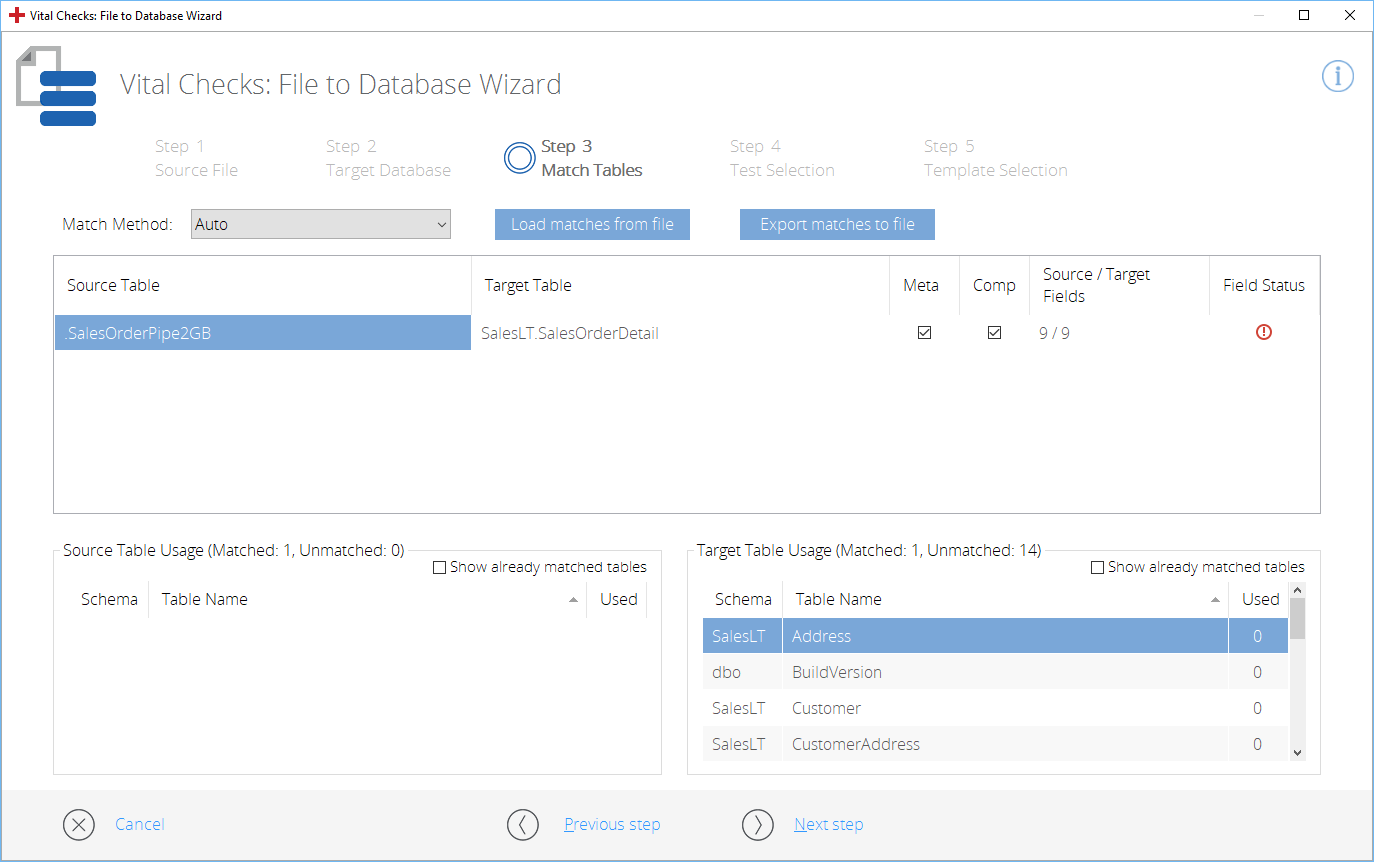
Match tables
The column Source / Target Fields indicates how many fields are in the source and in the target.
The column Field Status indicates unmatched fields in the respective row. Hover over the ![]() icon with your mouse to get a brief error description.
icon with your mouse to get a brief error description.
The sections Source Table Usage and Target Table Usage contain tables which could not be matched. To see a list of all tables, enable the check box next to Show already matched tables.
Data Integrity supports multiple matches for one table. The Used column indicates how many times an individual table was matched to another table. For information on how to create multiple matches, see chapter "Multiple matches for one table".
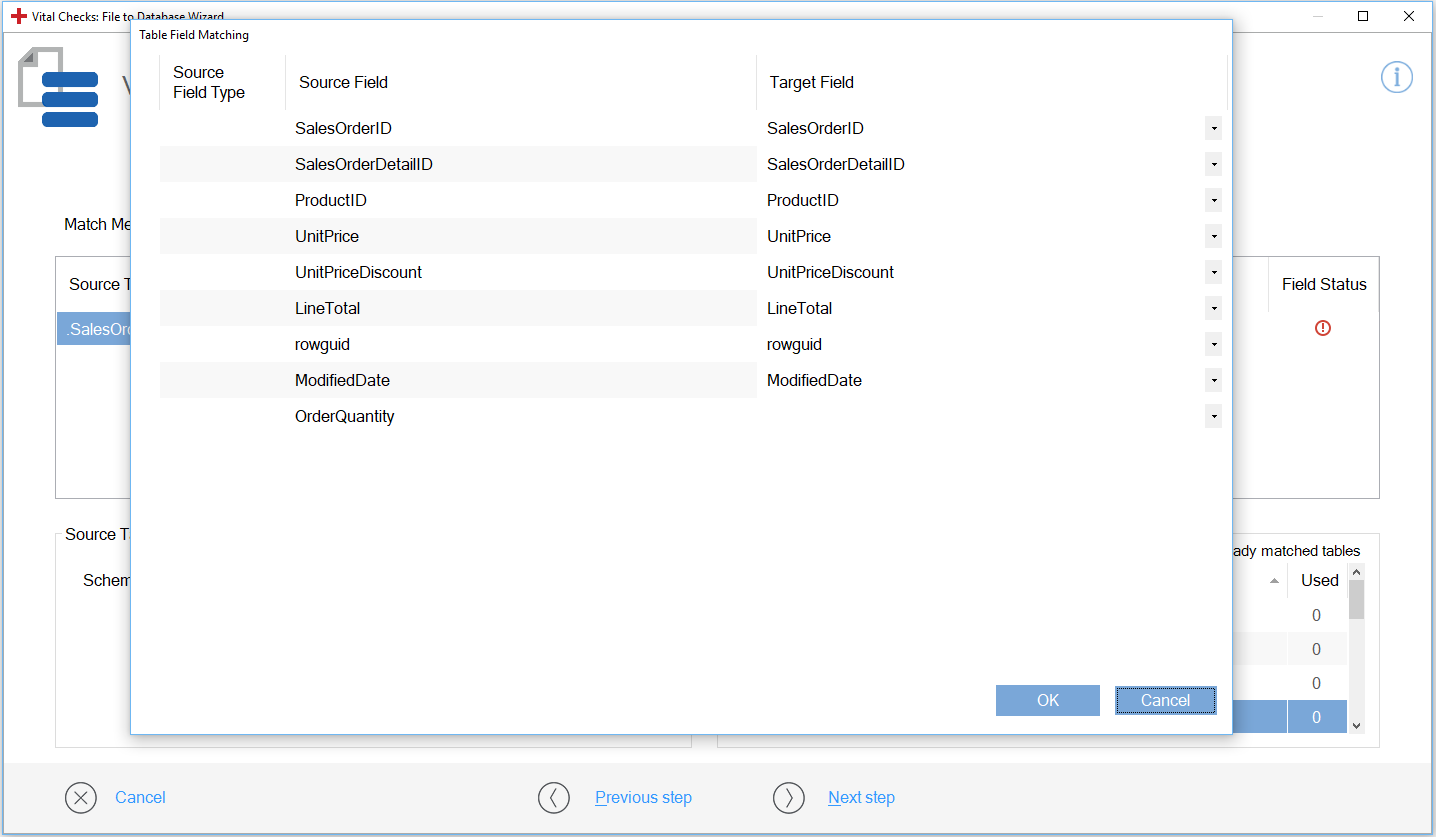
Change an existing field match
To change an existing field match, follow the steps below:
-
Double-click the respective Source Table or Target Table in the top section, i.e. the one displaying all matched tables.
-
In the subsequent dialog, select the field you want to use as your new match and click OK.
Select a different field for a match
You can export manual matches as a CSV file. When you re-run your Vital Checks tests, you can match your tables with this file instead of having to re-do all manual matches.
To export matches as a file, follow the steps below:
-
In Step 3 - Match Tables, click Export matches to file.

Click Export matches to file in the Vital Checks: File to Database Wizard
-
In the subsequent dialog, choose where you want to save the file and click Save.
Select tests
Once you have matched your source and target tables, select the tests you want to run on the table pairs.
By default, the Vital Checks: File to Database Wizard selects the following test types:
|
Test type |
Definition |
|---|---|
|
Meta |
Metadata tests compare predefined table definitions against the current table definition. |
|
Comp |
Completeness tests check row counts on file or table level. |
Deselect any tests you do not wish to run by disabling the respective check box. Alternatively, you can disable tests via the context menu.

Disable tests via the context menu
Once you have matched the tables and selected your table tests, click Next step to select your field tests in Step 4 - Test Selection.