Use qTest AI Chat
Use AI Chat to interact with your test organization through natural language conversations with AI assistants.
qTest administrators can initiate a trial for AI Chat this feature from the AI Chat window.
Use the AI Chat feature to work with qTest using natural language.
Before you start
As an administrator, you can add users you want to have access to AI Chat to the system generated AI User group. Additionally, all administrators can access AI Chat.
When you first open the AI Chat, accept and read the select the Terms and Conditions to read and accept them.
If you're a qTest admin without AI credits, qTest prompts you to start an AI trial when you open AI Chat. To add AI credits, please contact your account manager.
Allow Local Network Access in your browser (opens in a new tab) to ensure AI Chat loads properly.
Use AI Chat
To access the AI Chat, select the ![]() AI Chat button on any page where it's available. Currently, you can only find this in your Requirements tab.
AI Chat button on any page where it's available. Currently, you can only find this in your Requirements tab.
When you open the AI Chat window, you have a few options available from the menu:
-
Select the
 History button to see previous conversations.
 -
Select the
 New chat button to start a fresh chat.
 -
Select the Credits icon to see how many credits you have available. To add more credits, please contact your account manager.
Keep track of credits
Each interaction with the AI Chat uses credits. Though the amount may vary, the following table covers how much credits cost for each tool.
|
Tool |
Credit cost |
Notes |
|---|---|---|
| Agentic Test Creation (ATC) | 5 per test |
One-time flat rate for each test produced. This is charged even if the test isn't saved. |
Start prompting
To start working with AI Chat, chat with your agent like a well-respected intern, giving it clear requests and parameters. To get you started, we have agentic tools that can easily aid with more complex tasks.
Use Agentic Test Creation
Learn more about how to use the Agentic Test Creation tool in AI Chat. For highest quality, watch the video in full-screen mode.
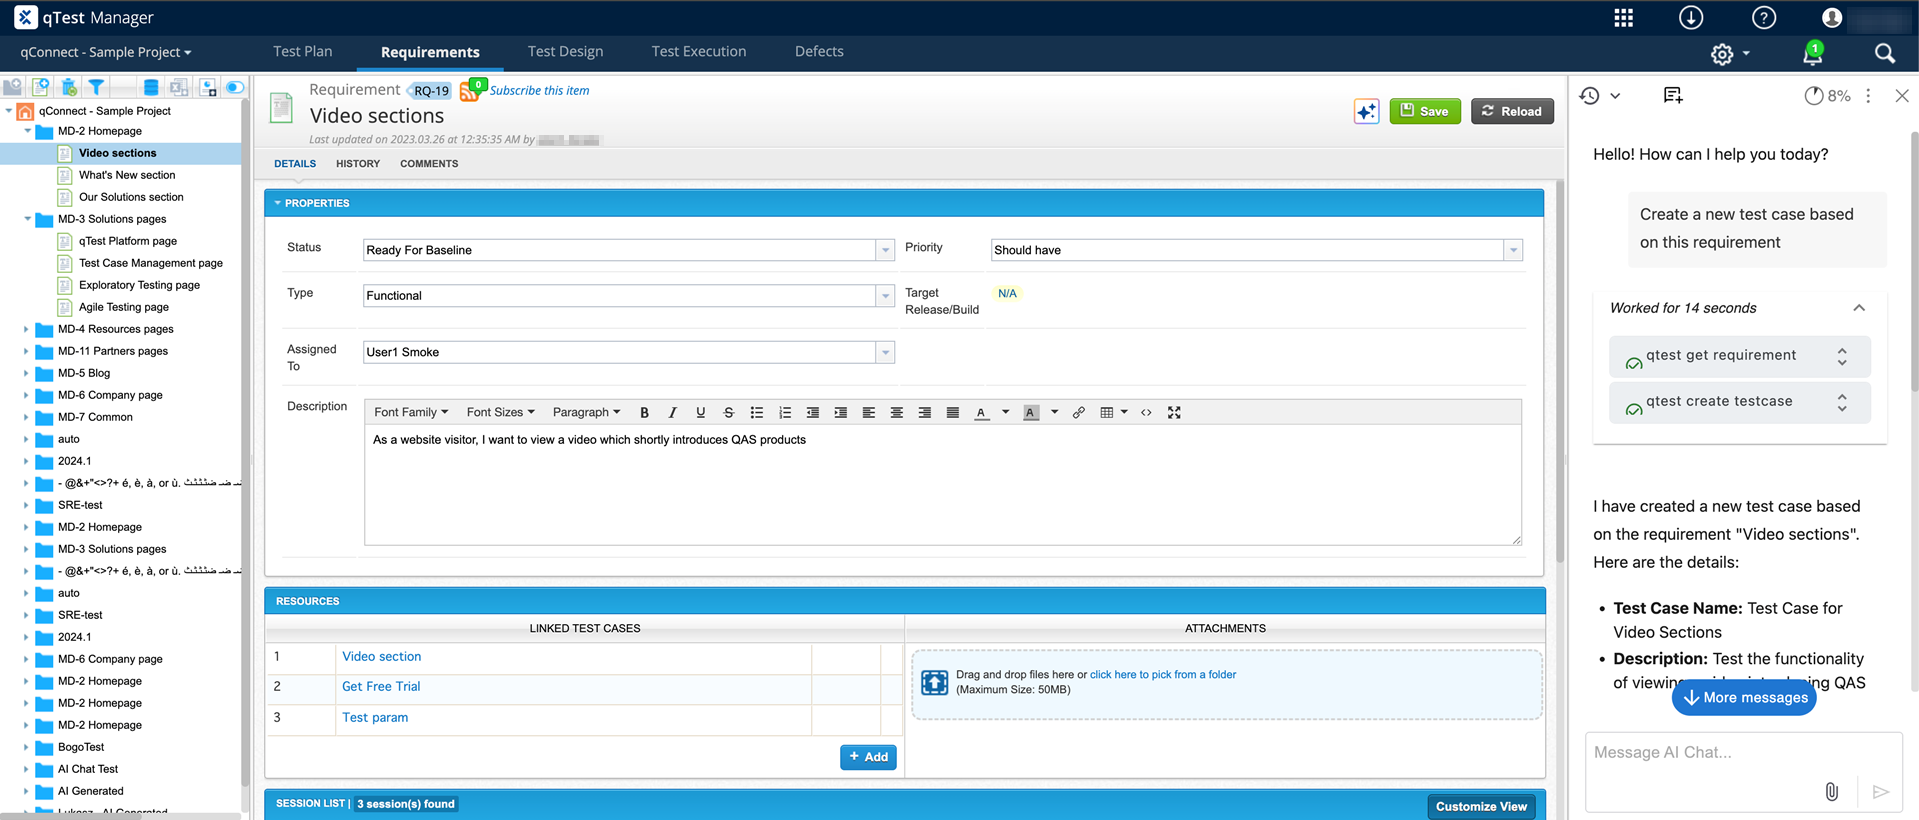
Need to create a set of tests to make sure your software meets your requirements? To save manual labor, you can work with Agentic Test Creation (ATC) in the AI Chat to turn an existing requirement into detailed test cases. Our agent analyzes everything inside of and attached to your requirement, so you can create as many useful, applicable test cases as needed, even if it's more than 10 at a time. qTest marks all AI-generated test cases with the ![]() AI-Augmented icon in the top-left, next to the test case ID.
AI-Augmented icon in the top-left, next to the test case ID.
To start creating tests, here are your core actions, along with some example prompts that you can adjust and build on to better meet your needs:
|
Action |
Example prompt |
|---|---|
| Retrieve all metadata for a requirement. | Can you tell me more about this requirement? |
|
Create test cases without importing them to qTest. |
Analyze this requirement and generate test cases. |
| Request specific types of tests to cover the requirement. | Generate a test case for this requirement that covers performance testing. |
| Rewrite a generated test case. |
Rewrite test case 5 to have more detail. |
Reuse test cases
If test cases are already attached to your requirement, the agent asks whether it should avoid duplicates. The agent won't modify any test cases that are already attached to the requirement.
When the agent asks if you want it to avoid duplicating or overlapping with attached tests, you have two options:
-
Yes: The agent reuses the test cases already attached to the requirement. The agent then determines what test coverage the existing test cases provide and generates new cases to fill the testing gaps it finds, without duplicating existing test cases.
-
No: The agent ignores the attached test cases. The agent then creates test cases as it usually would and may duplicate the requirement's attached test cases.
Review and save test cases
After you generate test cases, you need to choose which ones you want to keep. AI Chat is disabled until you review or dismiss your generated test cases.
To approve or reject test cases, select the Review test cases card in the chat to open the Review multiple test cases window.
The Review multiple test cases window displays all generated test cases on the left panel. Select a test case to view all its generated content in the right panel.
For each test case in the list, you can:
-
Select the Accept button to mark a test case for saving. Accepted test cases display highlighted in green.
-
Select the Reject button to exclude a test case. Rejected test cases display with a strikethrough.
To accept or reject all test cases at once, select Save all or Reject all at the top of the list.
When you're finished reviewing, select Finish and save to start using AI Chat again. This saves accepted test cases to the AI Generated folder in the Test Design tab and attached to the requirement used to generate them. After the test cases are generated, you can move them to any folder you want. qTest marks all AI-generated test cases with the ![]() AI-Augmented icon in the top-left, next to the test case ID.
AI-Augmented icon in the top-left, next to the test case ID.
To continue using AI Chat without approving or rejecting test cases, close the AI Chat window and refresh the qTest page. This permanently deletes the generated test cases.
Update ATC Chat Settings
To get an overview of the AI Chat use in your tenant, go to Administration > Settings and select ATC Chat.
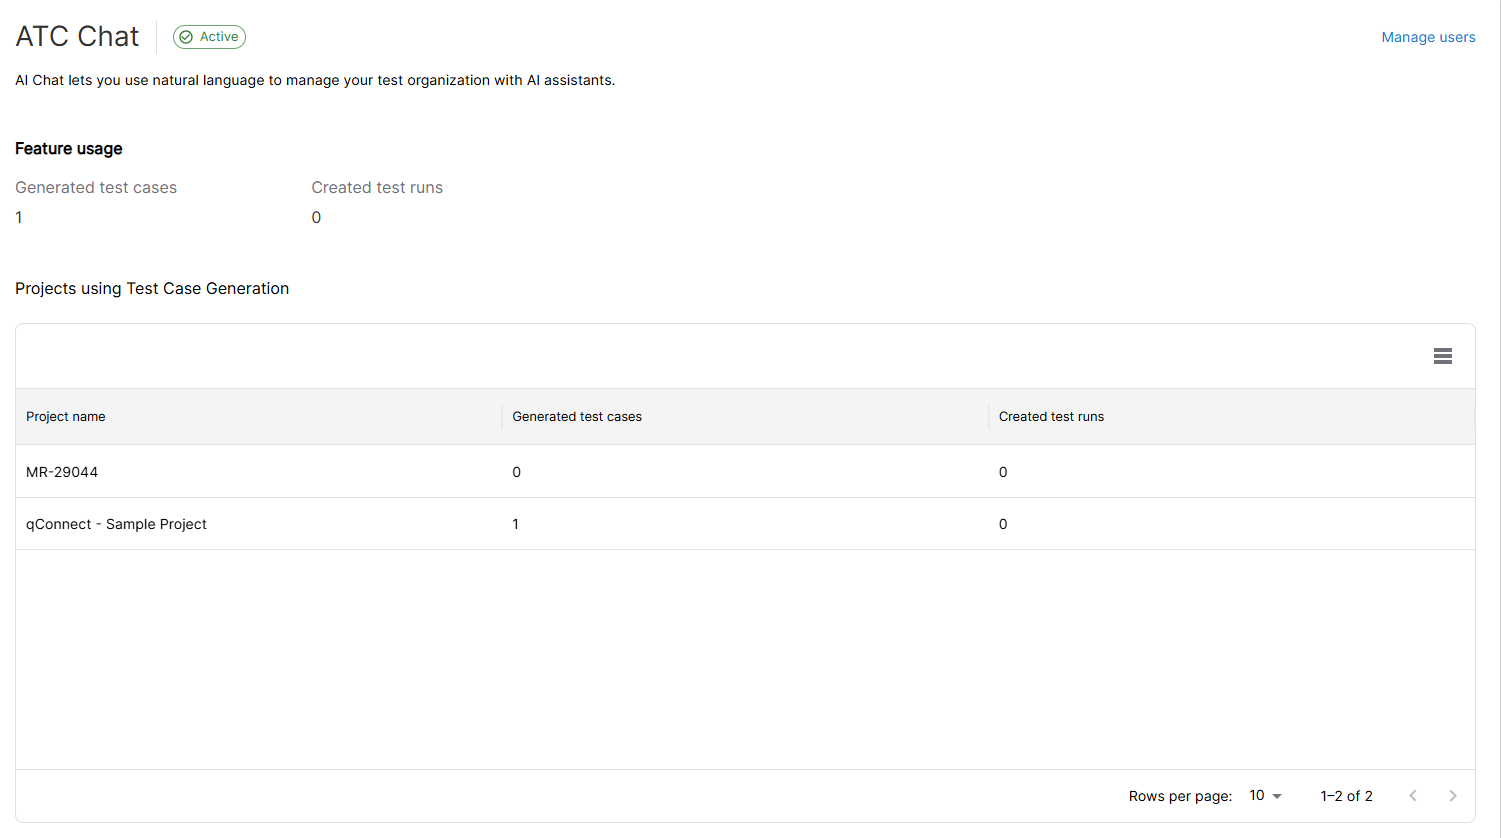
Get an overview of where you're using ATC in your projects in ATC Chat Settings.
The ATC Chat settings page tells you which projects use the feature, how many test cases have been generated with ATC Chat, and how many test runs you created from an AI-generated test case.
To add more AI users to your instance, select Manage users.
ATC Chat statistics are counted separately from AI Copilot statistics.
What's next?
Set up a qTest MCP to access even more qTest functions with natural language.
If you're feeling adventurous, you can also try out some MCP commands in your AI Chat, though they work best in a dedicated qTest MCP.