Run a test
Once a project is uploaded and configured, as documented on the Create a Test page, the test can be started.
To run a test, follow these steps:
-
Select a Workspace as described in Workspace selector.
-
In the left navigation panel, select the Tests view. All Tests of your Workspace are listed in the central panel.
-
Click on the Test you want to run.
-
Click on the START button on the top right part of the screen. It opens the Run a Test dialog box.
-
This dialog enables you to review, modify if necessary and confirm the Test settings and launch the Test.
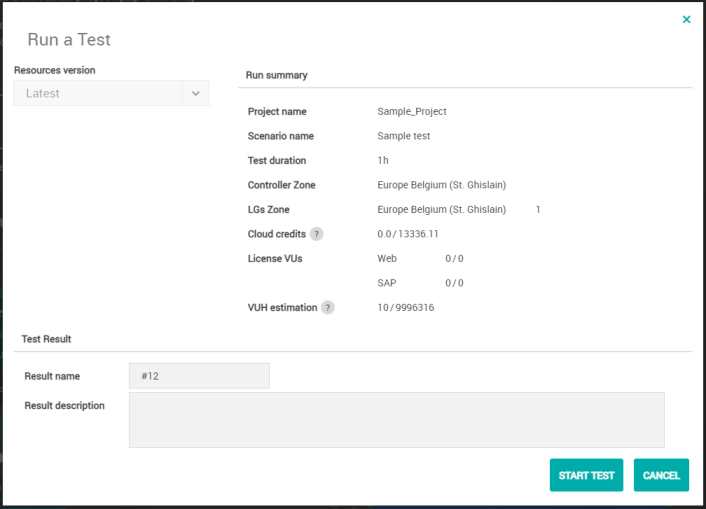
The Resources version list box allows selecting the compatible Controller version to use for the test.
To set environment variables on the Controller, you can use the API. You can use environment variables to override the properties in the controller_user.properties and controller.properties files.
Tip: When the number of Load Generators required is not reached, selecting a different Controller version can help obtain the required number of Load Generators.
Run summary panel
The LGs Zone field allows identifying the Load Generators available for each Zone vs. those required during the test configuration. When the numbers do not match, the test cannot be launched.
The Cloud credits field is displayed when the test uses Cloud zone(s). It displays the number of credits that will be consumed. Consumption is calculated per hour and according to the number of Load Generators running. For example, here 2 Cloud credits will be used because the test is supposed to last 2 hours and use 1 Load Generator.
Pricing for Cloud Load Generators
Cloud Credits: When the Test is licensed through subscription VUs, then Cloud Credits are required: 1 Cloud Credit is consumed per Load Generator and per hour, based on the effective test duration. The first minute is due, after that, billing is calculated with one-second accuracy.
Cloud Credits and VUH: When VUH are used on top of subscription VUs, then Cloud Credits are consumed on the pro-rata of subscription VUs versus test VUs:
Cloud Credits = (Cloud_LG_Count * test_duration_in_s / 3600) * (License_VUs / Test_VUs)
VUH estimation: As its label indicates, this field displays a mere estimation of the VUH that will be necessary to complete the test. The actual VUH consumption is computed based on the effective test duration and the maximum number of VUs used over the Test.
Test Result panel
The Result name field is to be populated with the name to assign to the Test Result. By default, it is filled in with the name of the test configuration but it can be changed in this field. The result name is the name of the Test Result you can analyze in the Test Result section of NeoLoad Web.
Result description: The Test Result can be described in this field.
When working on a collaborative project, ticking the Publish Test Result onto collaboration server check box allows sharing the Test Result with the other members of the team.
Click the START TEST button to launch the initialization of the test.
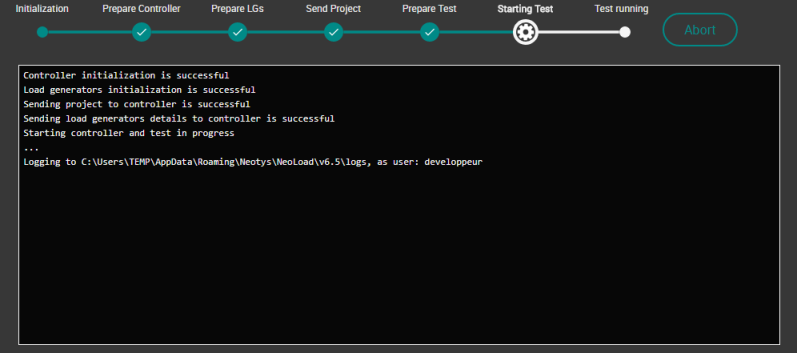
The initialization screen identifies the initialization steps in real-time. This gives you accurate information about the initialization process and can help identify any error that might occur.
A click on the Abort button allows canceling the test initialization and redirects you to the Logs tab.
When the initialization is completed, the test is started.

For more information about running tests, see Running test graph.
A click on the stop button  opens the Stopping Test dialog box.
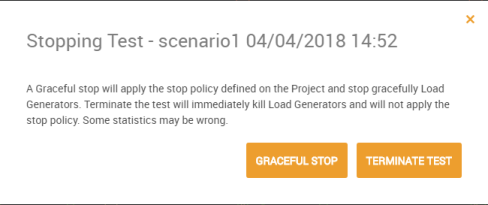
The test can either be stopped with a graceful stop or directly terminated. The warning in the dialog box helps you choose the appropriate way to end the test.
Note: When stopping a test with the Stop button or through the API, after the test has properly stopped running and the final report is displayed, the Cloud machines are stopped and any non consumed credits are refunded to my Account.