Manage Workspace deletion policies
As a Tester, you can create, update and delete deletion policies, as long as you are a member of the Workspace.
Being able to configure automatic deletion of Test Results is useful:
-
On SaaS environments, it will help manage the volume of Tests Results to stay under the limit of your subscription.
-
For on-premise deployments, it will help maintain the numbers of Tests Results under the volume your MongoDB setup can accept to keep NeoLoad Web performance acceptable.
Note: If a user is removed from a Workspace, the deletion policies they created for that Workspace are conserved.
Create a deletion policy
As a Tester, you can create one or a set of deletion policies so that Test Results are automatically deleted.
Note: Each policy is executed for the first time 24 hours after its creation. It is then rescheduled every 24 hours.
Caution: If you encounter an issue with the deletion policy, for example if a Test Result has been deleted and you don't know why, the only way to check which deletion policy has been executed and when, and which Tests Results were deleted, is to reach out to the Tricentis Support who have access to the logs.
Tip: To protect some Test Results from automatic deletion, lock them as described in the page Lock Test Result against automatic deletion.
Deletion policies will enable you to configure which Test Results will be automatically deleted, based on two criteria:
-
A filter to select the Tests concerned by the policy
-
A rule to select the Tests you want to delete
Tip: You can create several deletion policies per Workspace. However, we recommend to have one policy per Workspace or one policy for each voluminous Test Result in a Workspace.
To create a Workspace deletion policy, follow these steps:
-
Select a Workspace as described in Workspace selector.
-
In the left navigation panel, select the Settings view.
-
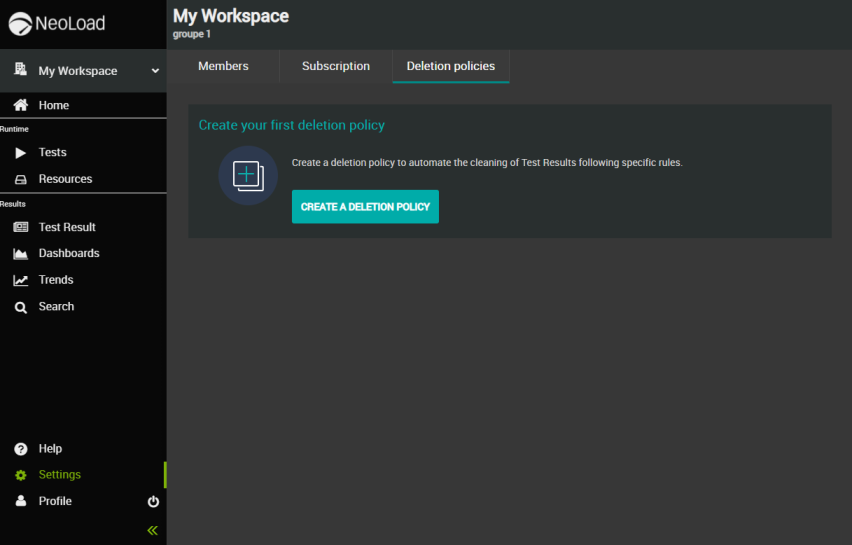
Click the Deletion policies tab.
-
Click the CREATE A DELETION POLICY button.
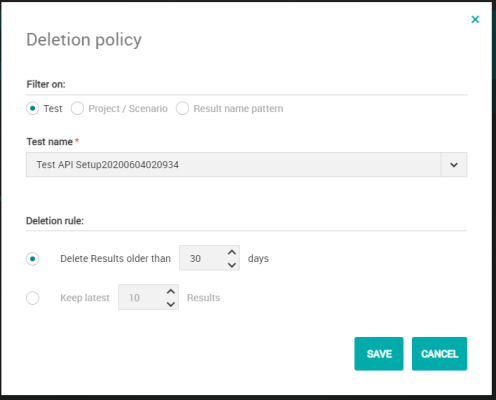
The Deletion policy screen pops up.
-
Select the radio button of the Filter you want to choose: either the Test name, or the Project and Scenario name combination, or the Result name pattern.
-
If you click the Test filter, use the Test name dropdown menu to select the Test on which you want to configure automatic deletion. To quicken your search, the list of Tests is filtered as you type.
-
If you click the Project and Scenario filter, use the Project name dropdown menu first to select the Project on which you want to configure automatic deletion. Select then a scenario.

-
If you click the Result name pattern filter, enter a regular expression to match the name of the Test Result you want to delete. You can hover the mouse cursor over the Help link to get syntax tips.

-
-
In the Deletion rule section, select the radio button of the rule you want to choose.
-
You can either choose that Test Results older than X number of days will be deleted, in this case, please enter the number of days.
-
Or you can choose to keep the X latest Test Results, in this case, please enter the number of Results.
-
-
Once you click SAVE, the deletion policy is created and appears in the list of the central panel of the Deletion policies tab.
As you can see in the screenshot below, the name of the policies is created automatically and is based on the deletion rule selected. The policies refer to the 3 examples shown above in the screenshots of step 5.

Edit a deletion policy
Any member of a Workspace can edit the deletion policies of the Workspace.
To edit a Workspace deletion policy, follow these steps:
-
Select a Workspace as described in Workspace selector.
-
In the left navigation panel, select the Settings view.
-
Click the Deletion policies tab.
-
Click on the deletion policy you want to edit.
You can also click the Edit button on the right of the policy row.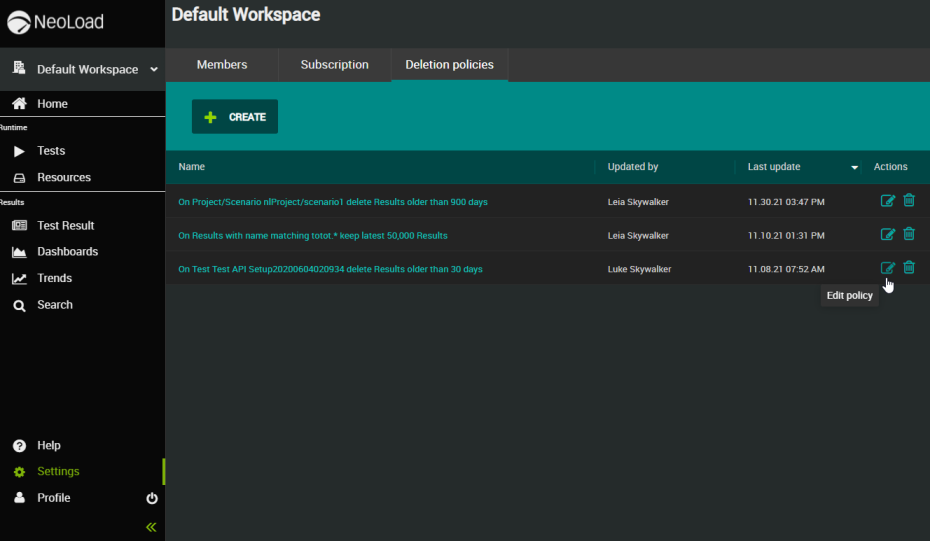
The Deletion policy screen pops up.
-
Update the policy as desired. For more information about the screen, please refer to the Create a Workspace deletion policy documentation page.
-
Click the SAVE button to confirm your changes.
Delete a deletion policy
Note: Any member of a Workspace can delete the deletion policies of the Workspace.
To delete a Workspace deletion policy, follow these steps:
-
Select a Workspace as described in Workspace selector.
-
In the left navigation panel, select the Settings view.
-
Click the Deletion policies tab.
-
Click the Delete button located on the right of the policy row.
The Delete policy screen pops up.
-
Click the DELETE button to confirm your action.
The deletion policy is permanently deleted.