Remote Terminal Emulator testing
NeoLoad's RTE feature allows you to conduct performance testing of terminal-based applications using protocols, such as VT420, TN3270 or TN5250. By capturing and replaying user interactions such as keystrokes and screen transitions, RTE lets you accurately simulate real-world scenarios. This helps you uncover performance bottlenecks in legacy systems, improve application responsiveness, and provide a seamless user experience even under heavy load.
Before you start
To follow the scenarios in this user guide, all you need to do is select RTE Sample project in the NeoLoad welcome page.
Scenario 1: Form input
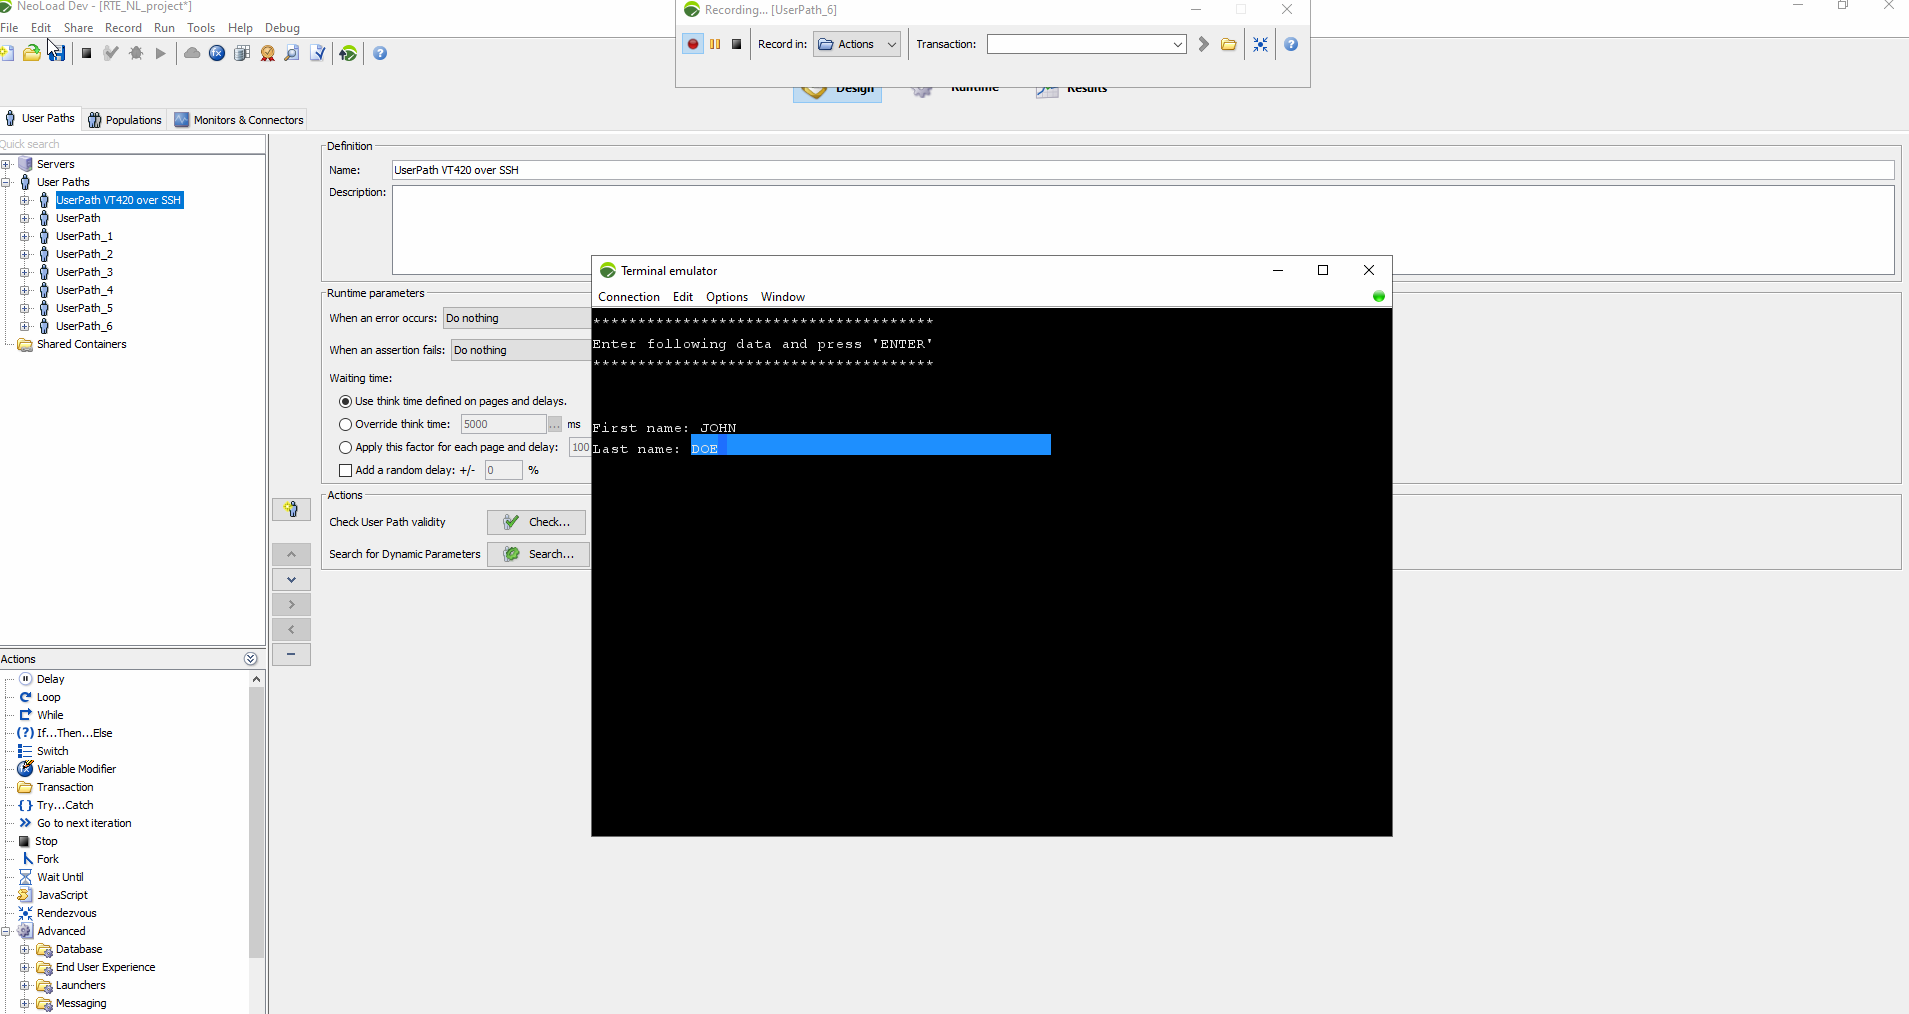
This scenario involves a form that shows a first and last name. You will enter a first name, press <TAB> to move to the next field, then type a last name and press <ENTER>. The application displays the name you entered.
Steps to record
-
Open the Connection dialog and select VT420, Telnet, and Port
23000. -
Once connected, type
guiCommandand press <ENTER> to open the form-based application. -
Enter a first name and press <TAB>.
-
Type a last name and press <ENTER> twice to display and close the form.
-
Enter exit and press <ENTER> to finish.
-
Disconnect from the session and stop the recording.
NeoLoad created the following actions:
-
Connect: Initiates the server connection.
-
-
guiCommand<ENTER> -
JOHN<TAB>DOE<ENTER> -
exit<ENTER>
-
-
Disconnect: Ends the session.
NeoLoad automatically adds delays between actions to maintain the original timing, which you can adjust as necessary.
Customizing action keys
To separate actions, like distinguishing between first and last name inputs:
-
Open the Connection Dialog and configure VT420, Telnet, and Port
23000. -
Add <TAB> as an additional action key.
-
Record the steps as before. NeoLoad will split the actions accordingly:
-
SendKeys
"JOHN<TAB>" -
SendKeys
"DOE<ENTER>"
-
NeoLoad split the actions with the additional action keys
Verify the User Path
Run a check on the User Path to make sure everything runs correctly. Put special attention to:
Request: The terminal state before each action.
Response: The terminal state after each action.
Scenario 2: Sequential task execution
This scenario features a process that runs 10 tasks sequentially, each taking 1 to 3 seconds. The result for each task will be either PASSED or FAILED once the task finishes.
Steps to record
-
Open the Connection dialog and configure VT420, Telnet, and Port
23000. -
Connect and type
longProcess, and press <ENTER>. -
Wait for the process to finish, then type
exitand press <ENTER>. -
Disconnect and stop the recording.
Designing the User Path
The goal is to have metrics about individual task executions. Follow these steps:
-
Update the wait condition in the SendKeys action to:
-
RegExp("Starting process at \\d\\d:\\d\\d:\\d\\d")
-
-
Create a loop action after the SendKeys that iterates 10 times to handle each task.
-
Add a Read action inside the loop:
-
Wait condition:
RegExp("Step ${loop_counter} completed at \\d\\d:\\d\\d:\\d\\d(.*?)(PASSED|FAILED)")
-
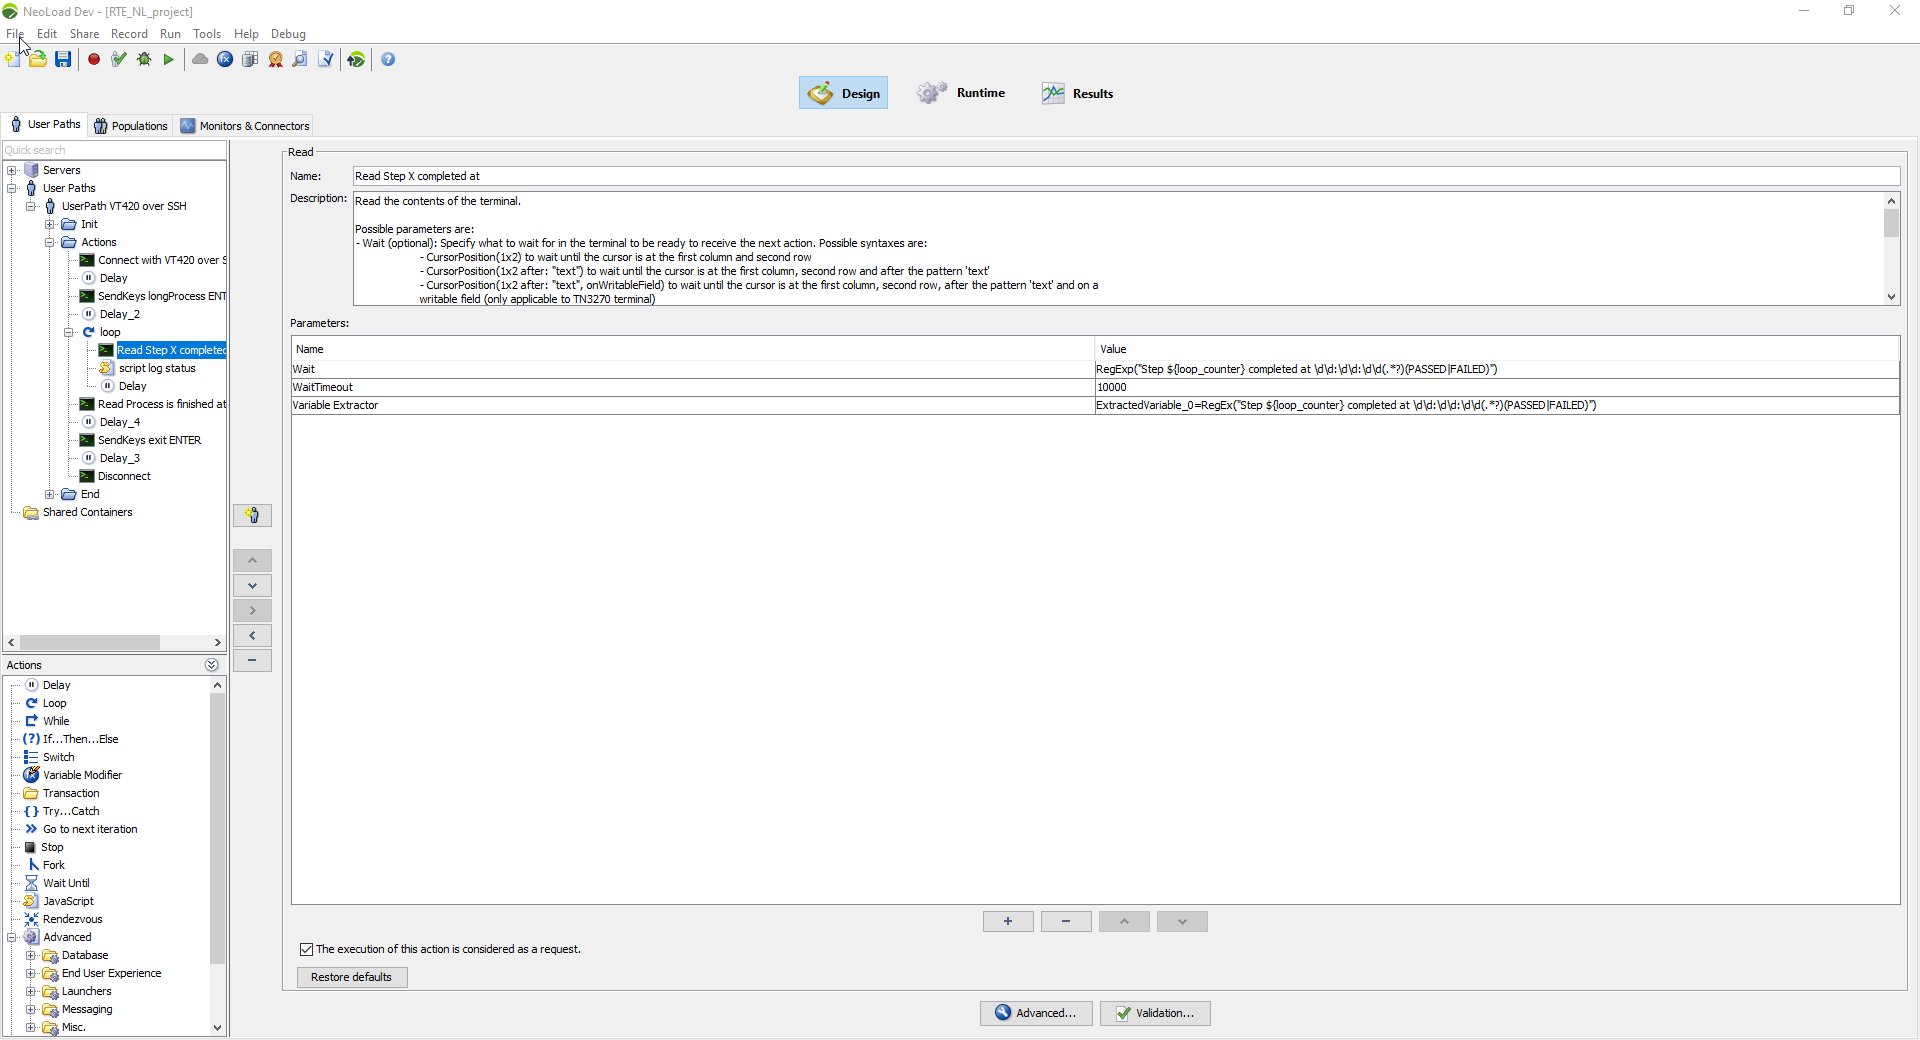
Wait condition added after the Read action
Using validations
Tag as errors tasks that have a FAILED result:
-
Open the Validation section for the Read action and add an assertion using:
Step ${loop_counter} completed at \\d\\d:\\d\\d:\\d\\d(.*?)PASSED
Extracting variables
We'd want to log each task result by saving it in a variable. To do so, follow these steps:
-
Add a Variable extractor to the Read action to capture task results:
-
Parameter:
RegEx("Step ${loop_counter} completed at \\d\\d:\\d\\d:\\d\\d.*?(PASSED|FAILED)") -
Store the result as
ExtractedVariable_0
-
-
Create a JavaScript action after the Read action to log the status:
-
var status = context.variableManager.getValue("ExtractedVariable_0");
logger.info("Status: " + status);
-
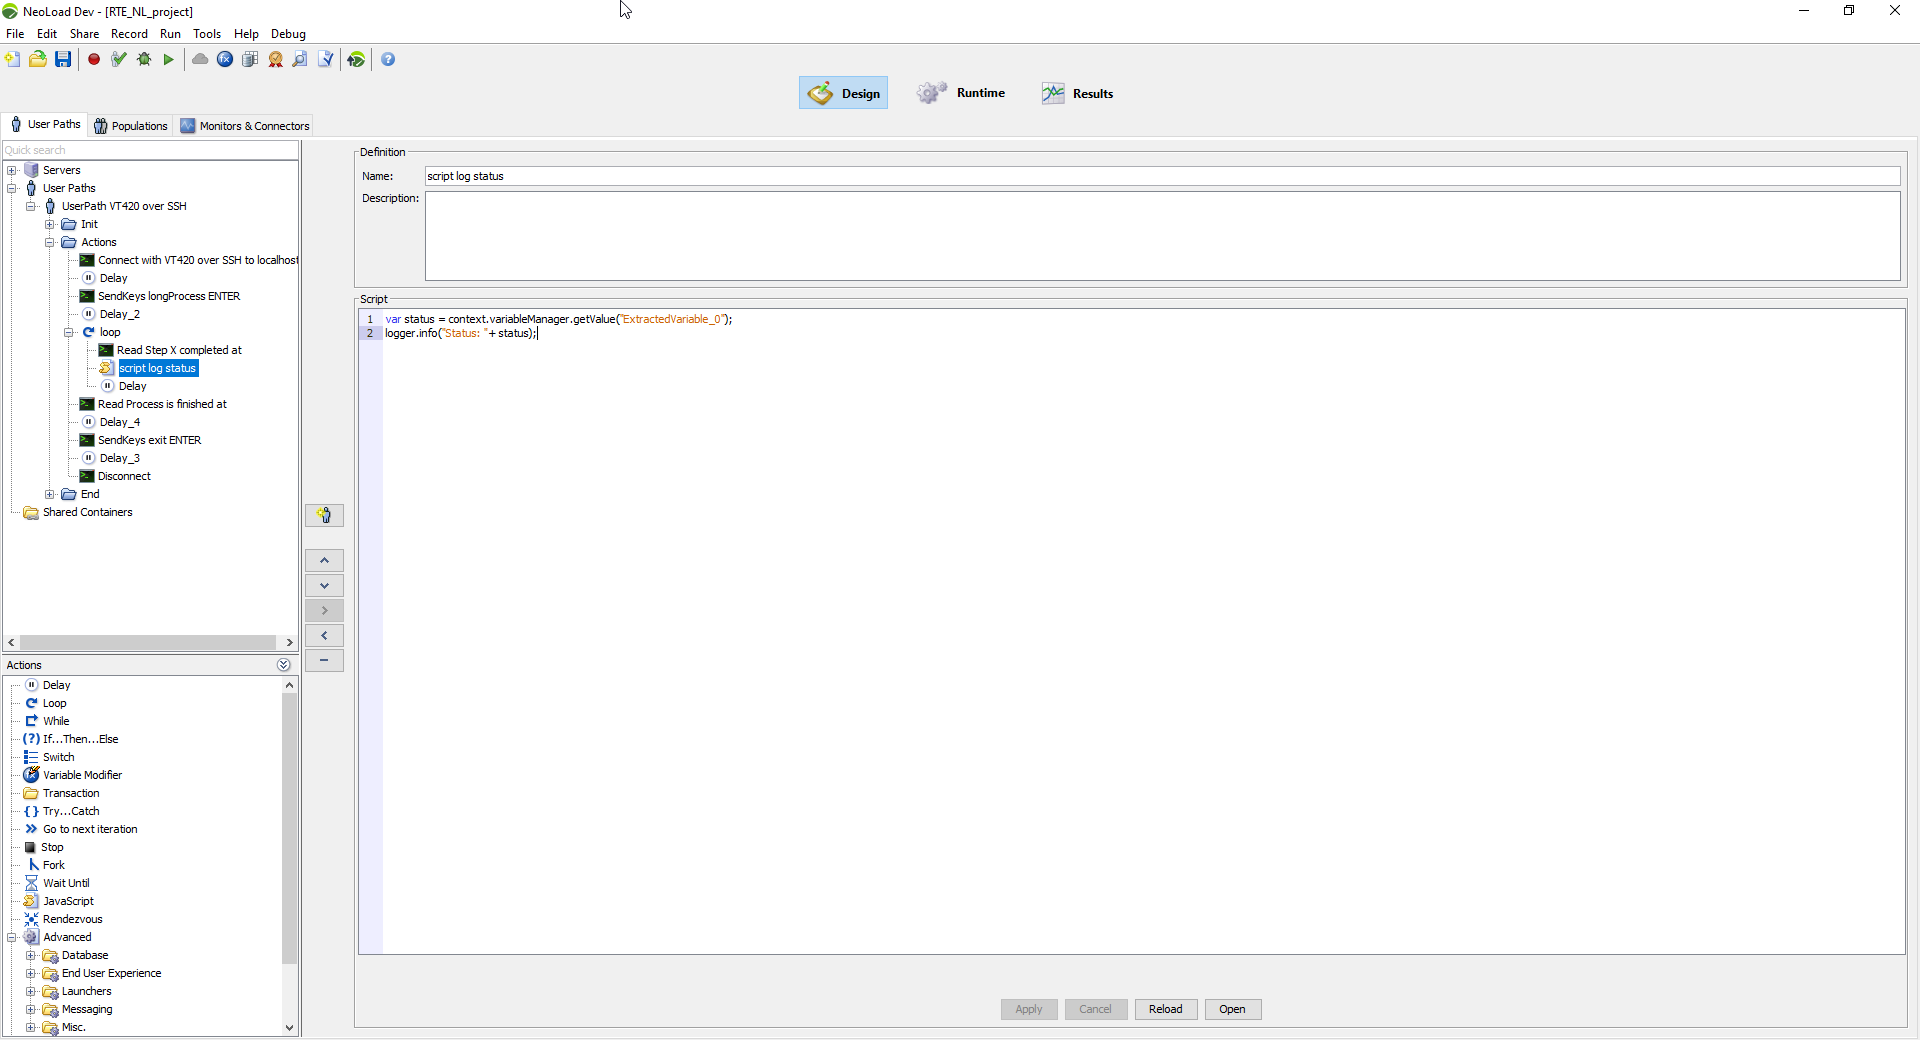
JavaScript variable for this test scenario
Validating the User Path
Run a check and review the outcomes. The PASSED steps should be successful, while FAILED steps should trigger errors.