Action modes
The Action Mode in a test step determines what Tosca Cloud does with the value of that step. For example, if your control is a text box and your value is a calculation, should Tosca Cloud enter the result into the text box or compare it to what's in the text box?
To specify this, you need to choose an appropriate action type from the Action Mode dropdown. This topic takes you through your options:
-
Reading operations with action modes Buffer, Constraint, Verify, WaitOn, Exclude, Output, and Select
Input
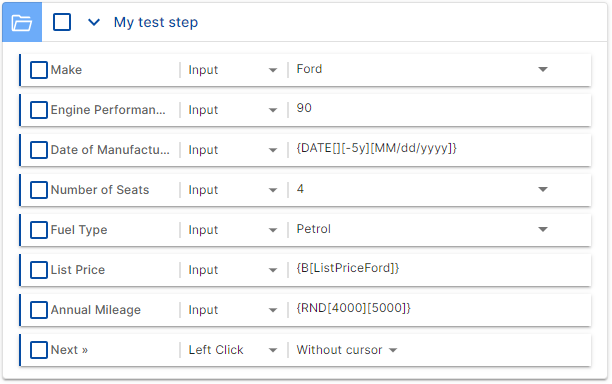
The Input action mode writes the value you've specified in your test step into the control. This lets you test any part of your application that requires input, such as forms or queries.
For the value, you can use static values or value expressions. Keep in mind that if your value contains special characters, you need to escape them.
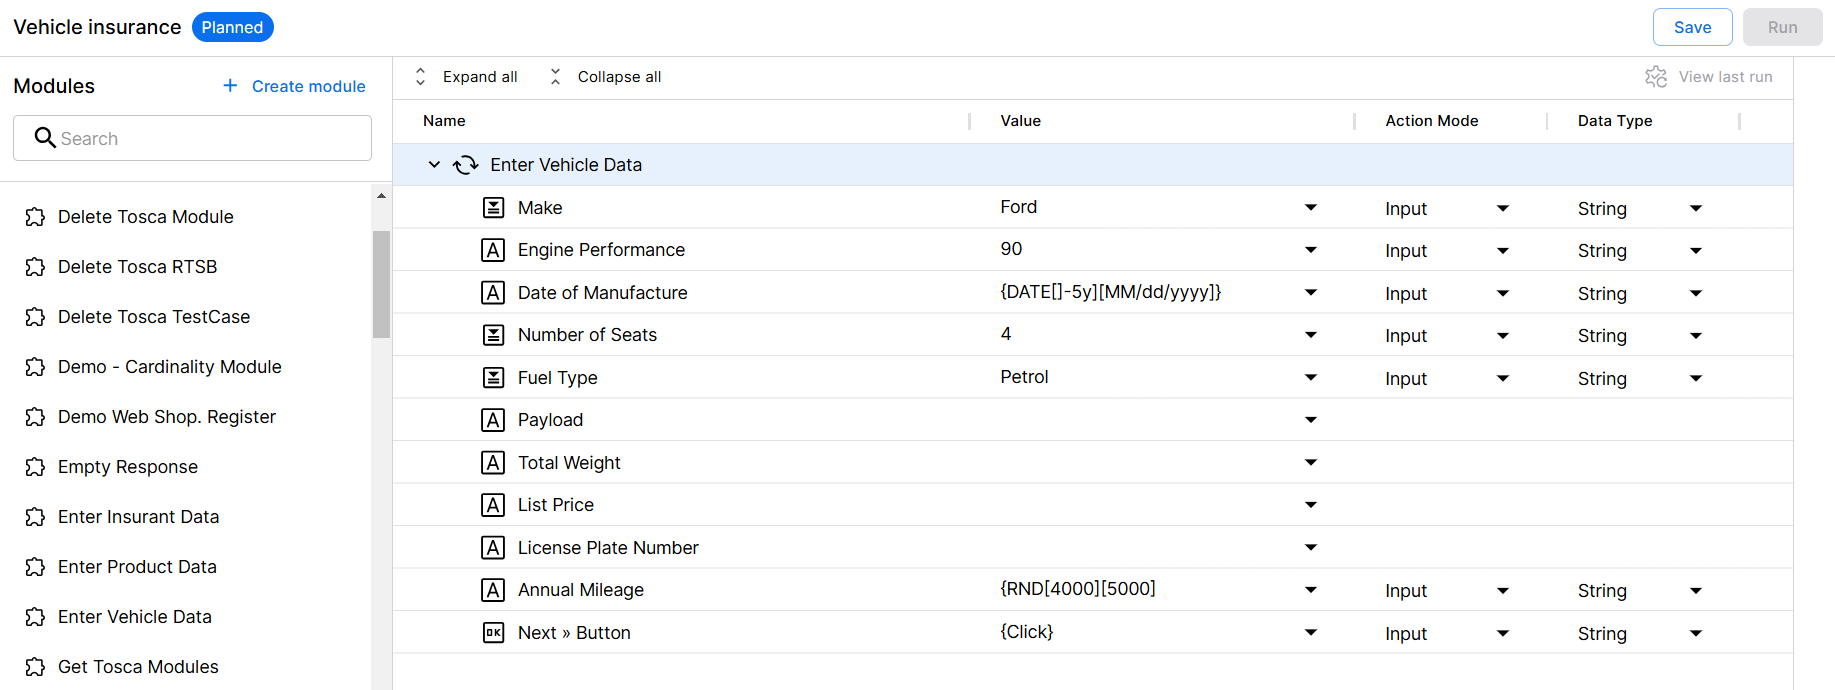
Inputs in a test step
Insert
The Insert action mode inserts a value into an API module control.

Inserts values into test steps
Verify
The Verify action mode compares a specified value to a control in your application. This lets you ensure that all elements of your application show the expected data or behavior.
You can verify the following information:
-
The content of a control. For example, to ensure that a confirmation message shows the right content.
-
The status of a control at runtime. For example, to check whether a particular button becomes active after you've filled out a form.
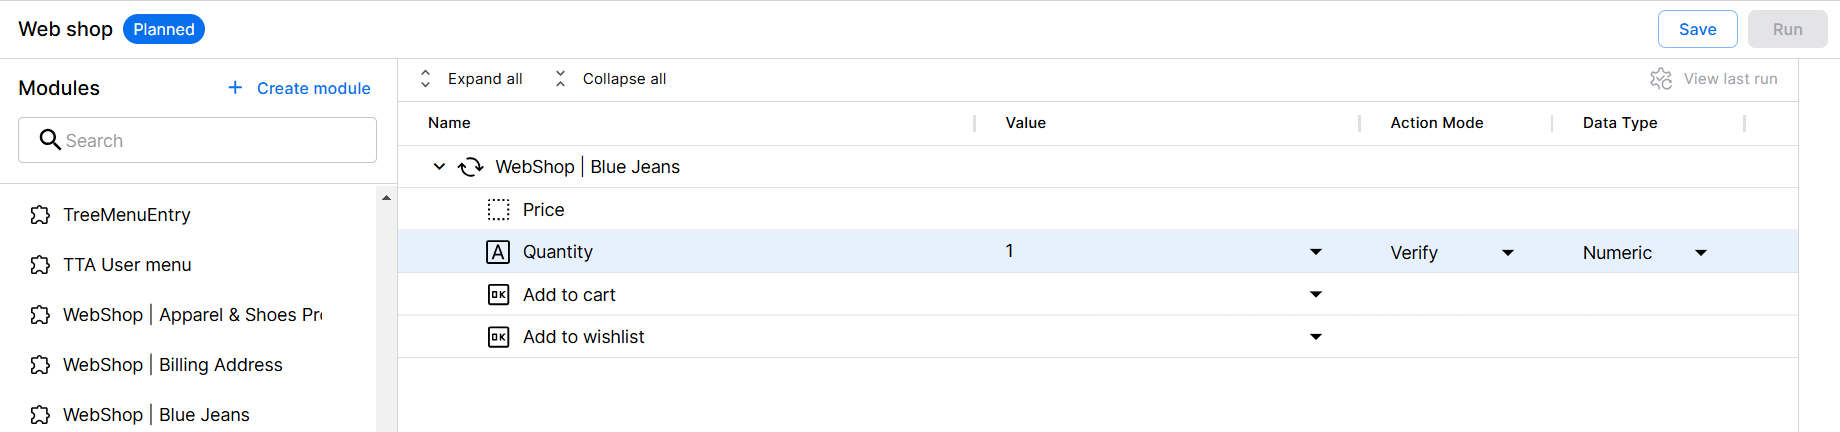
Verifies that the amount is 1
Buffer
The Buffer action mode writes a buffered value into a control. This lets you use a value more than once.

Setting the buffer value
WaitOn
The WaitOn action mode adds a dynamic wait time to your test case. That way, Tosca Cloud waits for a control to reach a certain state before it continues.
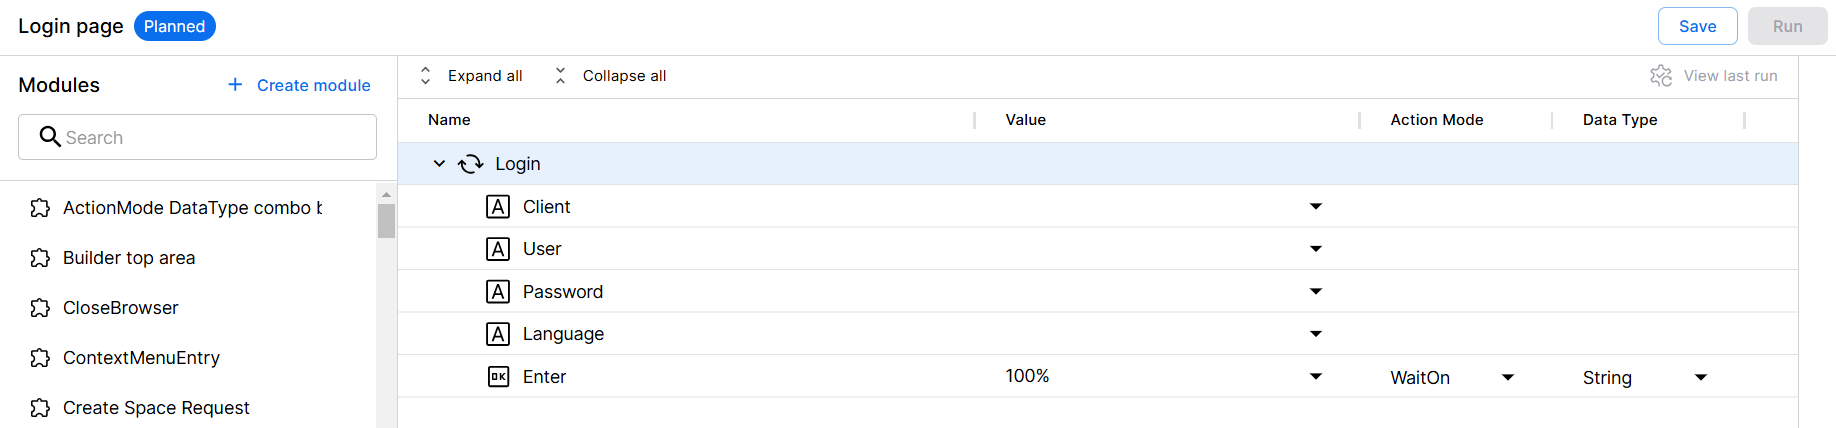
Wait until Enter button has reached 100%
Select
The Select action mode selects specified controls. The required control must have a unique name.
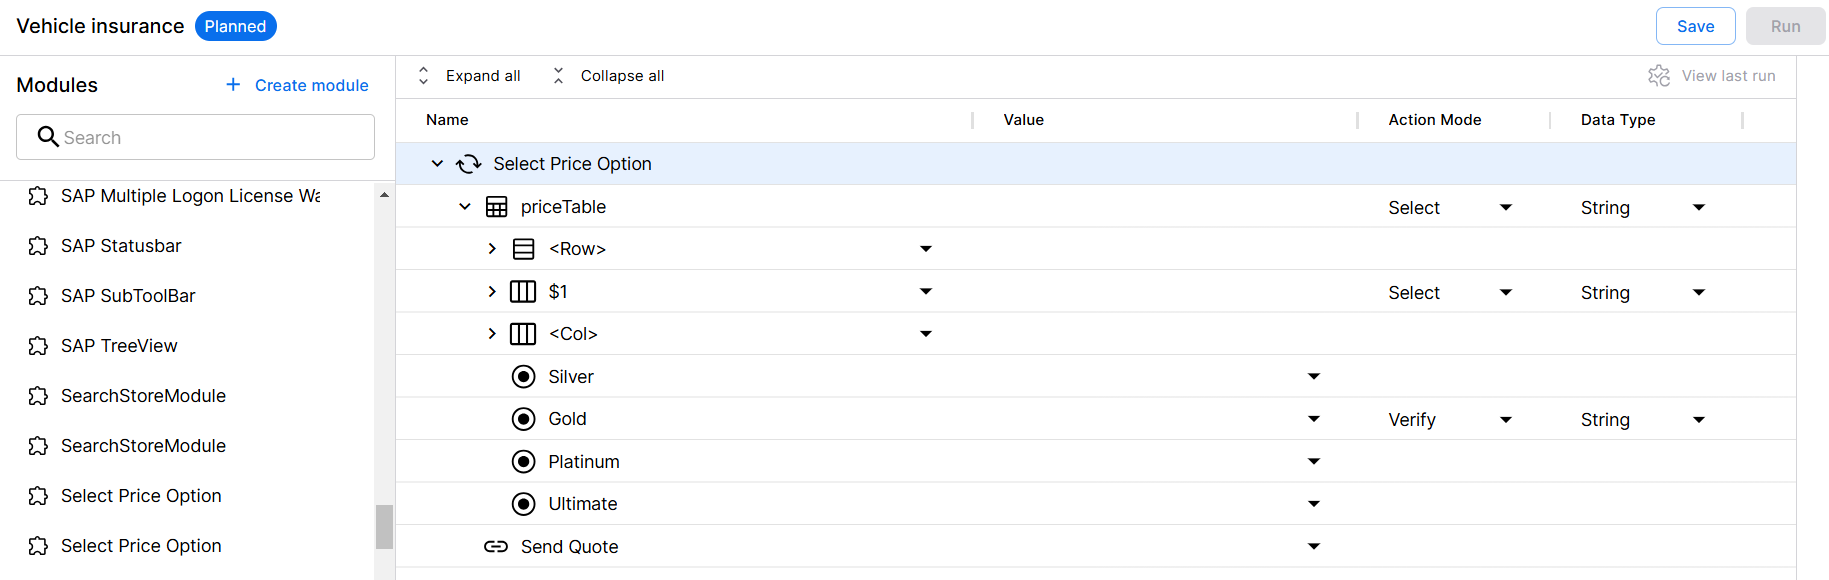
Selects Gold in the price table
Constraint
The action mode Constraint limits the search for a parent control in a table.
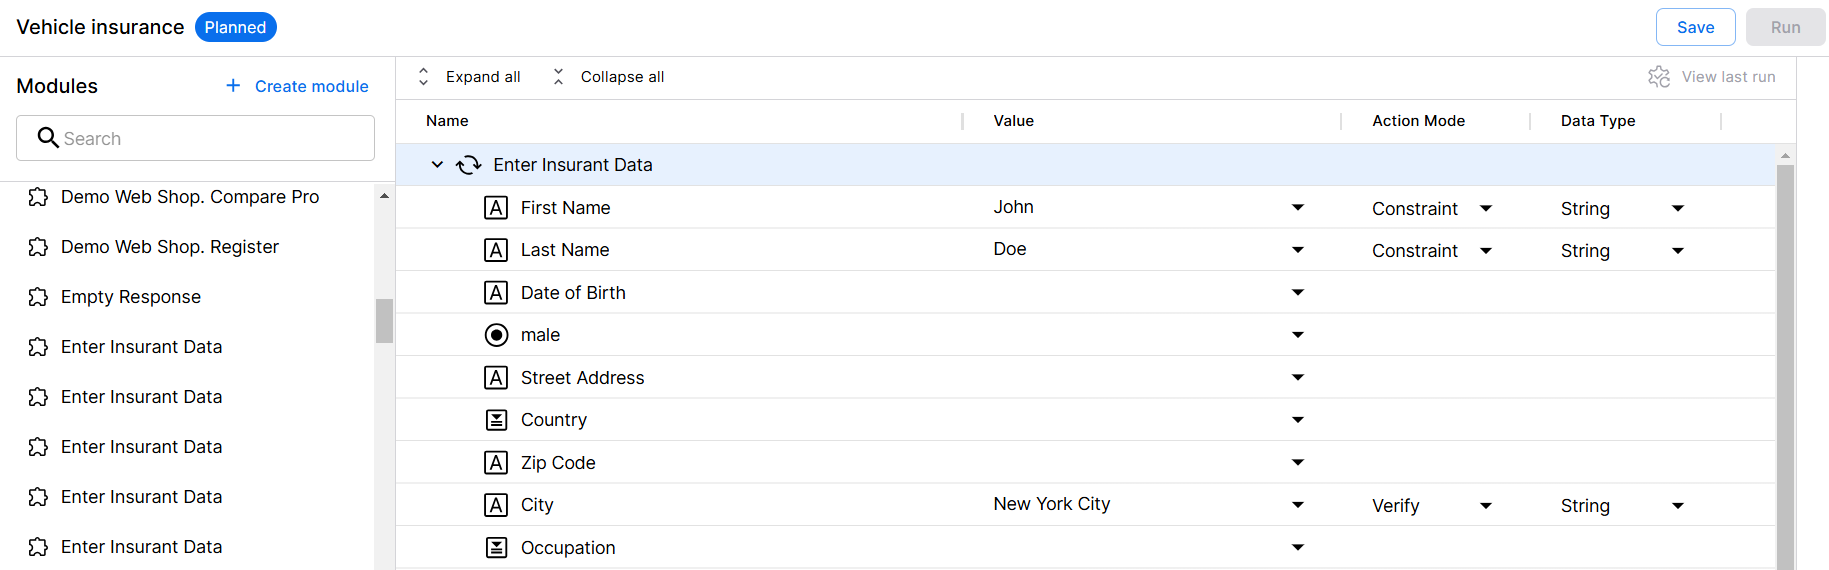
Searches for unique customer with First NameJohn and Last NameDoe
Output
The action mode Output stores control data in a variable so that you can reuse it later on. For example, to insert it into another part of your application or to compare it with the contents of a different control. This lets you ensure that the overall user journey works as expected.
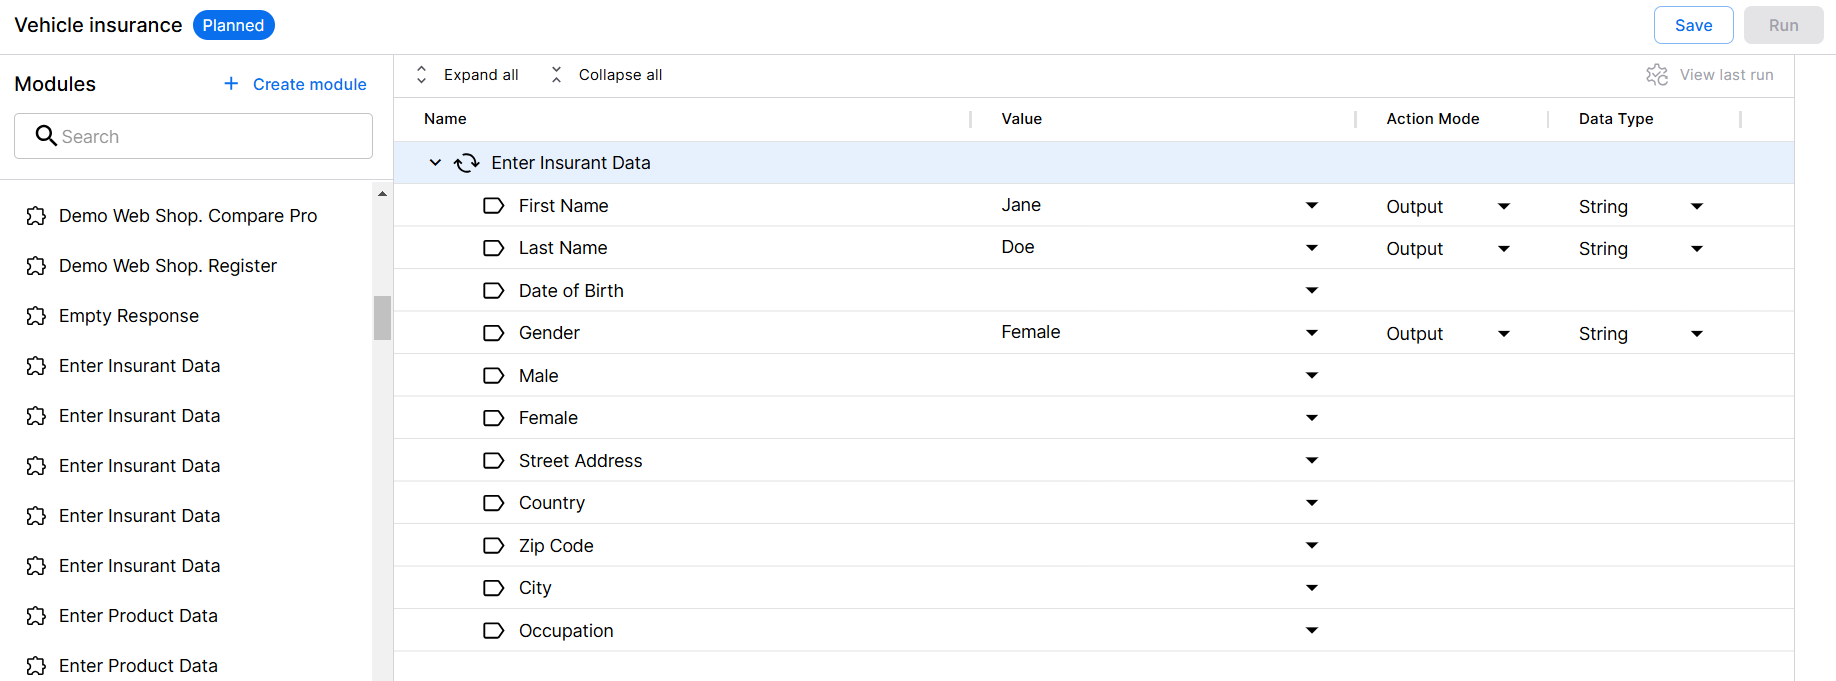
Outputs in a test step
Exclude
The action mode Exclude excludes specific rows or columns from tables. You can exclude rows and columns within the same test step.
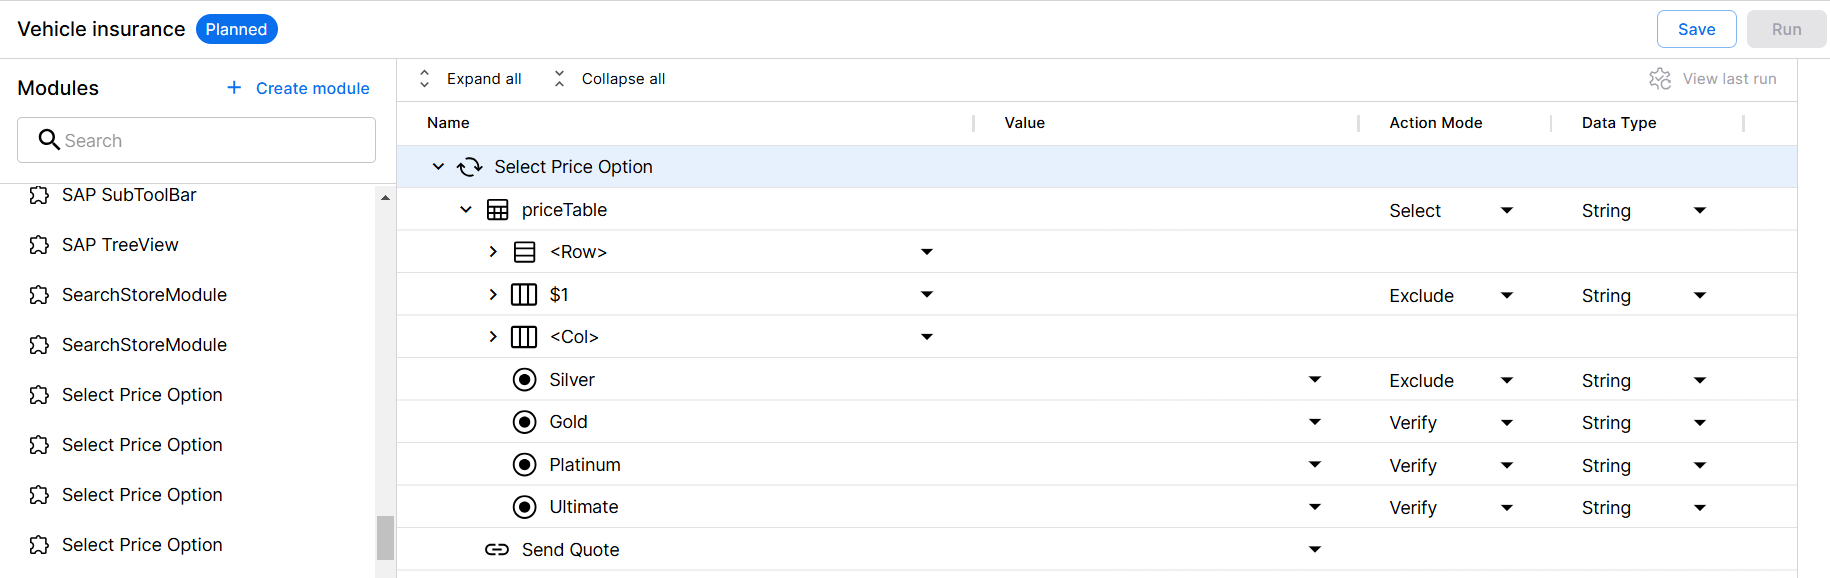
Excludes first row and Silver
To use action types from the old test case editor, you need to select an appropriate action type from the Action dropdown list. This topic walks you through your options.
Mouse
The Mouse action type lets you test menus, buttons, and other elements in your application that require mouse actions. For example, by dragging and dropping an item on the interface.
You can choose from the following options in the Mouse dropdown:
|
Option |
Description |
|---|---|
|
Left Click |
Left click with or without the cursor. With cursor is more precise, without cursor is faster and more stable. |
|
Right Click |
Right click with cursor. |
|
Double Click |
Double click with cursor. |
|
Drag |
Left click and drag the control. |
|
Drop |
Drop the control you're dragging onto this control. |
|
Hover |
Move the cursor to the center of the control. This is useful if hovering over a control opens additional elements that the test case needs to interact with. |

Click a button
You can also use special click operation commands to fine-tune your mouse movement and click behavior.
Input
The Input action type writes the value you've specified in your test step into the control. This lets you test any part of your application that requires input, such as forms or queries.
For the value, you can use static values, value expressions, or additional click operations. Keep in mind that if your value contains special characters, you need to escape them.
Inputs in a test step
Output
The Output action type saves control data to a variable so you can reuse it later on. You can save the following data:
-
Contents of a control. For example, to insert it into another part of your application or to compare it to the contents of a different control. This lets you verify that the overall user journeys work as expected.
-
The status of a control at runtime. For example, to make sure a particular button is active.
To save control data to a variable, follow these steps:
-
Set the Action to Output, then enter a name for your variable.
-
From the Value dropdown, select one of the following entries:
-
Value to save the control's default value.
-
InnerText to save the value of the control's inner text property.
-
Enabled, Exists, or Visible to save the respective status: true or false.
-

Save the content of the Order number control to a variable called MyExampleVariable
Keep these things in mind:
-
Make sure to give your variable a unique name, because you can have multiple variables in a test case.
-
Make sure to reuse your variable within the same test case. You can't set a variable in test case A and then reuse the value in test case B. To learn how to reuse variable values, check out Variable values.
Verify
The Verify action type compares a specified value to a control in your application. This lets you ensure that all elements of your application show the expected data or behavior.
You can verify the following information:
-
The content of a control. For example, to ensure that a confirmation message shows the right content.
-
The status of a control at runtime. For example, to check whether a particular button becomes active after you've filled out a form.
To verify a control's data, follow these steps:
-
Set the Action to Verify.
-
Select your operator: == (is) or != (isn't).
-
Enter the expected value. You can choose from these options:
-
Static values, static values with *wildcards, or value expressions.
-
true or false for the status.
-
-
Select the
 icon, then select one of the following entries from the dropdown list:
 -
Value to verify the control's default value.
-
InnerText to verify the value of the control's inner text property.
-
Enabled, Exists, or Visible to verify the respective status.
-

Verify whether the Order number control exists
Create a dynamic wait with Verify
Dependencies between controls can lead to failed tests. Tosca Cloud doesn't distinguish between controls that aren't there and controls that aren't there yet. By default, Tosca Cloud waits up to 10 seconds, and then it reports an error.
You can use action type Verify to add a dynamic wait time to your test case. That way, Tosca Cloud waits until a control has reached a certain state before it continues. For example, if a progress bar has to reach 100% before the Next button activates.
To add a dynamic wait, follow these steps:
-
For the control you want to wait on, set the Action to Verify.
-
Define the expected state. Like with any verification, this can be the expected content or status of the control.
-
Select the
 WaitOn icon. A blue icon means that the WaitOn function is turned on.

Add a dynamic wait for the Progress bar
By default, Tosca Cloud waits 20 seconds for all WaitOn test steps. If you need more or less time, add a parameter to your test case; you need to use the special task parameter SynchronizationTimeoutDuringWaitOn.
Create a variable with Verify
The variables you create with Output save the entire value of a control. However, sometimes you may just need parts of it. For example, if a confirmation message has a static and a dynamic part: <dynamic order number> processed. And you want to check whether the new order number shows up in your database.
In this case, you can verify the content and create a variable at the same time:
-
Set the Action to Verify.
-
Select the == operator.
-
Enter the full value of the control in your test step. Then replace the part you want to save with {XB[variable name]}.

Verify the confirmation message and save the order number to a variable called OrderNo
To reuse the variable value, use the same syntax that you use for variables you create with Output.
For more information, check out Variable values.