Test APIs
APIs allow different software applications to communicate with each other and exchange information. In API testing, you send requests to the API and check the responses to ensure that everything works as expected.
Each API test requires one or more API messages. Each API message consists of a request and a response module. The request module contains the information required to send the API request, such as the method, endpoint, resource, properties, and payload. The response module validates the API response. Once you create a message, run it as a quick test or use it in your test cases.
You can build messages in the API playground or generate them with an AI assistant connected to the MCP server via MCP action.
Create an API message
To create an API message, follow these steps:
-
Go to
 Build > API messages to open the API playground. This automatically creates a new API message that has no name or settings yet.
 -
Enter a clear name for your API message.
-
Set up your request:
Field
Description
You have two options to specify a connection.
-
Select a connection you created on the API connections page. The Endpoint and Authorization fields become read-only. The base URL for a connection usually doesn't change. If you want to use the same endpoint for multiple requests, you can enter the path and query parameters in the Resource field.
-
Enter Endpoint manually.
Method
For HTTP connections, select the request method. If you select a connection type other than HTTP, this field shows the respective actions instead.
Enter the URL of your API endpoint.
When your Connection and base URL stay the same, edit this field instead of replacing the whole URL. Enter only the path and query that come after the base URL from the Endpoint. For example: /api/v1/orders/42?expand=lines. Tosca Cloud combines the Endpoint and Resource when you send the request. This field is not available for message broker connections.
Payload
Enter the data to send.
If needed, add extra information, such as content type or custom fields.
Properties
This tab appears next to Headers when you select a message broker connection that you created on the API connections page. Messaging properties are metadata the broker attaches to each message, such as message type, correlation ID, or priority. View or edit them here.
Params
Use this tab to define parameters as separate key-value pairs, or type them directly into the Resource field. Tosca Cloud keeps both in sync. Parameters can be one of the following types:
-
Query: Append key-value pairs to the URL to filter, sort, or paginate results. For example, add a parameter with the key expand and the value lines. Tosca appends ?expand=lines to the URL in the Resource field.
-
Path: Replace a placeholder in the URL path with a specific value to target a particular resource. For example, add a parameter with the name userId and the value 42 to resolve {userId} in the URL to 42.
Enter basic credentials directly, or select an API connection that includes authentication. The API playground shows all other authentication types as read-only from the selected connection.
-
-
Define a Verification for the response message, if you want to check that the expected value matches the actual value.
-
Run a quick test to see whether your entries are valid and the verification returns the expected value.
-
Select Save.
Find all your API messages in the API playground panel:
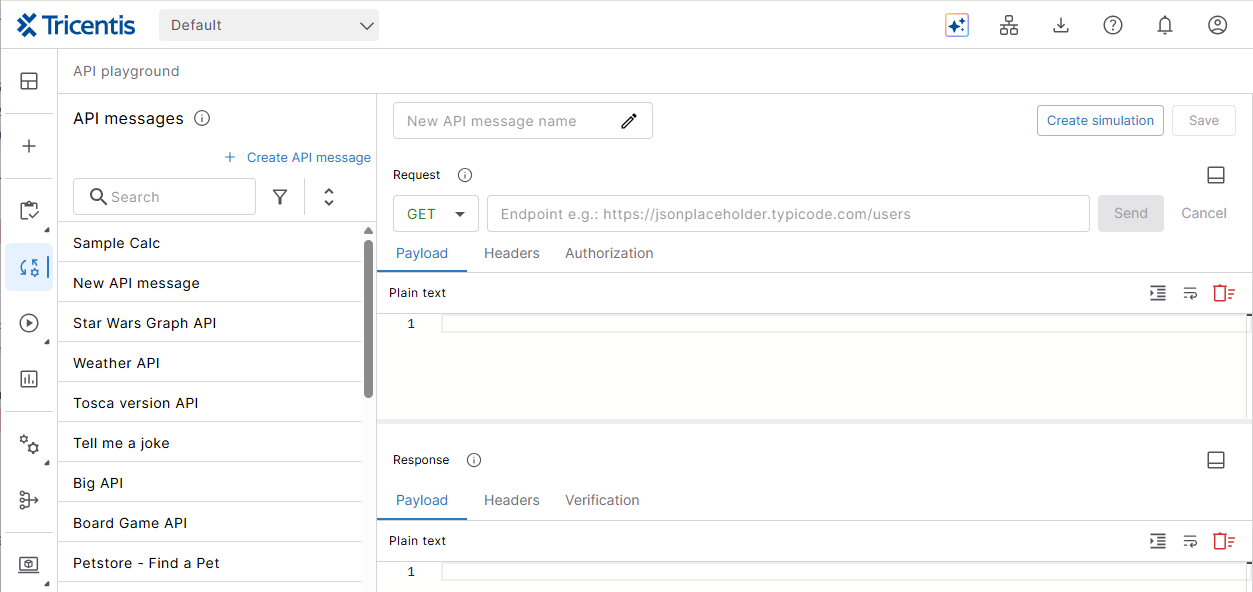
Click to enlarge. API playground
Set up verification
Verifications help you test whether your service works as expected. You can verify message format, content, or response codes. Set the values you expect and compare them to what the service returns.
To set up verification:
-
Select an existing API message or create a new one.
-
In the Response section, select the Verification tab.
-
Select
 to add a verification.
 -
Select the verification and configure the following properties:
-
Name - Enter a unique name for the verification.
-
Type - Select what to verify: Header, JsonPath, XPath, StatusCode, or ResponseTime.
-
Expression - Required for JsonPath or XPath. Enter your expression.
-
Operator - Select the comparison operator: Equal, NotEqual, Smaller, LessOrEqual, Greater, or GreaterOrEqual.
-
Value - Enter the expected value.
-
-
Select Save.
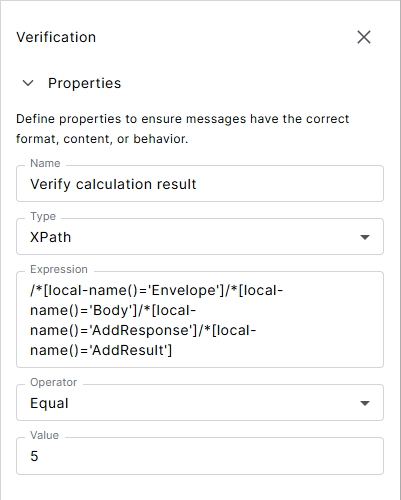
Click to enlarge. This example uses XPath to check a calculation result.
Run a quick test
To run a quick test, follow these steps:
-
Select an existing API message or create a new one.
-
Select Send from cloud. Use the option Send via agent to securely access APIs from within your environment, even when firewalls or network restrictions prevent direct connections. The personal agent safely delivers your data to the API.
-
Check your results on the Response tab:
-
Status code - Shows if your message reached the API successfully.
-
Verification results - Shows whether your verifications passed.
-
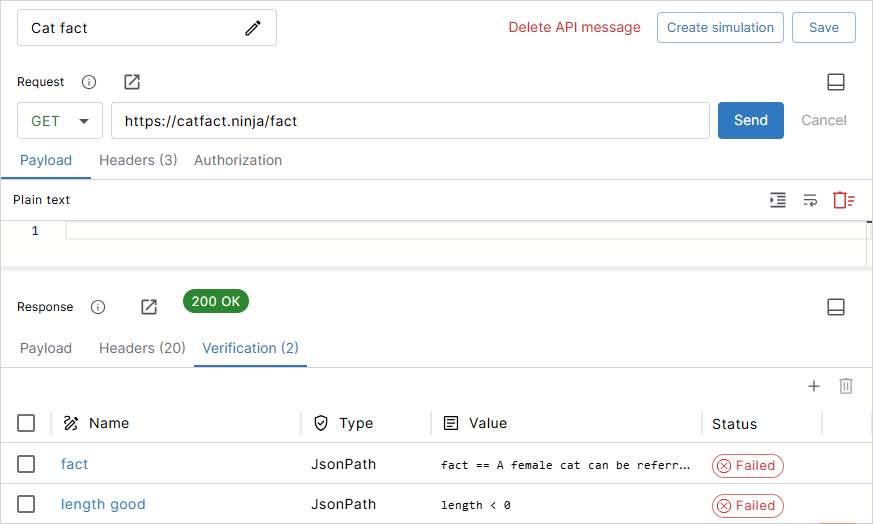
Click to enlarge. Response results
Select Save if you don't want to lose your changes when you leave the screen.
If you have uploaded API messages from Tosca on-prem, they may only work with the Send via agent option. The Send from cloud option doesn't support all features yet.
Create module attributes from API message elements
You can create module attributes from API message elements, such as the method or body. This allows you to control these elements in your test cases.
To create module attributes, follow these steps:
-
Select the API message from which you want to create a module attribute. Then, switch to Build mode.
In Build mode, you can see the request and response modules of the selected API message, including their current module attributes. The request module shows the Endpoint and Resource for the outgoing call.
-
Add API message elements to the Attribute preview panel in one of the following ways:
-
Elements with an
 icon: Select the icon next to an element.
 -
Payload elements: Select one or more elements in the request or response. This adds a preview for each selected element.
-
The entire payload: Select
Body to add the full payload body.
-
-
To create an attribute from an element, select + Add in the Attribute Preview panel.
-
Save your API message.
Any message elements you create from a response also appear in the Verifications tab of the playground.
Create API test case from API message
To create an API test case, follow these steps:
-
Select an existing API message or create a new one.
-
Select Create API test case.
-
In the menu bar on the left, select
Build > Test cases to find your new API test case. -
Design your test case as needed and save it.
Delete API messages
To delete an API message, go to ![]() Build > API messages, select the message to delete, then select Delete API message.
Build > API messages, select the message to delete, then select Delete API message.
This affects all test cases that currently use the API message. Update these test cases before you proceed. Otherwise, they will fail at runtime.
What's next
Learn how to create a simulation from your API message.