Visualizing TestCases
Select a TestCase in the tree view in order to enable the Control Flow Diagram tab in the right section of the window.
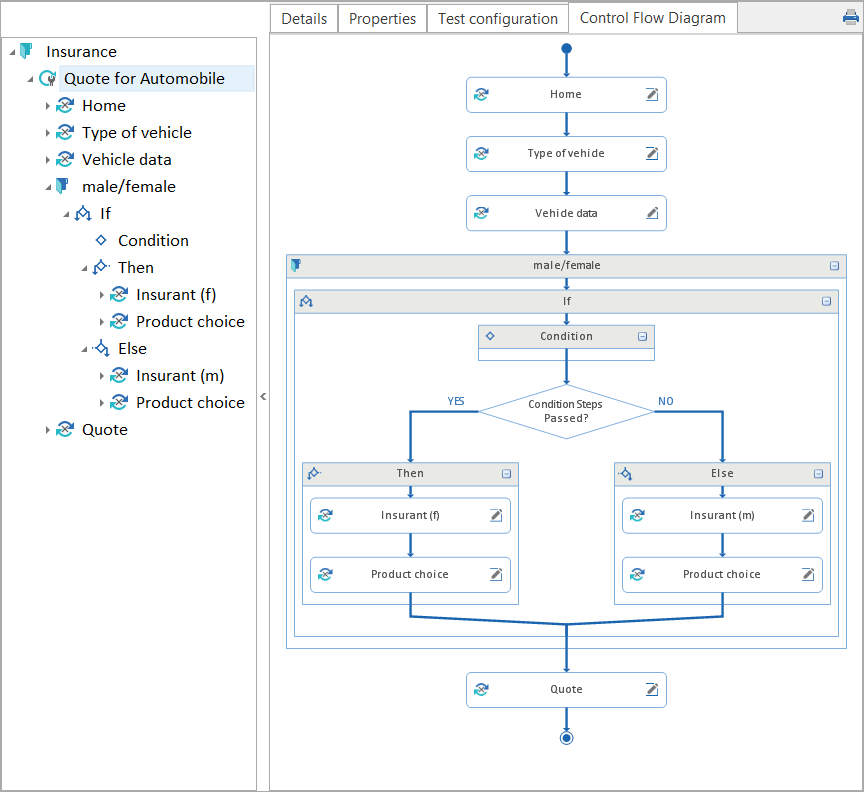
Flow chart
-
Use the + and - signs to expand or collapse nodes in the chart.
-
Double-click onto a node title in order to rename it.
-
Move nodes within the flow chart by using drag and drop.
-
If you select an item in the tree view or a node in the flow chart, Tosca will highlight the corresponding node in the flow chart or the item in the tree view.
The following buttons are available in the Control Flow Diagram tab:
-
Collapse All: The view for all nodes that are located directly beneath the currently selected node is collapsed.
-
Expand All: The view for all nodes that are located directly beneath the currently selected node is expanded.
-
Expand One Level: This expands the first node which is located directly beneath the currently selected node.
-
Extend Lines: All lines and arrows pointing to the child nodes are shown.
-
Equal Widths: TestStep nodes are shown in the same width if TestStep names should exceed a certain length.
-
Center Diagram: The chart is centered.
-
Zoom: The chart is either scaled up or down.
The flow chart provides the following options in addition to the standard options Cut, Copy, Delete etc):
-
Create Before / Create After: This creates folders, manual TestSteps or statements (IF, DO, WHILE) either above or beneath the selected node.
-
Create Surrounding Folder: This creates a folder which includes the selected node(s). Use Ctrl+left mouse button for multiple selection.
-
Delete Surrounding Folder: This removes the parent folder. However, the nodes within the folder are not deleted.
-
Show Detail: This navigates to the details view of the selected node. Alternatively you can click on this button in a node:
 .
.