Create Excel UI Modules
This chapter describes how to create Excel UI Modules.
For information on how to steer the Excel user interface, see chapter "Steer with the Excel UI Engine 3.0".
Scan the Excel UI
You create Microsoft Excel UI Modules with ToscaXScan.
To do so, right-click a Module folder and select Scan->Application. Alternatively, click on the dynamic menu Modules and select ![]() Scan->Application. For more information on scanning, see chapter "Create Modules by scanning".
Scan->Application. For more information on scanning, see chapter "Create Modules by scanning".
Scan and create Excel UI Modules with menu items
You can use ToscaXScan to scan Excel UI menu items.
By default, XScan identifies and scan top-level menu items in Excel's ribbon tabs. However, to access submenu options within these menus, you must manually add them during the configuration of your Excel UI Module. For instance, you can scan the Conditional Formatting button from the main ribbon menu but can't directly steer its menu options Highlight Cells Rules or Top/Bottom Rules without a few changes to your Module.
To create a Module that steers Excel UI menu and submenu items, follow these steps:
-
Use XScan to find and select the menu items you want in your Module.
-
Create your Module and close XScan.
-
Go to your new Module and rename your menu items to match what appears in the Excel UI.
-
For each menu item:
-
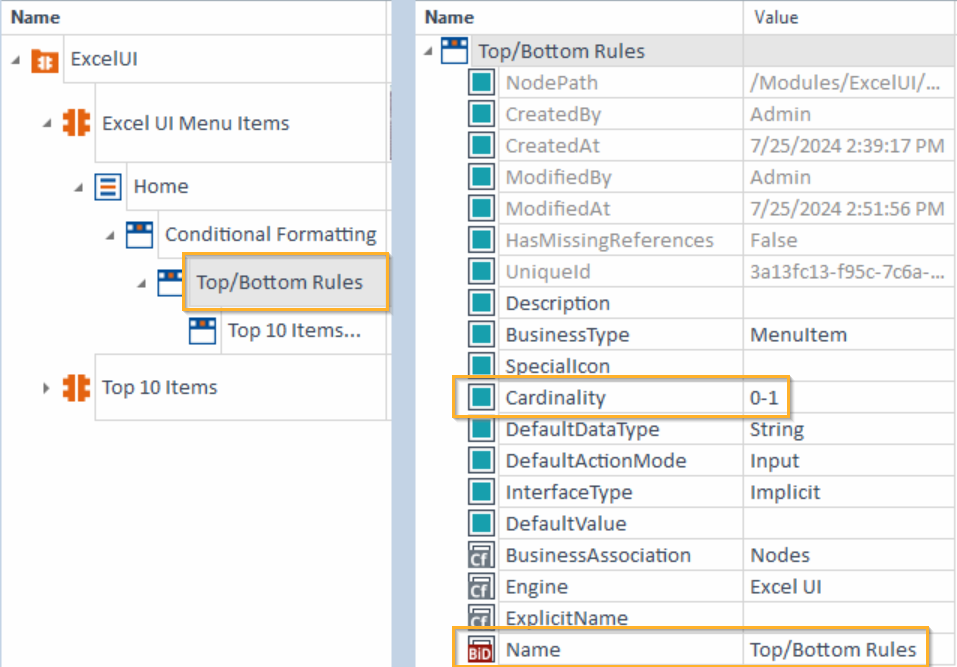
In Properties, change the Cardinality to 0-1.
-
In Properties, add a BusinessID parameter and rename it to Name. Make sure you enter a value that matches the menu item as it appears in the Excel UI.
-
You can now steer Excel UI menu items with this Module.

|
In this example, you configure a Module to steer the Top/Bottom Rules menu option under Home > Conditional Formatting.
Configuration for the menu item Home->Conditional Formatting->Top/Bottom Rules |