Configure Scenario
After installing the qTest Scenario plug-in, you must configure the Scenario settings on a per project basis to use Scenario in that project. The configuration will allow you to link your Jira project, Scenario, and your Git repository. The first time you use qTest Scenario, you will be prompted to enter your Git username and password and select your preferences.
To configure qTest Scenario in a Jira project and use Scenario inside of Jira, the Git Repository Administrator will need to turn on your Git repository for the Jira project and assign the user his or her credentials in the Git repository.
The user must be a collaborator on that Git project, and the administrator must grant them push access. Currently, Scenario integrates with the following Git repositories:
| Git Repository Supported Versions | |
|---|---|
| Bitbucket Cloud | any version |
| Bitbucket Server | 5.8.0 - 5.11.1 (latest) |
| GitHub Cloud | any version |
| GitHub Enterprise | any instance equipped with API v3 |
| GitLab Cloud | any version |
| GitLab Enterprise Edition/Community Edition | latest version |
Get your access token
If you are using certain Git repository types, you can't connect with a username and password. Instead, you'll need to get the right token and enter it in the Git Password field when you configure Scenario.
Use a Personal Access Token instead of a password. To learn how to retrieve your Personal Access Token (opens in a new tab).
Use an API token that meets the following criteria:
-
Has the following scopes:
read:account:bitbucket,read:repository:bitbucket, andwrite:repository:bitbucket. -
Starts with
ATATT.
Learn how to create an API token for Bitbucket Cloud (opens in new tab).
Configure Scenario
-
Open your Jira application.
-
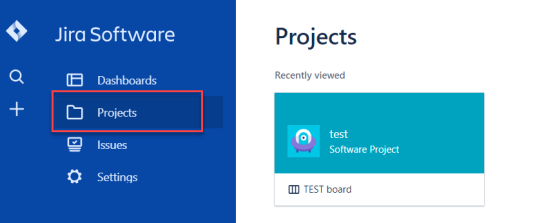
Select the Jira Project for which you would like use Scenario.
-
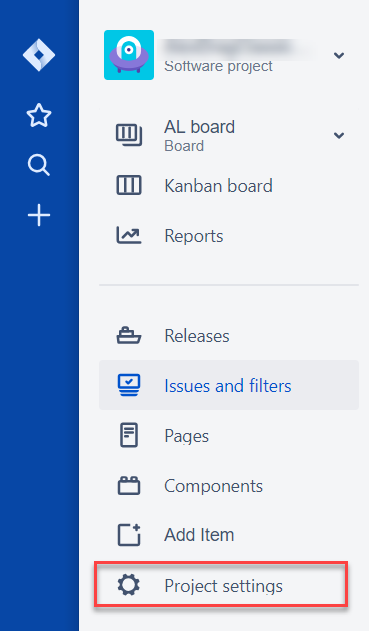
Navigate to the Settings tab for the Jira project.
-
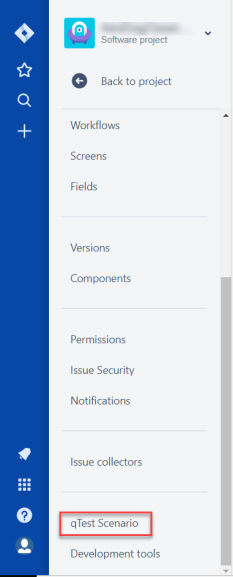
Scroll down within the Jira Project settings, and select qTest Scenario.
-
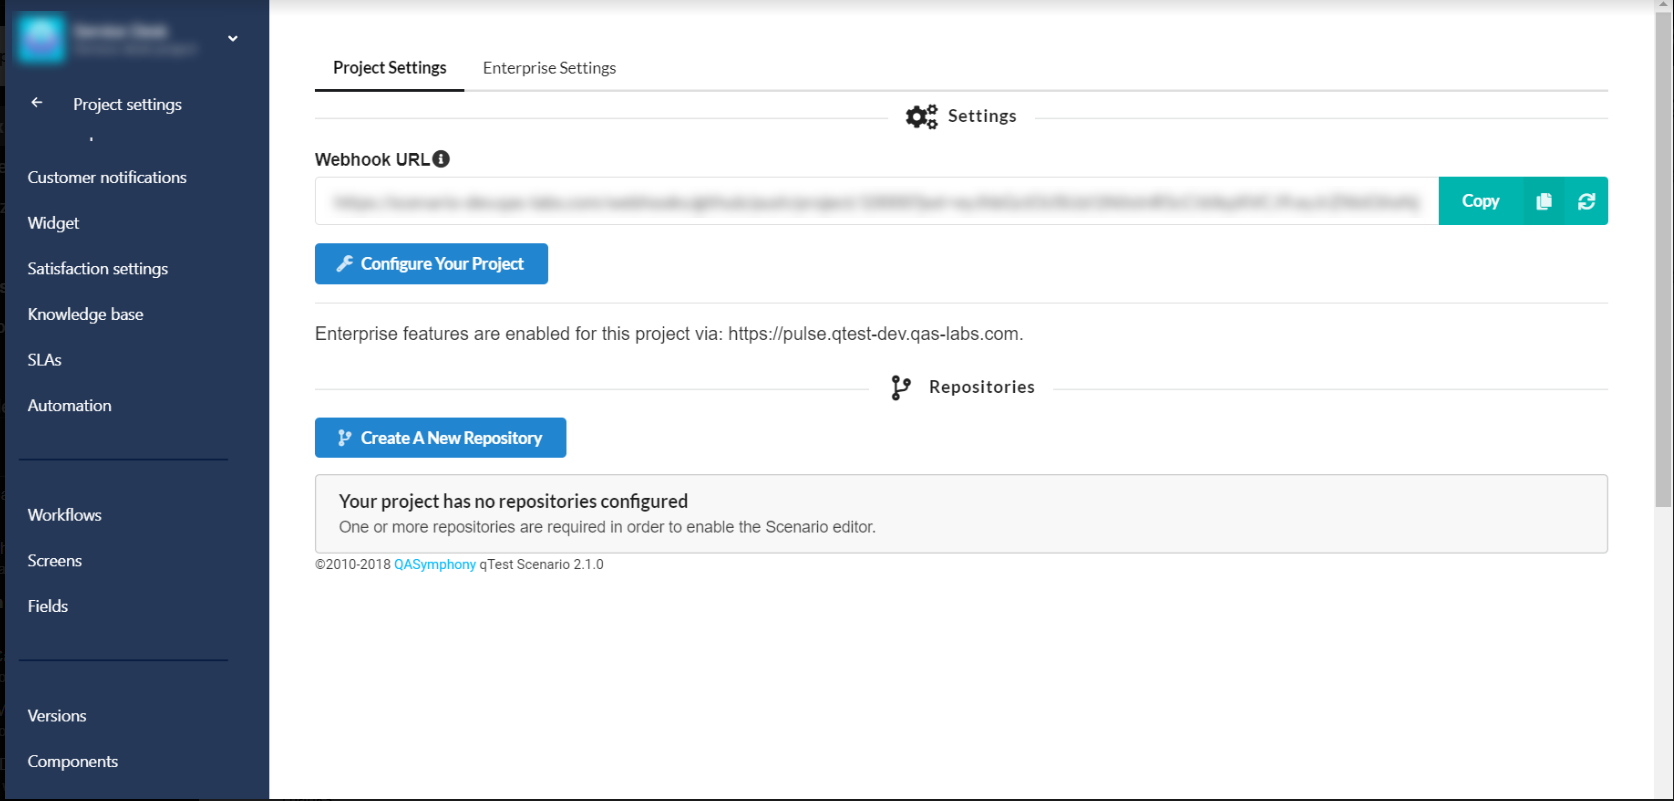
The Project Settings page displays.
The webhook displayed here is your Scenario webhook. You will use this to connect to your Git Repository.
Project Settings
-
Select Configure your Project.
-
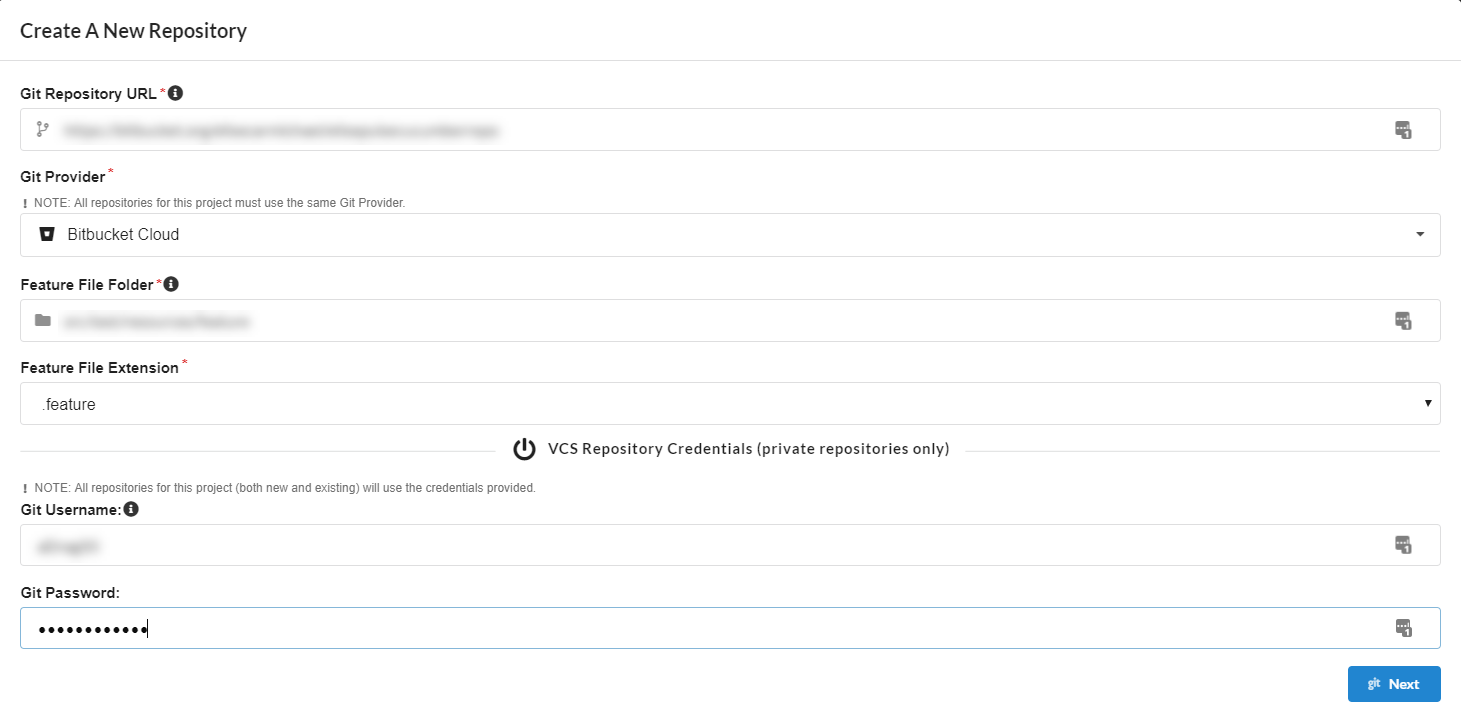
The Configure Your Project Settings dialog displays. Input the following:
Git Repository URL
Git Provider: Choose the appropriate server environment
Feature File Folder: Provide the directory path for the highest level feature file directory.
Feature File Extension: Choose either the .feature or .story extension.
Git Username: If you are a Git user, enter your Git username. If you are a Bitbucket user, enter your Atlassian account email.
Git Password: Enter your password. If you are an SSO or Bitbucket Cloud user, enter your API token. If you are a GitLab user, enter your Personal Access Token.
-
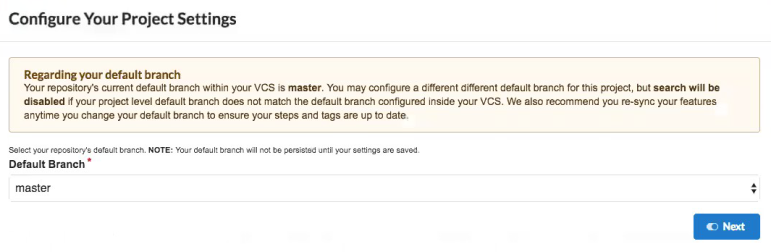
Select Next, and choose your Default Branch to commit your code. This is the repository code branch where your features files will be entered.
-
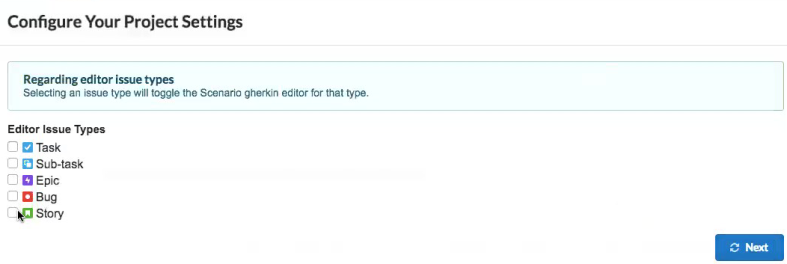
Select Next, and choose your Editor Issue Type. The issue type selected here will be the default for the Scenario Gherkin editor.
-
Select Next, and you will receive a message validating your setup is complete. Save.
-
Now your Scenario application is configured with your Jira application.
Enterprise Settings
To access these settings, select the Enterprise Settings tab right next to the Project Settings tab.
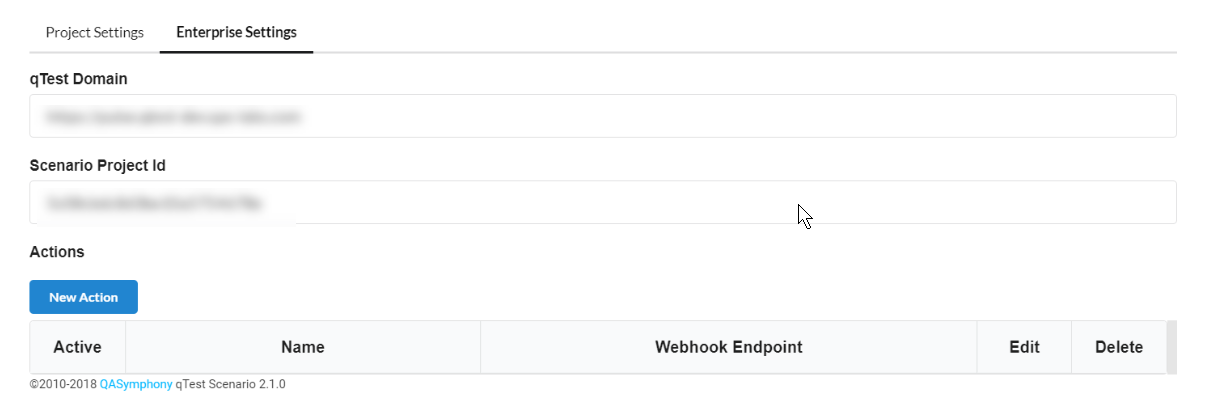
Input the following information:
-
qTest Domain: Enter your qTest Pulse URL
-
Scenario Project Id: This is unique for each Jira project configured with Scenario. You will input this as a Pulse Constant.
-
Actions: Used to configure Scenario with the Trigger Jenkins Pulse Rule. To add a new Action, do the following:
-
Select the New Action icon.
-
Ensure the Active check-box is selected.
-
Name the Action.
-
Input the Webhook Endpoint which is the Pulse Event webhook associated with the Pulse Rule you are configuring with Scenario.
-
Save.
-