2024.4 OnPremises Single Server Upgrade Guide for Windows
In this article, we provide step-by-step instructions to upgrade qTest components from 2024.1 to 2024.4 OnPremises on a single Windows machine. Please read the instructions thoroughly before starting your upgrade.
Complete the OnPremises Technical Services Request form (opens in new tab) to request assistance or obtain self-installation links, whether you're upgrading or performing a fresh install.
Windows: Ctrl+F5
Mac/Apple: Apple+R or Command+R
Linux: F5
About the Command Line Wizard
The qTest 2024.4 Command Line Wizard is a command line interface application that allows you to configure basic settings for qTest applications in your purchase package.
You should understand these Command Line Wizard characteristics before you begin:
-
For each step, the installer will prompt you for a specific input value. After you provide a value, the installer will validate the input. If the value is incorrect, or additional permissions are required, an explicit error message displays so it’s easy to know how the input value should be corrected.
-
Default values display in square brackets [ ]. To use the default value, simply hit the Enter key.
-
Input values for yes/no questions, should be 'y', 'yes','n', 'no' (ignore case sensitive.) Any value other than those listed will be treated as a 'no.'
-
-
To terminate the configuration at any time without completing it, press Ctrl+C.
In the event you cannot start the Command Line Wizard again after terminating the configuration, backup then remove the qTest.config file. Retry starting the Command Line Wizard again.
Before You Begin
Read the following:
-
Back up your qTest data before you upgrade.
The Command Line Wizard will prompt you for each installation instruction. You need to perform action items and gather specific connection information before you begin the upgrade process.
Enter in the same configurations as in your 2024.1 qTest.config file within the Command Line Wizard unless there are configuration changes to account for.
If you need to change your previous configurations, review the application checklist provided in 2024.4 OnPremises Single Server Installation Guide for Windows so you can see what information you will need.
Ports
Make sure the appropriate Ports for the prerequisite applications and qTest applications are open prior to any self-assisted upgrade. You should only open the HTTPS ports if you plan to serve SSL from the application.
Prerequisite applications
| Product | Port |
|---|---|
| PostgreSQL | 5432 (TCP) |
| Elasticsearch |
9200 (TCP) 9300 (if using ES Clustering) |
| Network File System (NFSV4) | 2049 (TCP and UDP) |
Native Linux and Windows
| Product | HTTP Port | HTTPS Port |
|---|---|---|
| Manager | 80 | 443 |
| Sessions | 8080 | 8443 |
| Scenario | 6080 | 6443 |
| Insights | 9080 | 9443 |
| Parameters | 5080 | 5443 |
| Pulse | 4080, 4090 | 4443, 4493 |
| Launch | 3080 | 3443 |
Stop qTest Applications
-
Open the Command Prompt as an Administrator and navigate to C:\qTestctl folder
-
Execute the command below to stop qTest applications.
C:\qTestctl>net stop qTest -
Remove the qTest service.
C:\qTestctl>uninstall.bat
Backup qTest Manager Data
Follow the Back up and Restore qTest Data guide for instructions.
Download and Start the Installation Package
-
Request the installation files through the OnPremises Upgrade Form.
Complete the OnPremises Technical Services Request form (opens in new tab) to request assistance or obtain self-installation links, whether you're upgrading or performing a fresh install.
-
Once the OnPremises Upgrade Form is completed and submitted, the download link will be emailed to you from our Implementation Team.
-
Download and extract the zip file to a folder on disc.
-
Navigate to the extracted folder at
C:\path\to\qtestctl
-
Run the following command in a terminal window to begin the installation
path\to\qTestctl>qTestctl.bat. -
The Command Line Wizard will prompt you for each installation instruction. You may need to perform action items and gather specific connection information before you begin the installation process. Enter the same configuration items from the previous version qtest.config file unless there are changes to the previous configuration that requires new information.
Do not copy the qtest.configuration or any other file from the previous installation.
Choose the Applications to Upgrade
Provide a Yes (y) or No (n) response to the following question. Your response provided here will determine which components are upgraded on this Windows machine.
-
qTest Manager: [Y] or [N]
-
qTest Sessions: [Y] or [N]
-
qTest Parameters: [Y] or [N]
-
qTest Insights: [Y] or [N]
-
qTest Launch: [Y] or [N]
-
qTest Pulse: [Y] or [N]
-
qTest PulseOld: [Y] or [N]
-
qTest Scenario: [Y] or [N]
Not sure if you should choose Pulse or PulseOld for your installation? Take a look at which version of the Pulse Executor to install.
Configure Prerequisite Applications
Review your PostgreSQL Database information you copied from your previous deployment. If you need to enter new values you may do so.
Example:
Configure Elasticsearch Database

Postgres 13.x and Elasticsearch 7
PostgreSQL 13.x to 16.x - Must be installed and configured prior to qTest application installation.
-
Hostname/IP
-
Port
-
Database Superuser - The standard postgres user can be used. If you require a separate user, it must have equivalent superuser permission (e.g. - read, write, create/delete/modify databases/tables/schemas/functions/sequences/triggers/views).
-
Database Superuser Password
-
TLS Certificate - The location of the TLS root certificate is required for installation. Make sure that the permissions and ownership allow the user installing qTest to access the path and certificate files recursively. For more information on PostgreSQL TLS connections, refer to the official documentation found at https://www.postgresql.org/docs/current/ssl-tcp.html.
Elasticsearch 7.17.x - Must be installed prior to qTest application installation
-
Hostname/IP
-
Port
-
TLS Certificate - The location of the TLS root certificate is required for installation. Make sure that the permissions and ownership allow the user installing qTest to access the path and certificate files recursively. For more information on Elasticsearch TLS connections, refer to the official documentation found at https://www.elastic.co/guide/en/elasticsearch/reference/7.x/ssl-tls.html.
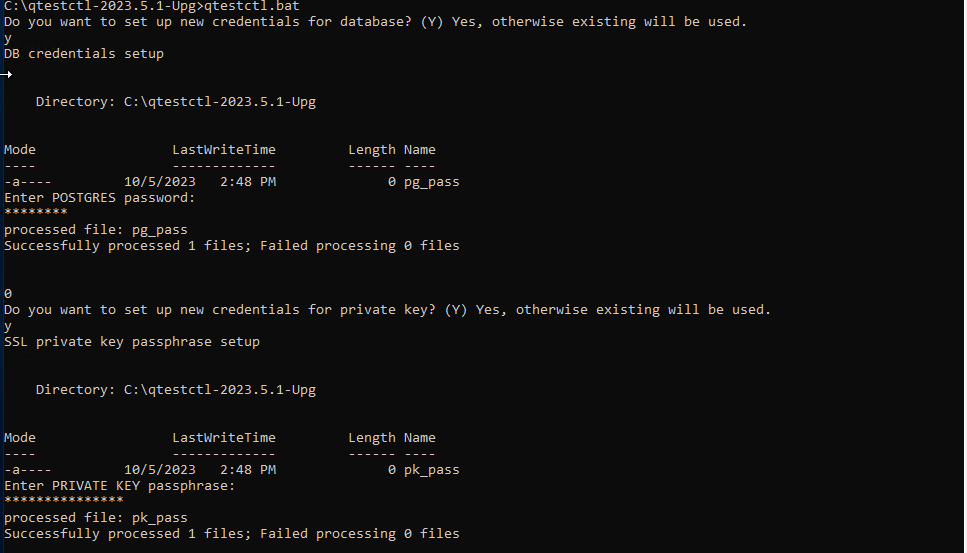
TLS Configuration
-
qTest and PostgreSQL
-
Cipher suite - the list of cipher suites the program uses in the ssl_ciphers.config file.
-
The server uses a default set of cipher suites in the the ssl_ciphers.config file, but you can edit the configuration file to provide your own. The configuration file contains cipher format examples and details on how to provide your own ciphers.
-
-
CA Signed Certificate – Use the absolute path to certificate location on the server. The user executing the qtestctl installation must also have read permission for this file and path recursively.
-
Private Key - Use the absolute path to certificate location on the server. The user executing the qtestctl installation should also have read permission for this file and path recursively. If a passphrase is used for the private key, make sure to have it available.
-
This information is only needed if you will be deploying with an SSL secured connection:
qTest Applications
-
Certificate File (.crt) - absolute path to the certificate file on this server.
-
Location should not be inside the directory tree of the qTest application (i.e. /qtestctl). The user executing the qtestctl installation must also have read permission for this file and path recursively.
-
-
Private Key (.key) - absolute path to the private key file on this server.
-
Location should not be inside the directory tree of the qTest application (i.e. /qtestctl). The user executing the qtestctl installation must also have read permission for this file and path recursively.
-
-
Private Key passphrase
Configure qTest Applications
The following applications will be configured using the information you copied from your previous deployment package. The prompt will ask for configuration details based on the applications you chose to upgrade in Step 1.
Example: If you chose to upgrade one application in Step 1, then you will only supply configurations to the Command Line Wizard for that one application on this machine.
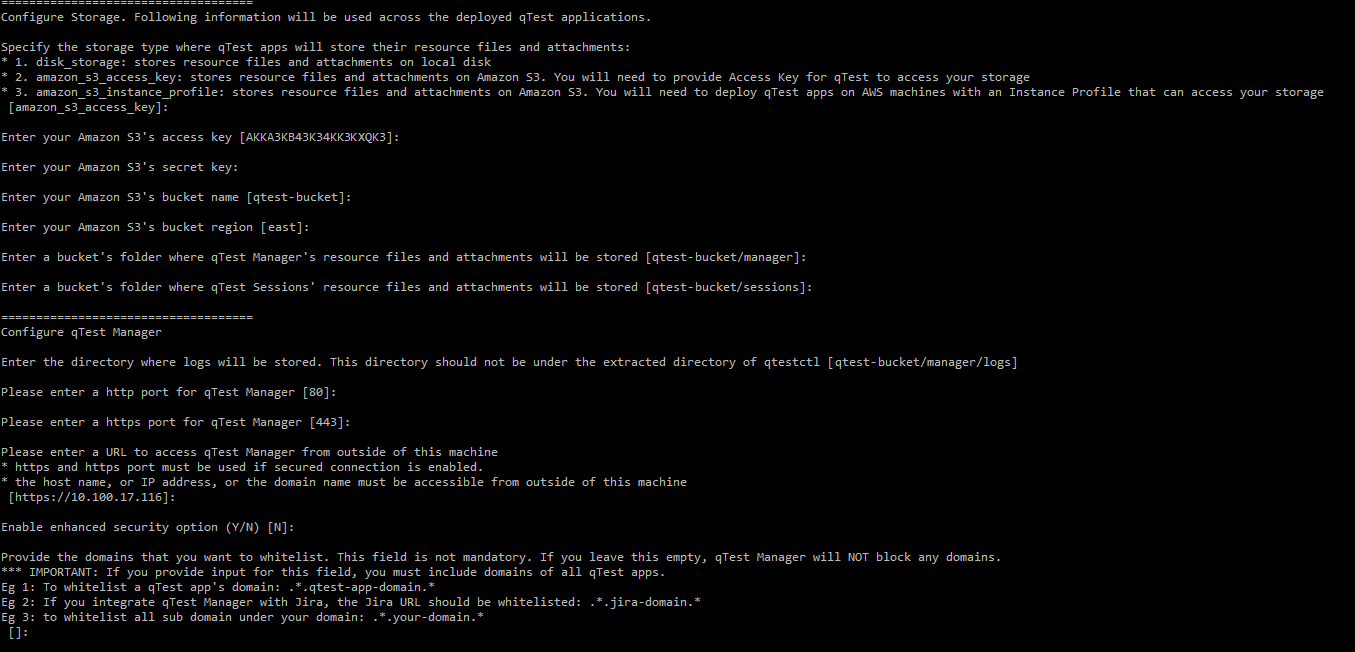
qTest Manager
Example:
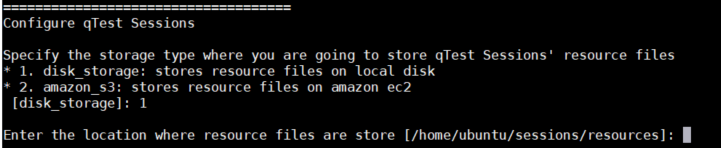
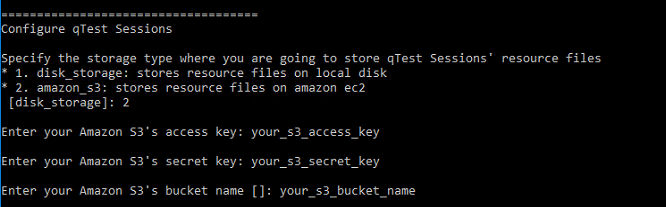
qTest Sessions
If you want to stores resource files on a local disk enter "1" or "disk_storage" and input the storage location. The location should be an absolute path to the folder. Please use / in the path.
Example:
Example:
Sessions Enhanced Security Option
During an attempted CSRF attack, user credentials may potentially be inherited and then used to maliciously perform undesirable actions, usually affecting a change of state of server. Please note that this does not result in any data theft. SSL must be enabled.
-
qTest Managers HTTP or HTTPS Port
-
URL to access qTest Manager outside of this machine
-
qTest Sessions HTTP or HTTPS Port
-
URL to access qTest Sessions outside of this machine
-
External Defect Tracker domain, such as Jira

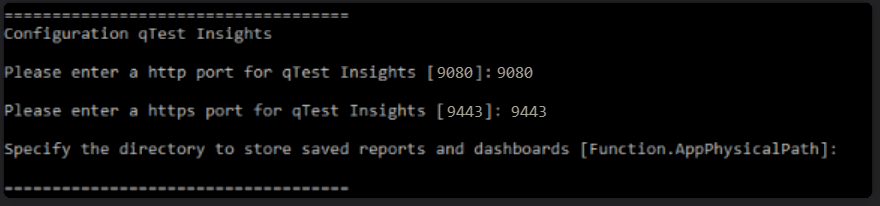
qTest Insights
For Insights, if you chose to specify a directory to store your saved reports and dashboards and this directory can be accessed from Insights (ex: D:\data\insdata, as this directory is completely independent of the Insights qtestctl directory).
Then to upgrade Insights: At the command "Specify the directory to store saved reports and dashboards [Function.AppPhysicalPath]", input the suitable path (ex: D:\data\insdata) of the directory used to store your Insights data.
Example:
Insights Enhanced Security Option
During an attempted CSRF attack, user credentials may potentially be inherited and then used to maliciously perform undesirable actions, usually affecting a change of state of server. Please note that this does not result in any data theft.
Three Insights features are impacted by this new security configuration:
-
embed reports/dashboard
-
shareable URL dashboard
-
rapid dashboard
Insights allow users to generate an HTML template and embed it into an external website ex: Confluence. Therefore, the domain of this website need to be included in the Whitelist domain. SSL must be enabled.
-
qTest Managers HTTP or HTTPS Port
-
URL to access qTest Manager outside of this machine
-
qTest Insights HTTP or HTTPS Port
-
URL to access qTest Insights outside of this machine
-
External Reporting domain i.e. Confluence

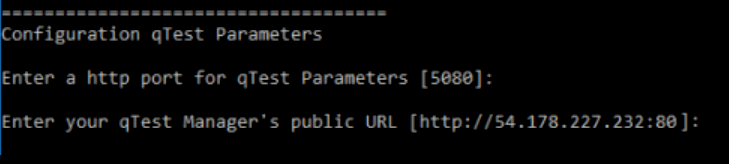
qTest Parameters
Example:
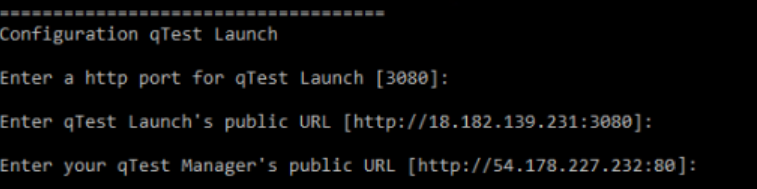
qTest Launch
Example:
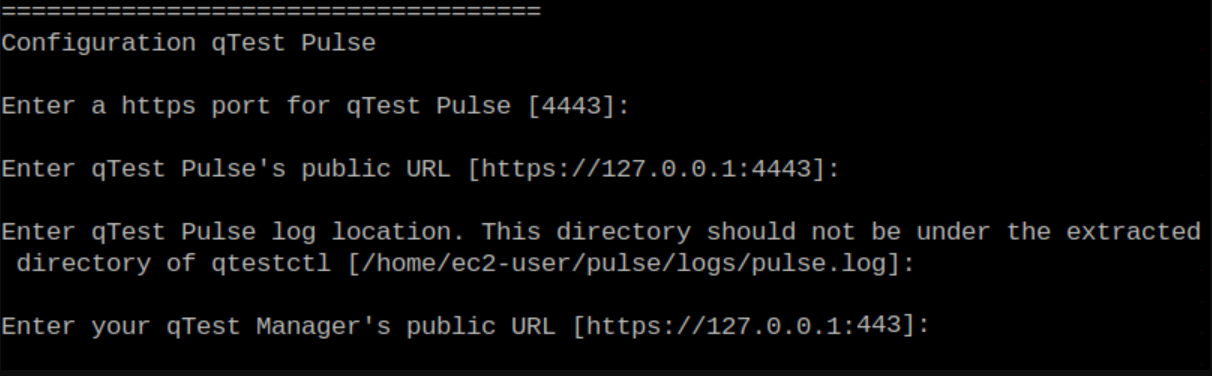
qTest Pulse
Example:
qTest Scenario
Example:

Review the Configuration
After all of the configurations are entered, they are stored in qTest.config file. You can open the file to review the configuration details.
-
If you need to modify a value, you can re-run the wizard (recommended) or modify the qTest.config file.
-
To restore the default configurations, delete qTest.config and re-run the wizard.
Example:

-
To start the deployment, execute this command:
qTestctl.bat start
-
The command will take control of the terminal. Keep it running.
Build Successful
You will receive a Build Successful message once the upgrade is complete.
Configure qTest Manager to Connect to qTest Applications
Refer to Configure qTest Applications to configure qTest Manager to connect with the other qTest applications you installed. You should also verify that the applications can be accessed and working properly before performing the final steps.
Stop the Running Process
Navigate back to the Command Prompt and stop the running process (Ctrl + C).
Install qTest Applications as a Windows Service
We highly recommend you enable qTest applications to start automatically when Windows starts.
-
Navigate to the folder C:\qTestctl-6.20
-
Execute the command below to install the new qTest service.
C:\qTestctl-6.20>install.bat -
You have now finished upgrading qTest applications.
-
Access qTest applications and verify the new versions.
Migrate Data from Insights
-
Navigate to the Root folder of Insights:
-
If using the default directory (Function.AppPhysicalPath) to store saved reports and dashboards in Insights, then use this root folder: \qtestctl\insights\build\tomcat\webapps\ROOT\Function.AppPhysicalPath
-
If using a directory that can be accessed from Insights (ex: D:\data\insdata), then navigate to that root folder.
-
-
Copy the following folders:
-
SavedBookmarks
-
SavedDashboards
-
Custom Reports
-
-
Move the copied folders to a new location for Insights at:
-
If using the default directory (Function.AppPhysicalPath) to store saved reports and dashboards in the qTest Insights configuration above, then paste to \qtestctl\insights\build\tomcat\webapps\ROOT\Function.AppPhysicalPath
-
Otherwise, paste to the directory (ex: D:\data\insdata) you specified in the qTest Insights configuration above.
-
Import qTest License
After the upgrade, you will need to manually copy the qTest License file from Manager 2024.1 and then import it to 2024.4. (These instructions are also covered in the Configure Manager article linked above.)
-
Access your qTest Manager instance via your browser using the URL as specified in the qTest.config file.
-
You will be redirected to the Licenses - Users tab in the Site Administration panel.
-
Select the Import License File button.
-
Browse to your license file located under the installation directory for qTest Manager 2024.1:
Example: <installation_dir>\manager\build\.tc\license.lic
-
Your license file will import into qTest Manager 2024.4.