Configure qTest Applications
After you successfully install qTest applications, you will need to perform the following:
Create Site Administrator Account
The Site Administrator account is used for qTest Manager and will initiate essential activities on any qTest OnPremises site, including creating projects, inviting users, assigning user profiles, purchasing licenses, etc.
Open your browser and access qTest Manager with the URL, as configured, when you installed qTest. If you did not change the default qTest URL and port, it is:
-
http//:[qTest Server IP]:80 or
-
https//:[qTest Server IP]:443
(in which [qTest Server IP] is the IP of the machine where qTest was installed.)
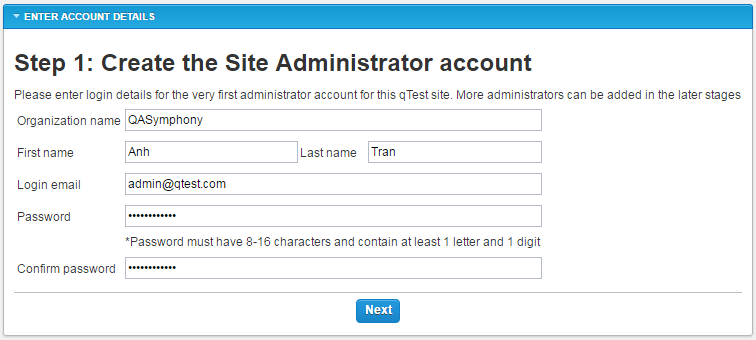
The first time you log into qTest OnPremises, you will be directed to the Site Administrator account creation form. To setup this account, simply enter details into the form as illustrated below:
| Organization name | This data is needed to create the root folder where all projects within a qTest site will be placed under. |
| First name & Last name | Specify the first name and last name of the Site Administrator, used for selection/task assignments when working in qTest. |
| Log in email | Specify the email address of the Site Administrator used for logging. This must not be an organizational email address, but must be a valid email address (such as: address@mail.com). |
| Password | Enter password and confirm the password again. This password must have 8-16 characters and contain at least 1 letter and 1 digit (such as: qTestadmin123). |
Set Up Email Server
This step is not required at this stage, but we strongly recommended to complete this step before proceeding if you have an email server already up and running. If you do not complete this step then email notifications will not be sent when inviting new users to your site. You can come back anytime later to set up your SMPT email server, if needed.
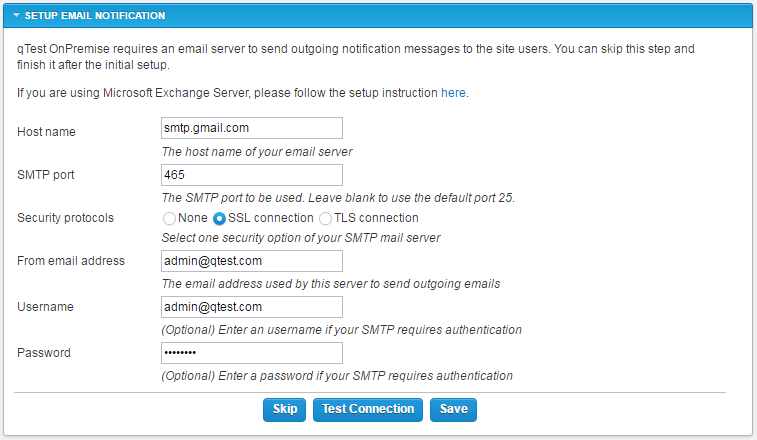
Once the Site Administrator account has been successfully created, you will be taken to the Email Server Setting form. This email server is required to send outgoing emails to users when certain events is triggered inside qTest (inviting users, deactivating/reactivating accounts, assigning tasks, editing items, subscribing users to items, etc..)
To set up a new email server for automatic notifications, complete the form as follows:
| Host name |
Specify the host name or IP address of your SMTP mail server. E.g.: smtp.yourcompanyname.com Some popular SMTP email server’s host names:
|
| SMTP port (optional) |
Specify the SMTP port number, usually 25 for SMTP or 465 for SMTPS. Leave this field blank to use 25 as the default port. Some popular SMTP email server’s port:
|
| Security protocols | Specify what security protocol your SMTP email server is using |
| Security protocols | Specify what security protocol your SMTP email server is using |
| From email address | Specify the email address used in the “Form” field in every outgoing email. This email address must be also configured and approved to send outgoing emails on this email server. |
| Username & password (Optional) |
Enter password and confirm password if the SMPT email server requires authentication. For free SMTP services, username is your full email address itself. E.g.:yourname@gmail.com |
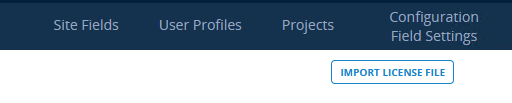
Import qTest Licenses
To activate your qTest application or to update licenses, you will need to import qTest licenses and change the .lic file.
-
Hover over your username and select Administration from the menu that appears.
-
Select the Licenses tab.
-
Click Import license file to upload your license file.
This license file will be generated and shared by Tricentis. Once imported into your application, this file will enable your account based on your subscription including:
-
Plan (Elite)
-
Concurrent or Named licensing model
-
Number of users
Pro and Premium are legacy subscription models and are no longer offered as of 2020. -
-
Once the license file is successfully imported, go to qtestctl/manager/build for all application clusters on which qTest Manager is installed.
-
Copy the license.lic file to the .tc folder.
Configure qTest Manager to Connect to qTest Applications
Manager
-
Log in to qTest Manager using a Site Administrator account.
-
Navigate to the Site Administration page and select the System Configurations tab.
-
In the Miscellaneous section, enter the qTest Manager URL to connect to qTest server's domain field:
-
http://[qTest_Manager_IPAddress]:[Port] if you install qTest Manager without SSL certificate Load Balancing: if you are using the Load balancing model, input the URL with the Public IP address of your qTest Manager Load Balancer.
OR
-
https://[qTest_Manager_IPAddress]:[Port] if you installed qTest Manager with SSL certificate.
-
Sessions
Configure Sessions
-
Log in to qTest Manager using a Site Administrator account.
-
Select Administration from the drop-down that appears when you hover over your username.
-
The Site Administration page will load and select the System Configurations tab.
-
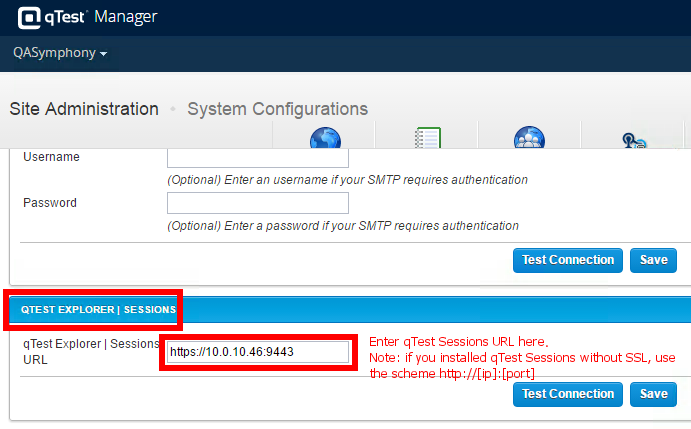
In the qTest Explorer| Sessions section, enter the URL of your qTest Sessions server in the qTest Explorer | Sessions URL field:
-
http://[qTest_Sessions_IP_Address]:[HTTP_Port] if you install qTest Sessions without SSL certificate Load Balancing: if you are using the Load balancing model, input the URL with the Public IP address of your qTest Sessions Load Balancer.
OR
-
https://[qTest_Sessions_IP_Address]:[HTTP_port] if you installed qTest Sessions with SSL certificate.
-
-
Select Test Connection and wait for qTest Manager to show a message "Connected to server successfully" then Save to save the configuration.
Access qTest Sessions
Follow these steps to validate that qTest Sessions was installed and configured successfully.
-
From qTest Manager's top navigation, select qTest Sessions from the Product Navigator.
-
The Explorer| Sessions homepage will display in a separate browser window.
-
On the qTest Sessions homepage, select + Sessions to create a new session.
-
Enter Session's Title and select Save & Close.
-
Verify that the new session has been created successfully.
Launch
Configure Launch
-
Log in to qTest Manager using a Site Administrator account.
-
Select Administration from the drop-down that appears when you hover over your username.
-
The Site Administration page will load and select the System Configurations tab.
-
In the Launch section, enter the URL of your qTest Launch server in the Launch URL field:
-
http://[qTest_Launch_IP_Address]:[HTTP_Port] if you installed qTest Launch without SSL certificate
OR
-
https://[qTest_Launch_IP_Address]:[HTTP_port] if you installed qTest Launch with SSL certificate.
-
-
Select Test Connection and wait for qTest Manager to show a "Connected to server successfully" message and then Save to save the configuration.

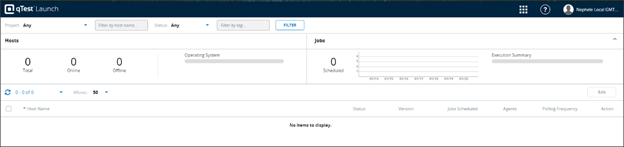
Access Launch
Follow these steps to validate that qTest Launch was installed and configured successfully.
-
In Manager, access qTest Launch from the Product Navigator.
-
qTest Launch will open in a separate browser window.
Insights
Configure Insights
-
Log in to qTest Manager using a Site Administrator account.
-
Select Administration from the drop-down that appears when you hover over your username.
-
The Site Administration page will load and select the System Configurations tab.
-
In the Insights section, enter the URL of your qTest Insights server.
-
http://<IP of the machine where you installed qTest Insights>:<Insights port which you've specified in the config file>
-
-
Select Test Connection and wait for qTest Manager to show a "Connected to server successfully" message and then Save to save the configuration.
Access Insights
Follow these steps to validate that qTest Insights was installed and configured successfully.
-
In Manager, access qTest Insights from the Product Navigator.
-
qTest Insights will open in a separate browser window.
Parameters
Configure Parameters
-
Log in to qTest Manager using a Site Administrator account.
-
Select Administration from the drop-down that appears when you hover over your username.
-
The Site Administration page will load and select the System Configurations tab.
-
In the Parameters section, enter the URL of your qTest Parameters server.
-
http://[qTest_Parameters_IP_Address]:[HTTP_Port] if you installed qTest Parameters without SSL certificate OR
-
https://[qTest_Parameters_IP_Address]:[HTTPS_Port] if you installed qTest Parameters with SSL certificate.
-
-
Select Test Connection and wait for qTest Manager to show the message "Connected to server successfully" then Save.
Access Parameters
Complete the following steps to verify that qTest Parameters was installed and configured successfully.
-
From qTest Manager's top navigation, access qTest Parameters from the Product Navigator.
-
qTest Parameters homepage will display in a separate browser window.
Scenario
For Scenario 2.0 there is no configuration required within qTest Manager. The Scenario placeholder visible inside of qTest Manager is no longer a valid component with Scenario 2.0. To configure Scenario with your Jira application and Git repository, refer to qTest Scenario Quick Start Guide.
Pulse
Configure Pulse
-
Log in to qTest Manager using a Site Administrator account.
-
Select Administration from the drop-down that appears when you hover over your username.
-
The Site Administration page will load and select the System Configurations tab.
-
In the Pulse section, enter the URL of your qTest Pulse server.
Pulse requires both the http:// and https:// ports.-
http://[qTest_Pulse_IP_Address]:[HTTP_Port] if you installed qTest Pulse without SSL certificate
-
https://[qTest_Pulse_IP_Address]:[HTTPS_Port] if you installed qTest Pulse with SSL certificate.
-
-
Select Test Connection and wait for qTest Manager to show the message "Connected to server successfully" then Save.
Access Pulse
Follow these steps to validate that qTest Pulse was installed and configured successfully.
-
From qTest Manager's top navigation, select qTest Pulse from the Product Navigator.
-
The Pulse homepage will display in a separate browser window.