Insights 2024.1 Single Server Installation Guide for Docker
In this article, we provide step-by-step instructions to install qTest Insights 2024.1 on a RHEL/ Ubuntu machine using Docker and connect to qTest Manager 2024.1 on another machine.
Complete the OnPremises Technical Services Request form (opens in new tab) to request assistance or obtain self-installation links, whether you're upgrading or performing a fresh install.
Before You Begin
-
qTest Insights 2024.1 only works with qTest Manager 2024.1 or later.
-
Docker 17.03 has been installed. Follow these instructions to install Docker on your machine if you have not already done so.
-
For RHEL, you need to follow additional instructions in Change Docker storage driver to avoid Overlay issue to adjust Docker Storage Driver from overlay to device mapper.
-
For RHEL 8 or Ubuntu 20.04 - 22.04 machines: Docker requires a 64-bit installation and your kernel must be at least 3.10.
Read the following:
Install qTest Insights 2024.1
Download Deployment Package
-
Download docker-deployment-4.18 package.
$ wget <ENTER DOWNLOAD LINK HERE> -
Extract the package.
$ tar -zxf <DOWNLOADED PACKAGE FILE NAME>
-
Access the docker-deployment-4.18 directory.
$ cd docker-deployment-4.18
Configure Before Deploying
Access the directory where you've extracted the package, and run the ./configure command to deploy the package.
The command has to include URL & port of qTest Insights.
Configure to deploy HTTP
$ ./configure --insights-url "http://<IP of current machine>:<insights port>" --insights-http "<insights port>" --cluster "<IP address of qTest machine>"
Configure to deploy HTTPS
$ ./configure --ssl-key "<SSL Key>" --ssl-cert "<SSL Cert>" --ssl-ca "<SSL Ca>" --insight-url "https://<IP of current machine>:<insights https port>" --insights-https "<insights https port>" --cluster "<IP address of qTest machine>"
Enhanced Security Whitelist Example:
-
qTest Manager domain: https://manager.qtest.com
-
qTest Insights domain: https://insights.qtest.com
-
You use a Confluence page to embed reports and dashboards, shareable URL dashboards, rapid dashboards: https://confluence.qtest.com
-
Whitelist domain: manager.qtest.com|insights.qtest.com|confluence.qtest.com or qtest.com
Configure to deploy with the Enhanced Security
$ ./configure --insights-security-csrf-trusted-source-pattern "<Whitelist domains>"
If you are configuring an external configuration, such as Confluence, then the Confluence URL should be whitelisted.
$ ./configure --insights-security-csrf-trusted-source-pattern "<qtest-manager-domain>[:port]|<qtest-insights-domain>[:port]|<confluence-domain>"
For example
$ ./configure --insights-security-csrf-trusted-source-pattern "qtest-manager.com|insights.com|confluence.atlassian.net"
Start the Deployment Process
$ ./startup
The script will download the application images to the Docker. It may take a couple of hours depending on your network connection.
Once the installation is complete, access to qTest Manager via your browser and setup for qTest Insights.
Set up qTest Insights
-
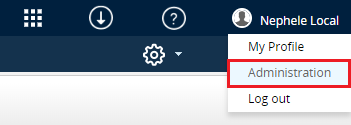
Hover over your username, and select Administration from the drop-down.
-
Under the Configuration page, scroll to section MISCELLANEOUS and enter the qTest URL into the field qTest server's Domain.
-
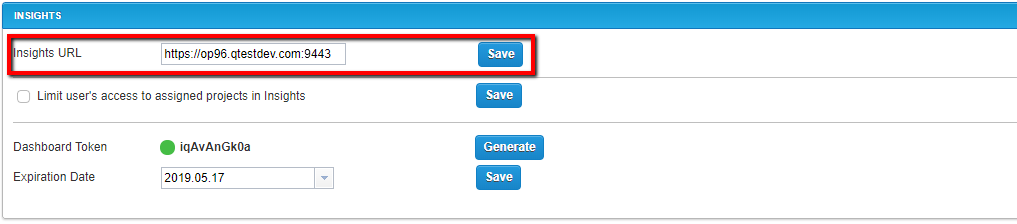
Scroll to the Insights section and enter the Insights URL:
-
http://<IP of the machine where you installed qTest Insights>:<Insights port which you've specified in the config file>.
-
-
Test Connection and Save the configuration.

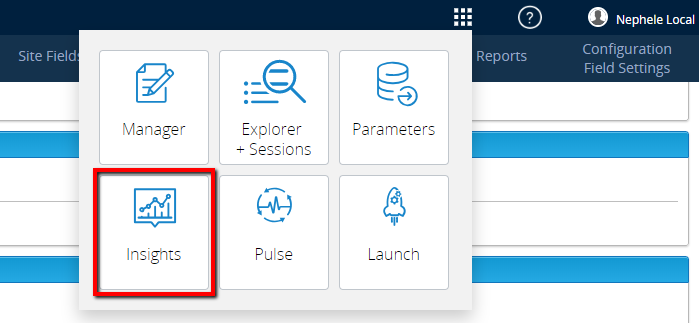
You now can access qTest Insights via its option in the Product Navigator.
Note
In order for the scheduler to work properly, you might want to check the SMTP port in a setting file to ensure it matches with your SMTP server port.
-
Open the setting file "build.gradle" under qtestctl/insights/build.gradle.
-
Find keyword "connSMTP".
-
Set the SMTP authentication method. The default is 0.
SmtpAuthenticationMethod="0"
-
0 for None
-
1 for Log on
-
2 for CramMD5
-
3 for TLS/SSL
-
-
Set the SmtpPort. You will need to change the value to your SMTP server port if it is not 465, as that is the default.
SmtpPort="465"