Create, edit, and delete a Workspace
As an Administrator, you can create a Workspace in an Account which consists in naming a Workspace and adding a description to it.
Create a new workspace
To create a Workspace, follow these steps:
-
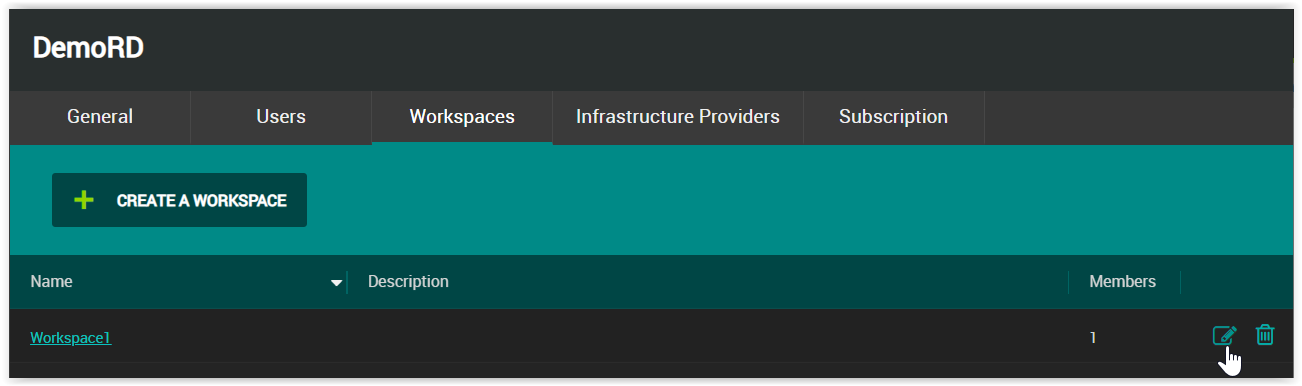
In the left navigation panel, click Settings and select the Workspaces tab.
-
Click the Create a Workspace button.
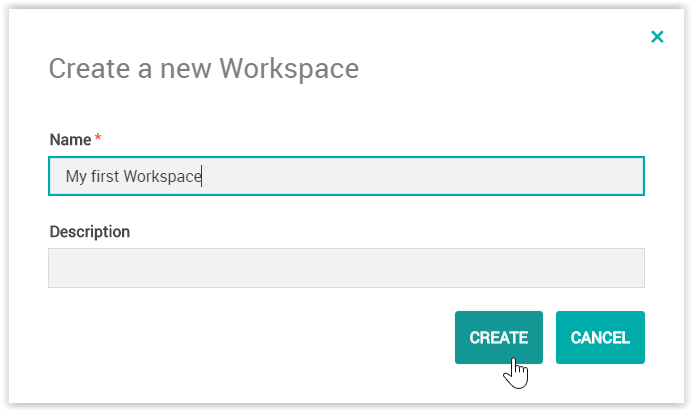
The Create a new Workspace screen pops up.
-
Enter the name of the Workspace in the Name field.
-
Optional: Enter a short description of the Workspace in the Description field.
-
Once you click Create, you are immediately redirected to the Members tab of the Settings / Workspaces / [workspace name] view so you can add members to the Workspace as described in Manage Workspace members.
Edit a Workspace
As an Administrator, you can modify details of a Workspace such as its name and description.
To edit Workspace details, follow these steps:
-
In the left navigation panel, click Settings and select the Workspaces tab.
All Workspaces of your Account are listed in the central panel, along with their names, descriptions and numbers of members.
-
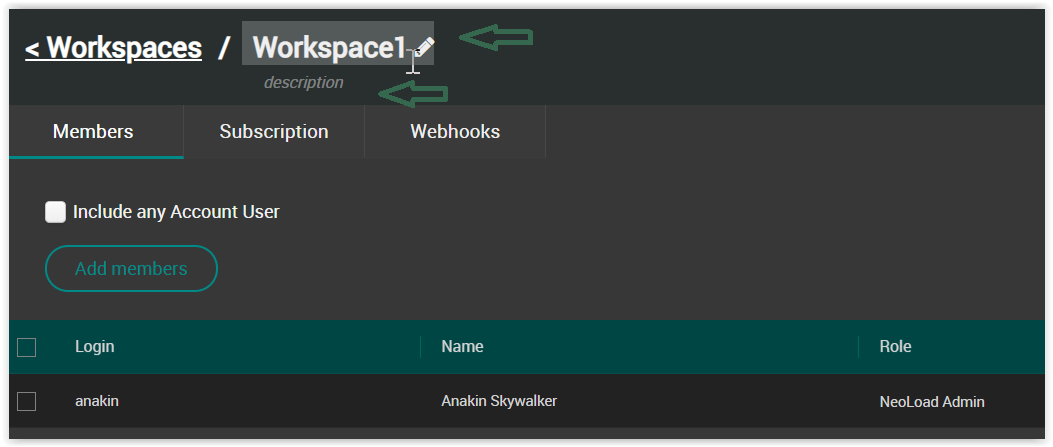
In the Workspace list, click on the Workspace you want to edit. You can also click the Edit button on the right of the Workspace row.
-
The name and description fields of the Workspaces are editable so you can directly modify the name and add/modify the description of the Workspace selected.
Delete a Workspace
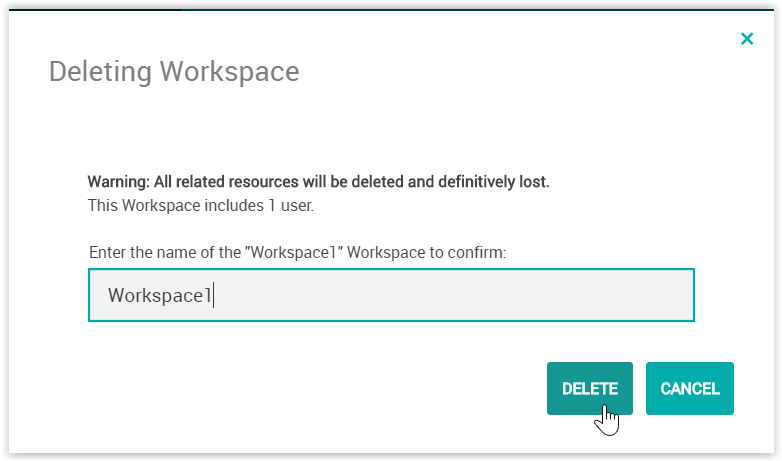
As an Administrator, you can permanently delete custom Workspaces created in an Account with NeoLoad Web. The "Default workspace" containing all migrated data cannot be deleted.
When a Workspace is deleted, all related assets (Tests, Test Results, graphboards, Reservations) are also permanently deleted.
Caution: Deleting a Workspace cannot be undone.
To delete a Workspace, follow these steps:
-
In the left navigation panel, click Settings and select the Workspaces tab.
All Workspaces of your Account are listed in the central panel.
-
In the Workspace list, click the Delete button on the right of the Workspace row you need to delete.
The Deleting Workspace dialog box pops up to validate the deletion.
-
You need to enter the name of the Workspace you want to delete before clicking on the Delete button to delete the Workspace.