Add an internal user
Adding an internal user consists in defining a user in NeoLoad Web and assigning them a role. For more information, see On-premise User roles.
To add an internal user, follow these steps:
-
In the left navigation panel, click Settings and select the Users tab.
-
Stay on the Internal users tab and click the ADD button.
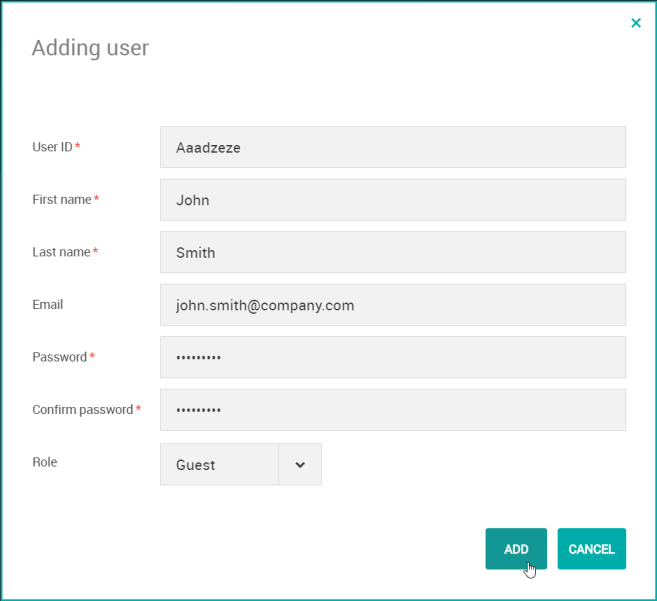
The Adding user screen pops up.
-
In the Adding user screen, you can access and specify the following details:
-
User ID: The name to be used by the user to log in to NeoLoad Web. Once created, it cannot be changed. Must be unique.
-
First name: The first name of the user
-
Last name: The last name of the user
-
Email: The email address to which the user will receive email notifications.
-
Password and Confirm password: The password to be used by the user to log in to NeoLoad Web.
-
-
Give a role to the new user, this will determine their access rights to NeoLoad Web. You can choose between Admin, Tester or Guest.
For more information about roles authorizations, see On-premise User roles.
-
Click ADD to validate the creation of the internal user.
