Test Analysis configuration
When running test analysis, it's important to have the correct set of metrics to help you make the correct assumptions on the actual outcome of your testing journey. With NeoLoad Web, you can choose to have up to ten metrics embedded into your test results.
You can also use regression detection to automatically compare current test results with static or custom dynamic metrics. This helps you keep track of unwanted changes in the core behavior of a feature with new increments, for instance. .
Specify metrics for your test results
To adjust the metrics displayed in a test view's graph, follow these steps:
-
In NeoLoad Web, go to Tests.
-
Select Settings inside the test you want to configure to open the Test Analysis Configuration dialog.
-
Within the Metrics section, add or remove relevant metrics to your test results.
-
Optionally, work with regression detection.
The resulting graph accommodates up to ten metrics, represented as solid lines. For additional information on the available metric values, see Value types.
Work with regression detection
NeoLoad Web uses Objectives to detect regression within your test results. When you specify an Objective as a metric, NeoLoad Web automatically compares your current test results with the values associated to the specified Objective. These can be:
If a respective value in your test results surpasses the value specified by your Objective, it indicates regression, leading to test result failure.
Note: Test failure due to regression detection also triggers Webhooks that depend on quality status Failure.
NeoLoad Web does not detect regression if:
-
There are no Objectives set in the Test Analysis configuration.
-
There is no value entered for the metric in the Test result.
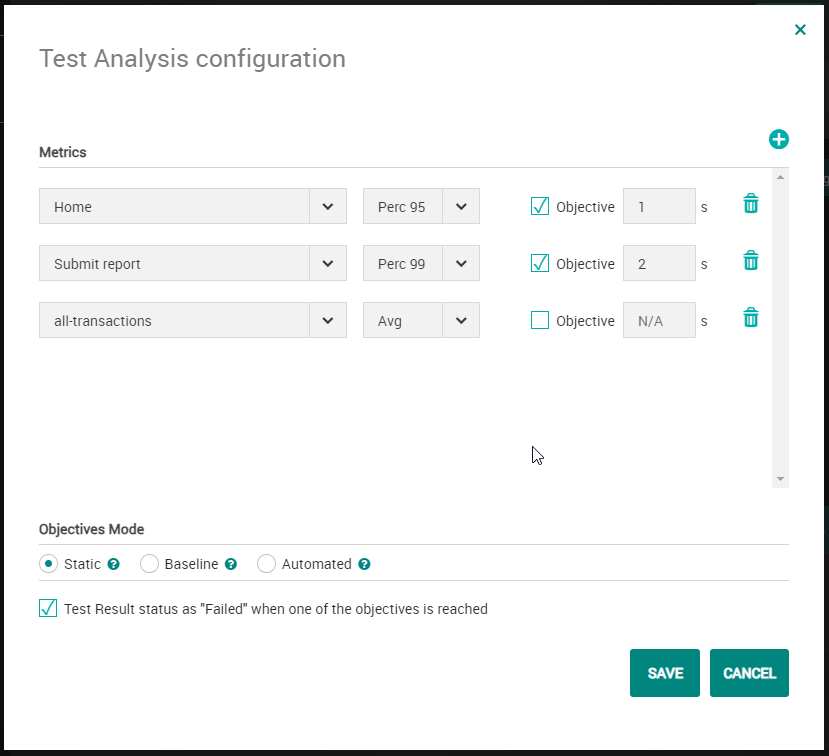
Static Objective Mode
You can use static Objectives to compare one of your metric's actual value with a fixed value you specify.
To specify a static Objective, follow these steps:
-
In the Test Analysis Configuration dialog, check one or more Objective boxes to specify a custom metric value.
-
In the Objective Mode section, select Static Objective Mode.
Baseline Objective Mode
You can use baseline Objectives to designate existing test results as the comparison baseline for your current test. Doing so automatically populates the Objective fields with the values of the designated baseline.
Note: You can't manually edit baseline Objective fields.
To designate existing test results as a baseline, follow these steps:
-
In the Test Analysis Configuration dialog, check one or more Objective boxes to specify a custom metric value.
-
In the Objective Mode section, select Baseline Objective Mode.
-
Specify a Reference result for that metric and its Tolerance. This automatically populates the value fields.
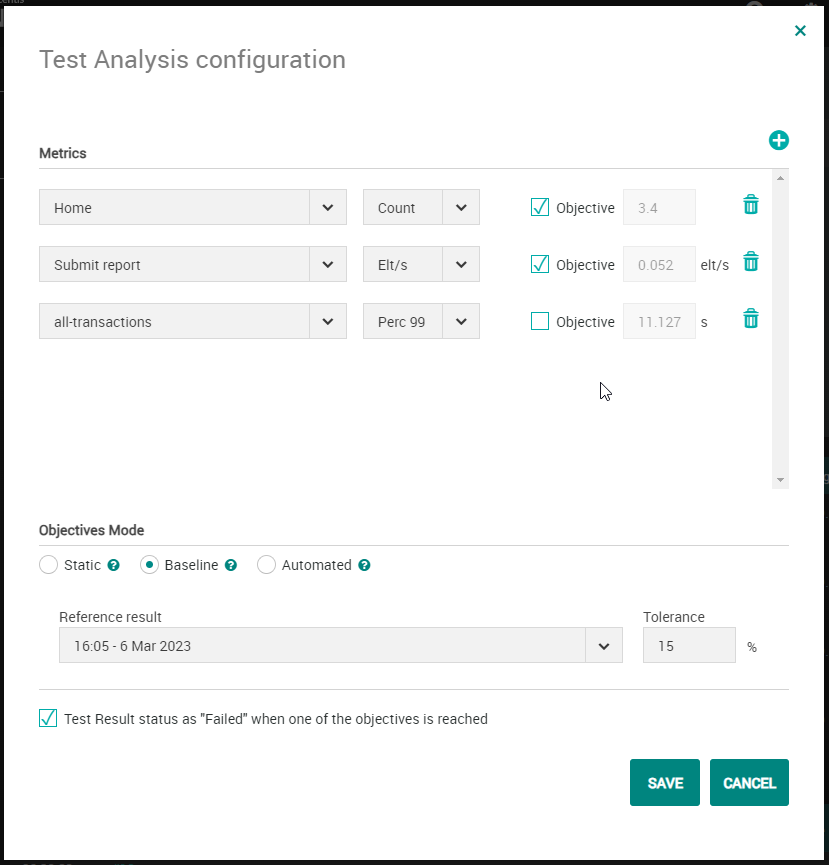
Note: The tolerance percentage sets a permissible deviation range for a metric without indicting a regression. It allows a small amount of change in the test results without considering the test as failed.
Automated Objective Mode
With an automated Objective, the Objective's value is computed at the end of the test result and is based on the most recent Passed results. In other words, NeoLoad goes through the last 50 successful test results to calculate the automated Objective's value.
To specify an Objective which uses a computed target value, follow these steps:
-
In the Test Analysis Configuration dialog, check one or more Objective boxes to specify a custom metric value.
-
In the Objective Mode section, select Automated Objective Mode.
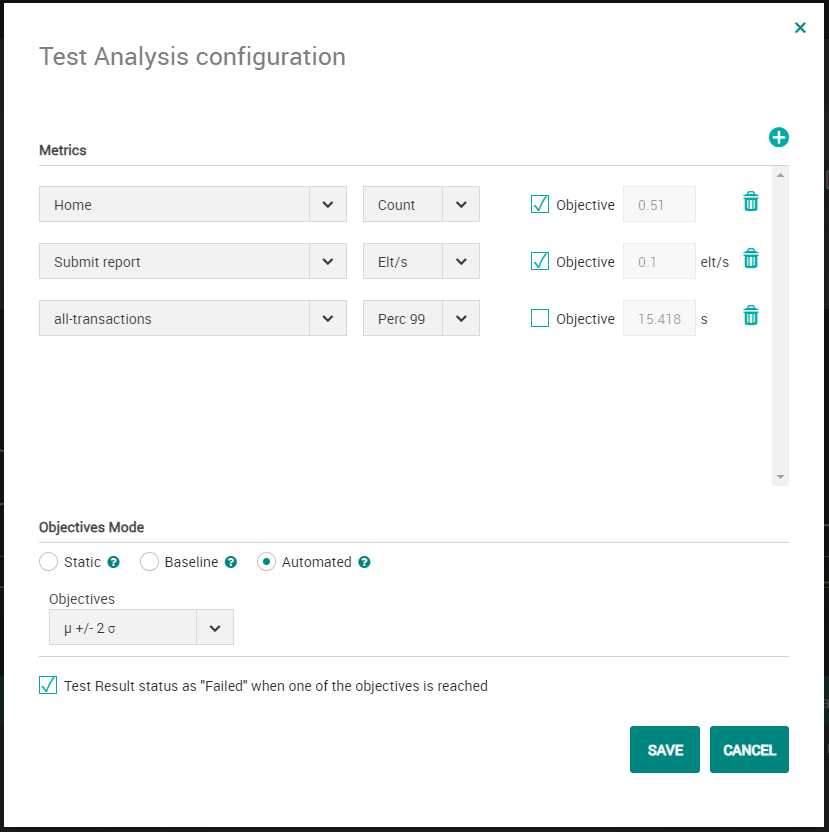
When you set your Objectives to Automated, there's an option to expand the deviation. Normally, this deviation is two times the standard deviation. However, if you want more flexibility, you can select a deviation that's three or four times the standard deviation.
Note: You must complete at least 2 tests that include the required metric to obtain an Objective value.