Oracle Forms: Design a scenario with iterations
This tutorial describes how to design a Virtual User executing iterations on Oracle Forms requests. It presents an actual case using NeoLoad on an Oracle Forms demo application. It describes in detail how to create a Virtual User that repeats a same business transaction several times over.
To gain the most from this tutorial, it is recommended to read Oracle Forms applications testing.
Understand the context
With NeoLoad, designing a scenario for an Oracle Forms application is very quick. Where the Oracle Forms application usage requires that a dynamic element be added, NeoLoad allows you to use logical actions, in particular the inclusion of a loop in the Virtual User design.
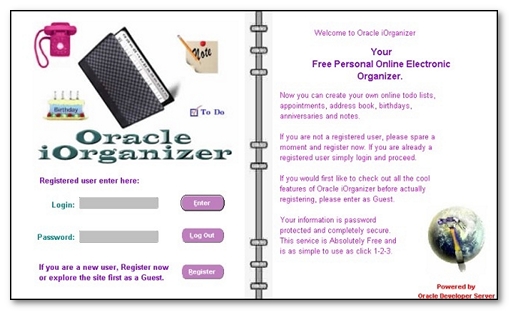
With an Oracle Forms application, it is vital to take this requirement into account in the initial phases of the scenario design. The following sections list the best practices to be observed, using iOrganizer, a demo application for the Oracle Forms 10g server.
Prerequisites
In this case, you are going to use the iOrganizer application, one of the demo applications for the Oracle Forms server.
The Demo Pack can be downloaded on the Oracle website. For example, click http://www.oracle.com/technetwork/developer-tools/forms/downloads/forms-downloads-11g-2735004.html to download the Oracle Forms 11g Demo Pack.
Once the Pack has been installed on your Oracle Forms server, connect to the following URL: http://<server>:8889/forms/frmservlet?config=iorg where <server> is the name of the Oracle Forms server host machine.
To be able to connect to the iOrganizer application, you need to create a user account. To create a user account, follow these steps:
-
Go to the following URL:
http://<server>:8889/forms/frmservlet?config=iorgwhere<server>is the name of the Oracle Forms server host machine -
Click Register.
-
A new page entitled
New User Pageis displayed. Fill in the following information:-
First Name: "Demo"
-
Last Name: "User"
-
Password: "NEOLOAD"
-
Phone: "0123456789"
-
Email: "demouser@test.com"
-
-
Click Save then Return to main page.
-
In the iOrganizer application login screen, enter "DUSER" in the Login field and "NEOLOAD" in the Password field.
-
Click ENTER. If the connection is successful, the application main screen should be displayed.
-
Click on the Exit Calendar button.
Before you can record the Oracle Forms scenario, NeoLoad needs the file containing the Oracle Forms applet. For more information, see Configure NeoLoad.
NeoLoad supports Oracle Forms component naming. Component naming must be configured on the Oracle Forms server itself.
You can check to see if the server is correctly configured by referring to the procedure for checking the Oracle Forms server.
If the server is not configured correctly, see Configure the Oracle Forms server.
Record the scenario
To record a scenario, follow these steps:
-
In NeoLoad, click Record > Start recording.
-
Name the Virtual User "AddressCreator".
-
Check the Delete cookies and Clear cache options.
-
Go to the following URL:
http://<server>:8889/forms/frmservlet?config=iorgwhere<server>is the name of the Oracle Forms server host machine. The Oracle Forms Applet is loading. -
In the NeoLoad Recording Toolbar, enter "AddressCreator_Login".
-
In the iOrganizer application login screen, enter "DUSER" in the Login field and "NEOLOAD" in the Password field.
-
Click ENTER.
-
In the toolbar, click Address Book.
-
In the NeoLoad Recording Toolbar, enter "AddressCreator_Create".
-
Still in the toolbar, click Create.
-
Return to the application and fill in the following information:
-
First Name: "DFirst"
-
Last Name: "DLAST"
-
Business Phone: "002233445566"
-
-
Click Save, then Return to Main Page.
-
In the NeoLoad Recording Toolbar, enter "AddressCreator_Validate".
-
Return to the application and click on the letter D (at the bottom). The new entry created in the address book should now be displayed.
-
In the NeoLoad Recording Toolbar, enter "AddressCreator_Logout".
-
Click Return to Main Page, then click Exit Calendar.
-
Close the browser and go back into NeoLoad.
-
Click on the Finish button.
Variabilize the scenario
To variabilize the scenario, follow these steps:
-
In NeoLoad, click Edit > Variables.
-
Click on the New variable button.
-
Select List in the list of variable types.
-
Enter "Contacts" in the Name field.
-
Double-click on the Add a column button.
-
Rename the columns as follows: "FirstName", "LastName", "BusinessPhone".
-
Double-click on the Add a value button.
-
Fill in the rows as follows:
-
First row:
FirstName:John,LastName:DOE,BusinessPhone:0011221100 -
Second row:
FirstName:Jack,LastName:SPARROW,BusinessPhone:6666006666 -
Third row:
FirstName:Bruce,LastName:SCOTT,BusinessPhone:1524323256
The input is case-sensitive. Failure to input the correct case may cause the Oracle Forms application to block the creation of the entry in the database.
-
-
In the Value change policy section, select For each Virtual User.
-
In the Variable scope section, select Local, each Virtual User instance iterates on each value.
-
Click OK once, and then again .
-
In the Virtual Users tree, expand the Container
AddressCreator_Createthen the page namedaddress_book_first_name_0:value=dfirst.Click on the request with the same name. -
In the request XML editor, replace "DFirst" with "${Contacts.FirstName}". Then click Apply.
-
Repeat the operation for the request named
address_book_last_name_0:value=dlast, this time replacing "DLAST" with "${Contacts.LastName}". -
Repeat the operation again for the request named
address_book_business_phone_0:value=002233445...replacing "002233445566" with "${Contacts.BusinessPhone}".
Design the iterations
To add iterations for the user AddressCreator, follow these steps:
-
In NeoLoad, click on the Virtual Users tab.
-
In the actions (bottom left, expand if necessary), drag and drop the
Looplogical action to a position just before theAddressCreator_CreateContainer. -
Select the
AddressCreator_CreateandAddressCreator_ValidateContainers and drag them inside the loop (namedloop). -
Click on
loop. Enter the value "3" in the Execute the loop field. -
In the actions, drag and drop the
Variable Modifierlogical action to a position just after theAddressCreator_ValidateContainer. -
Click on
variable_modifier. Enter "Contacts" in the Variable name field.
Configure the project
The Oracle Forms applet often issues requests that result in an HTTP 404 error on the server. Therefore, you will need to tell NeoLoad not to count these as errors by using the following procedure.
To ignore HTTP 404 errors in the recording, follow these steps:
-
In NeoLoad, click Edit > Preferences.
-
Click on the Project settings tab.
-
Select the Runtime parameters category.
-
Check the option Do not mark the specified HTTP error code when the same error occurs during the record.
-
Click OK to confirm the setting.
Validate the Virtual User
To validate the Virtual User, follow these steps:
-
In NeoLoad, click Run > Start checking.
-
Click on the Advanced button.
-
Check the Play thinktime option.
-
Click OK in the dialog box to confirm the setting.
-
Select the Virtual User AddressCreator.
-
Click the Start checking button. The Virtual User executes with the same think times as in the recording.
-
Once the Virtual User has stopped, you may re-connect to the iOrganizer application to check that the contacts have been created (search the "D" entries for
DOE, and "S" forSPARROWandSCOTT).
Learn more
Using this scenario, you can add substance to the test by:
-
Recording and playing back the creation of different user accounts
-
Using several user accounts to run a load test
-
Adding clicks on the entries created then configuring a validation on the response. This will make sure that the entries are always created correctly during the load test.