Use Case 3: Sending my load test data to a third-party tool
For this use case, we will see how to send test data (number of VUs, response times, etc.) to a third party. The third party in our case will be Amazon CloudWatch. This will help the operations to see what is tested in their usual monitoring environment.
What we need:
-
The NeoLoad Advanced action archetype.
-
The NeoLoad Web API. For more information, see NeoLoad API in the NeoLoad Web documentation.
-
The CloudWatch SDK available here: https://mvnrepository.com/artifact/com.amazonaws/aws-java-sdk-cloudwatch
-
Credentials to AWS.
-
An access key and a secret key.
-
The URL for your specific cloud zone.
Note: The access keys for your AWS account can be managed in AWS: http://docs.aws.amazon.com/general/latest/gr/managing-aws-access-keys.html
Note: The URL for you CloudWatch zone can be found here: http://docs.aws.amazon.com/general/latest/gr/rande.html#cw_region
Note: The code for this Advanced action can be found here: https://github.com/ttheol/NeoLoadTutorials/tree/master/neotys-advanced-action-aws-integration
We will first create a new Advanced action with Maven. The method is the same as in the previous use cases (for more details, see Prepare the action).
-
Add the AWS CloudWatch dependencies:
As NeoLoad already uses Jackson, we do not need to load it from the AWS dependencies. We can exclude them with the following block:
<dependency>
    <groupId>com.amazonaws</groupId>
        <artifactId>aws-java-sdk-cloudwatch</artifactId>
        <version>1.11.221</version>
    <exclusions>
        <exclusion>
            <groupId>com.fasterxml.jackson.core</groupId>
            <artifactId>jackson-databind</artifactId>
        </exclusion>
        <exclusion>
            <groupId>com.fasterxml.jackson.core</groupId>
            <artifactId>jackson-core</artifactId>
        </exclusion>
    </exclusions>
</dependency>-
Force the Jackson version:
We will also force the Maven project to use version 2.9.0 of Jackson with the following block at the end of the "pom.xml" file (after the repositories):
<dependencyManagement>
    <dependencies>
        <dependency>
            <groupId>com.fasterxml.jackson.core</groupId>
            <artifactId>jackson-databind</artifactId>
            <version>2.9.0</version>
        </dependency>
        <dependency>
            <groupId>com.fasterxml.jackson.dataformat</groupId>
            <artifactId>jackson-dataformat-cbor</artifactId>
            <version>2.9.0</version>
        </dependency>
    </dependencies>
</dependencyManagement>-
Download the Jackson jars here:
-
Jackson core : http://central.maven.org/maven2/com/fasterxml/jackson/core/jackson-core/2.9.0/jackson-core-2.9.0.jar
-
Jackson databind: http://central.maven.org/maven2/com/fasterxml/jackson/core/jackson-databind/2.9.0/jackson-databind-2.9.0.jar
-
Jackson annotations: http://central.maven.org/maven2/com/fasterxml/jackson/core/jackson-annotations/2.9.0/jackson-annotations-2.9.0.jar
-
-
Update the Jackson version used in NeoLoad.
-
Close NeoLoad.
-
Place the three jar in the
<NeoLoad installation>/libfolder. -
Add ".old" to the extension of the old Jackson libs (
jackson-annotations-2.2.3.jar.old,jackson-core-2.7.4.jar.oldandjackson-databind-2.2.3.jar.old). -
Create a NeoLoad Web API Java client. For more information, see Generate an API client.
-
For the generation of the client, you can use the YAML file here: https://raw.githubusercontent.com/ttheol/NeoLoadTutorials/master/neoload-web-api/swagger.yaml
-
Copy the dependencies from the newly generated client "pom.xml" file to the Advanced action "pom.xml" file.
Copy<dependency>
<groupId>io.swagger</groupId>
<artifactId>swagger-annotations</artifactId>
<version>${swagger-core-version}</version>
</dependency>
<dependency>
<groupId>com.squareup.okhttp</groupId>
<artifactId>okhttp</artifactId>
<version>${okhttp-version}</version>
</dependency>
<dependency>
<groupId>com.squareup.okhttp</groupId>
<artifactId>logging-interceptor</artifactId>
<version>${okhttp-version}</version>
</dependency>
<dependency>
<groupId>com.google.code.gson</groupId>
<artifactId>gson</artifactId>
<version>${gson-version}</version>
</dependency>
<dependency>
<groupId>joda-time</groupId>
<artifactId>joda-time</artifactId>
<version>${jodatime-version}</version>
</dependency>
-
Get the variables from the java client "pom.xml" file. The new one should then have the following section:
Copy<properties>
<neoload.installation.folder>C:\NeoLoad</neoload.installation.folder>
<swagger-core-version>1.5.15</swagger-core-version>
<okhttp-version>2.7.5</okhttp-version>
<gson-version>2.8.1</gson-version>
<jodatime-version>2.9.9</jodatime-version>
</properties>
You can find the "pom.xml" file of your Advanced action here: https://github.com/ttheol/NeoLoadTutorials/blob/master/neotys-advanced-action-aws-integration/pom.xml
-
Copy-Paste all the packages in the src/main/java from the swagger java client to the Advanced action. You should then have something like this:
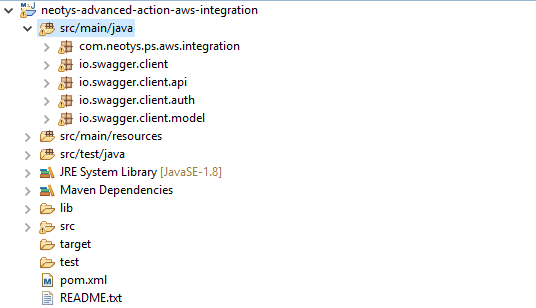
Now that we have everything set up, we can start coding our Advanced action. The interface is quite straightforward. Input parameters are:
-
The name of the AWS region we want to send the data to.
-
The accessKey for AWS.
-
The secretKey for AWS.
Our getDefaultActionParameter() function will then look like this:
@Override
public List<ActionParameter> getDefaultActionParameters() {
  final List<ActionParameter> parameters = new ArrayList<ActionParameter>();
  parameters.add(new ActionParameter("AWS Region", "eu-west-1"));
  parameters.add(new ActionParameter("accessKey", ""));
  parameters.add(new ActionParameter("secretKey", ""));
  return parameters;
}
As we did for the last use cases, you will need to change the "bundle.properties" file, and you can eventually change the icon of the Advanced action. The "bundle.properties" file used contains this:
displayName=CloudWatch Integration
displayPath=Monitoring/Cloud
iconFile=AWS-icon.png
The behavior of the Advanced action will be coded in 2 steps:
-
Getting data from NeoLoad Web.
-
Sending the data we need to CloudWatch.
Get data from NeoLoad Web
-
Parse the parameters
You can declare variables to store the parsed parameters, and create a function to go through them. It would be something like this:
private static String awsRegion;
private static String awsAccessKey;
private static String awsSecretKey;
private static String nlWebHost;
private static String nlWebToken;
private static void parseParameters(Context context, List<ActionParameter> parameters) {
    //Initialise the parameters
    nlWebHost = "neoload-api.saas.neotys.com";
    nlWebToken = context.getAccountToken();
    //Parse the advanced actions parameters
    for (ActionParameter temp:parameters) {
        switch (temp.getName().toLowerCase()) {
        case "aws region" :
            awsRegion = temp.getValue();
            break;
        case "accesskey":
            awsAccessKey = temp.getValue();
            break;
        case "secretkey":
            awsSecretKey = temp.getValue();
            break;
        case "neoload web host":
            nlWebHost = temp.getValue();
            break;
        case "neoload web token":
            nlWebToken = temp.getValue();
            break;
        default:
            break;
        }
    }
}-
Create a NeoLoad Web API client
You should now have generated a swagger client and imported it in you project. We will add a new constructor to instantiate an API client in the ResultsApi class (in the "io.swagger.client.api" package):
public ResultsApi(String basePath, String token) {
        this(Configuration.getDefaultApiClient());
        apiClient.setBasePath(basePath);
        apiClient.addDefaultHeader("", token);
    }
We can now go back to the execute() function of the ActionEngine, and add the following code:
//Parse the parameters
    parseParameters(context, parameters);
    //Instantiate a NL Web API client
    String nlWebPath = String.format("https://%s/v1",nlWebHost);
    ResultsApi nlWebClient = new ResultsApi(nlWebPath,nlWebToken);
We will then get the test id we will use when calling the NeoLoad Web API, and log that in the check VU:
String testId = context.getTestId();
appendLineToStringBuilder(requestBuilder,String.format("Test Id:%s",testId));
We can now call our API and get test information:
//Get the test information
TestDefinition definition = nlWebClient.getTest(testId);
We will now log all that information in the request of the check VU:
//Log the information of the test
appendLineToStringBuilder(requestBuilder,String.format("Name:%s",definition.getName()));
appendLineToStringBuilder(requestBuilder,String.format("Description:%s",definition.getDescription()));
appendLineToStringBuilder(requestBuilder,String.format("Author:%s",definition.getAuthor()));
appendLineToStringBuilder(requestBuilder,String.format("Termination Reason:%s",definition.getTerminationReason()));
appendLineToStringBuilder(requestBuilder,String.format("LG count:%d",getLgCount()));
appendLineToStringBuilder(requestBuilder,String.format("Project Name:%s",definition.getProject()));
appendLineToStringBuilder(requestBuilder,String.format("Scenario Name:%s",definition.getScenario()));
appendLineToStringBuilder(requestBuilder,String.format("Status:%s",definition.getStatus()));
appendLineToStringBuilder(requestBuilder,String.format("Quality Status:%s",definition.getQualityStatus()));
appendLineToStringBuilder(requestBuilder,String.format("Start Date:%tc",new Date(definition.getStartDate())));
appendLineToStringBuilder(requestBuilder,String.format("Duration:%tT",new Date(definition.getDuration())));
//Build the request for the check VU
sampleResult.setRequestContent(requestBuilder.toString());
We will now also get some statistics from NeoLoad Web. We can get and log them this way:
//Get the latest test statistics
TestStatistics stats = nlWebClient.getTestStatistics(testId);
int countVU = stats.getLastVirtualUserCount();
float requestsPerSec = stats.getLastRequestCountPerSecond();
//Log the latest test statistics
appendLineToStringBuilder(responseBuilder,String.format("Number of Virtual Users: %d",countVU));
appendLineToStringBuilder(responseBuilder,String.format("Requests per second: %f",requestsPerSec));
Send the data to CloudWatch
In order to send data to CloudWatch you need:
-
A CloudWatch Client with:
-
An accessKey
-
A secretKey
-
A Region
-
-
An AWS Namespace: We will use the word "NeoLoad".
-
A collection of dimensions for filtering in AWS: We will use the test properties.
-
A name for the metric
-
A unit
-
A value to send
We will create here three functions, to be able to create an AWS Client, add dimensions, and send the request. The three functions are the following:
private AmazonCloudWatch createNewAWSClient(String accessKey, String secretKey, String region) {
    BasicAWSCredentials awsCredentials = new BasicAWSCredentials(accessKey, secretKey);
    AmazonCloudWatch client = AmazonCloudWatchClientBuilder.standard()
        .withCredentials(new AWSStaticCredentialsProvider(awsCredentials))
        .withRegion(region)
        .build();
    return client;
}
private void addDimension(java.util.Collection<Dimension> dimensions, String dimensionName, String dimensionValue) {
    dimensions.add(
            new Dimension()
            .withName(dimensionName)
            .withValue(dimensionValue));
}
private void AWSPutRequest(AmazonCloudWatch client, java.util.Collection<Dimension> dimensions, String nameSpace, String metricName, Double value, StandardUnit unit) {
    MetricDatum datum = new MetricDatum()
        .withDimensions(dimensions)
        .withMetricName(metricName)
        .withUnit(unit)
        .withValue(value);
    PutMetricDataRequest request = new PutMetricDataRequest()
        .withNamespace(nameSpace)
        .withMetricData(datum);
    client.putMetricData(request);
}
We can now call those functions in the execute():
-
Creating a new AWS client:
Copy//Instantiate an AWS Client
AmazonCloudWatch cwClient = createNewAWSClient(awsAccessKey, awsSecretKey, awsRegion);
-
Working with dimensions:
Copy//Initialise the dimensions for AWS filtering
Collection<Dimension> dimensions = new ArrayList<Dimension>();
addDimension(dimensions,"TestId",testId);
-
Sending a datapoint to CloudWatch:
CopyAWSPutRequest(cwClient, baseDimensions, awsNameSpace, "Number of LGs", lgCount, StandardUnit.Count);
If you need to see how those were done in the project, you can get the final Action Engine here: https://github.com/ttheol/NeoLoadTutorials/blob/master/neotys-advanced-action-aws-integration/src/main/java/com/neotys/ps/aws/integration/CloudWatchIntegrationActionEngine.java
Push the action to NeoLoad
Once you have finished developing your Advanced action, you can push it to NeoLoad and try it as explained in Check the behavior of the Advanced action.