Create a Custom action
This tutorial describes how to implement the Custom action API to create a custom Advanced Action. For more information about how to implement the Custom action API in NeoLoad, see Advanced actions.
Use case environment
The use case presented in this tutorial was performed in the following environment:
-
Computer on Windows 7 with an Administrator account
-
Java Development Kit version 7
-
Eclipse for Java developers launched with Administrator privileges
-
NeoLoad 5.0 and above
Create a Java project
This section describes how to create a Java project with Eclipse to create an implementation of the Custom Action API provided by NeoLoad.
To create a Java project to implement the Custom Action API, follow these steps:
-
Create a workspace in Eclipse or use an existing one.
-
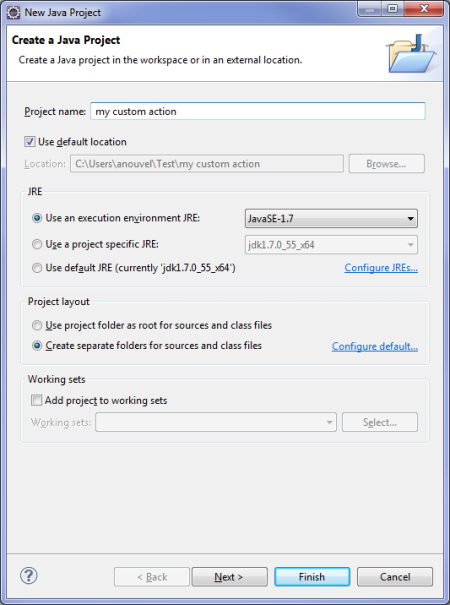
In Eclipse, select New > Java project.
-
Specify a name for your project in the Project name field before clicking the Finish button.
-
Access the properties for the new project in the Properties for <project> dialog box.
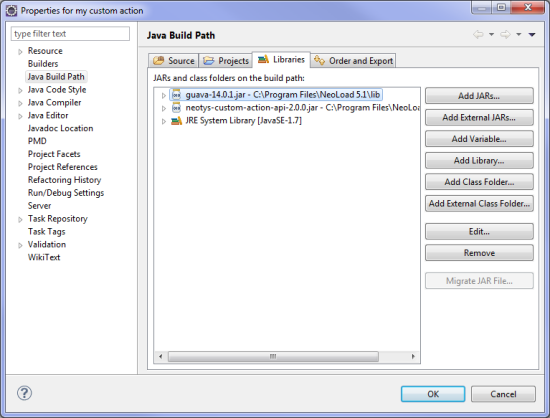
-
In the Java Build Path property, select the Libraries tab.
-
Click the Add External JARs... button and browse to the JAR files available in the NeoLoad installation directory:
-
<install-dir>/api/Custom Action API/Java/neotys-custom-action-api-2.16.2.jar -
the files in the
<install-dir>/api/Common/Javafolder
-
-
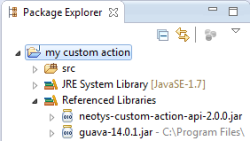
Click OK to save the project.
Attach the API sources
This section describes how to attach in Eclipse the sources of the public API provided. The sources are provided in the NeoLoad installation directory as a JAR file:
<install-dir>/api/Custom Action API/Java/neotys-custom-action-api-2.3.0-sources.jar
To attach the API sources in Eclipse, follow these steps:
-
Open the Java project in Eclipse.
-
Right-click
neotys-custom-action-api-2.3.0.jarand select Properties.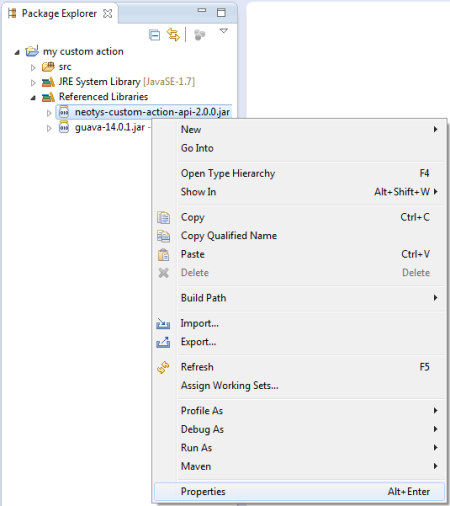
-
Select the Java Source Attachment section and check the External location option.
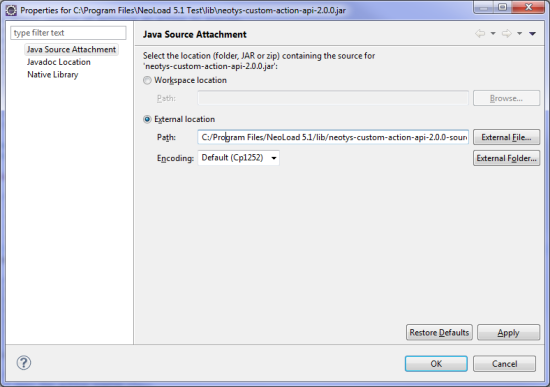
-
Click the External File... button and select
<install-dir>/api/Custom Action API/Java/neotys-custom-action-api-2.3.0-sources.jar. -
Click OK.
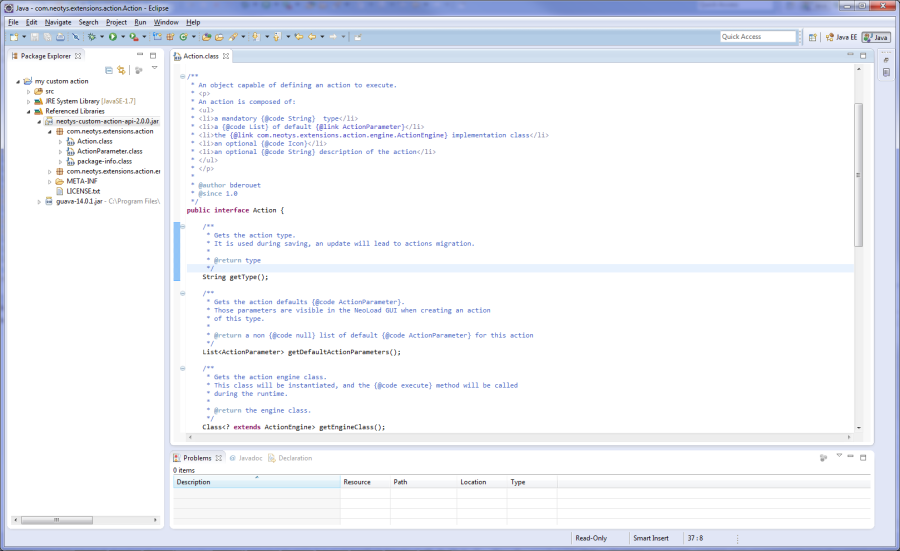
The sources are attached and you can read the Javadoc and the API source code.
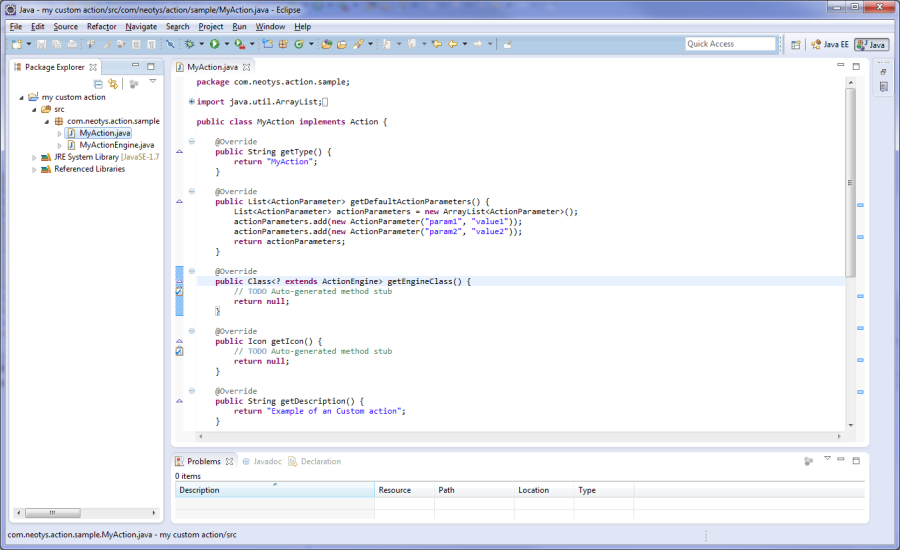
Implement and declare the Action class
This section describes how to create an Action class with Eclipse.
To create an Action class, follow these steps:
-
In Eclipse, select New Java Class to create a class in order to implement the interface
com.neotys.extensions.action.Action. -
You can specify a custom name for the Java class, e.g.
MyAction. -
Click Finish to validate the new
MyActionclass.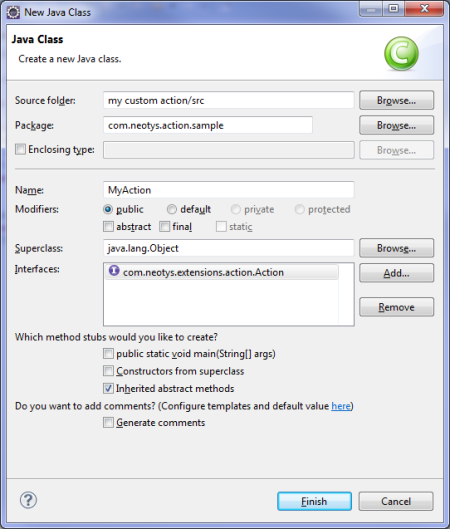
-
Fill type, default parameters, icon and description fields.
For methods
getMinimumNeoLoadVersionandgetMaximumNeoLoadVersion,replace the line
return null;withreturn Optional.absent();. Additionally infile module-info.jav, add the following lines:Copymodule mycustomaction {
requires neotys.custom.action.api;
requires java.desktop;
requires com.google.common;
}
-
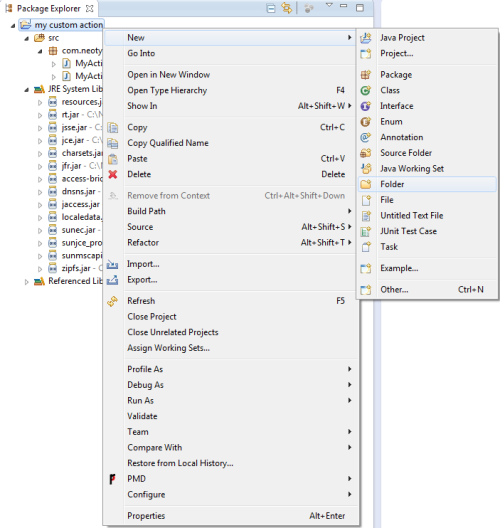
Reference the new action class in the file
META-INF/services/com.neotys.extensions.action.Action:-
Right-click the project and select New > Folder.
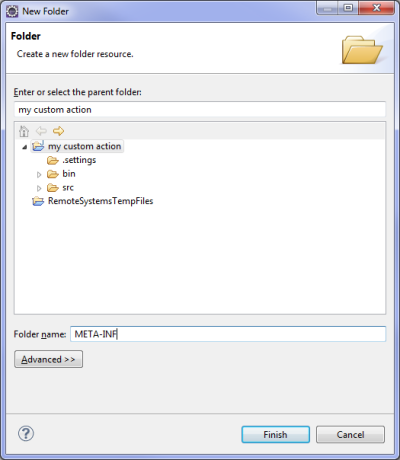
-
Enter
META-INFin the Folder name field and click Finish.
-
-
Repeat the previous step to create a folder called
servicesin theMETA-INFfolder. -
Right-click the folder services and use the New > File command to create a file named
com.neotys.extensions.action.Actionin the folder services. -
Double-click the
com.neotys.extensions.action.Actionfile to edit it adding the full qualified name of the Action class (i.e. package and class name).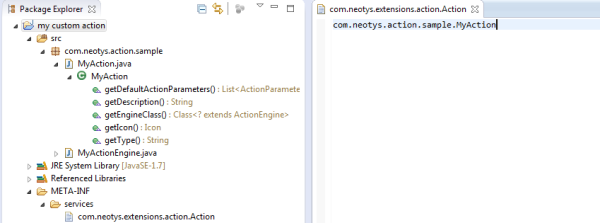
-
If the Custom Action supports taking screenshots, then override method "supportScreenshot()" to return true:
Copy@Override
default boolean supportScreenshot() {
return true;
}
Create an ActionEngine class and link it to the Action class
This section describes how to create and link an ActionEngine class in Eclipse.
To create an ActionEngine and link it to the Action, follow these steps:
-
In Eclipse, select New Java Class to create a class in order to implement the interface
com.neotys.extensions.action.engine.ActionEngine. -
You can specify a custom name for the Java class, e.g.
MyActionEngine. -
Click Finish to validate the new
MyActionEngineclass.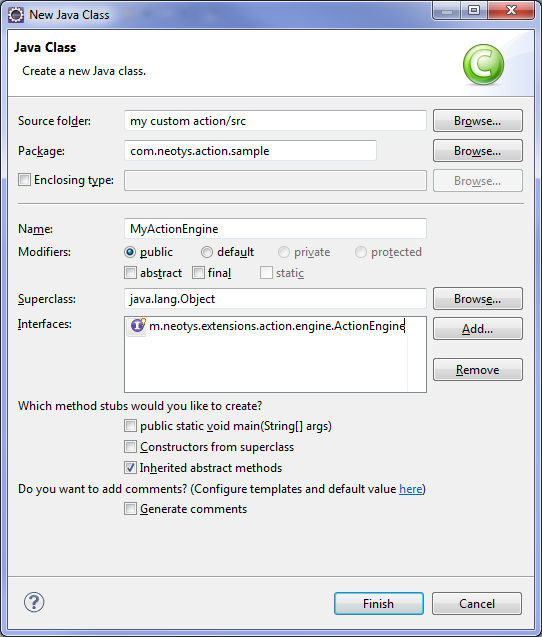
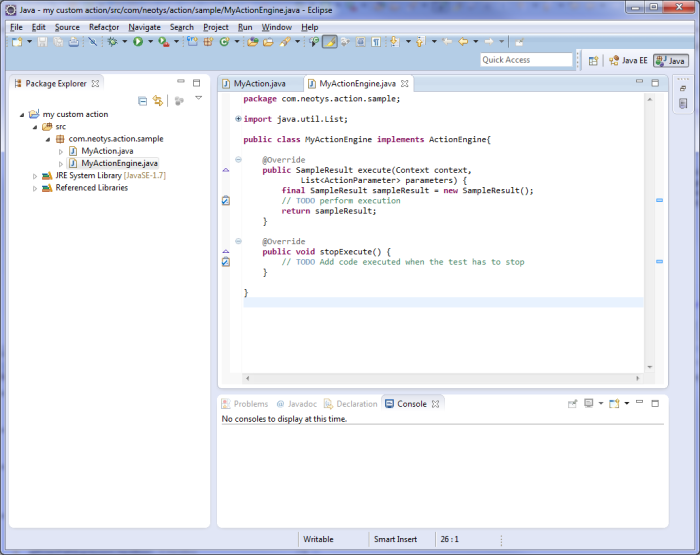
-
Fill in the code for the execution and the creation of the result.
-
If the Custom Action supports taking screenshots, then override method "takeScreenshot()" to return the bytes of the image:
Copy@Override
public byte[] takeScreenshot() {
// TODO return the bytes of the image
} -
Link the ActionEngine class to the Action class.
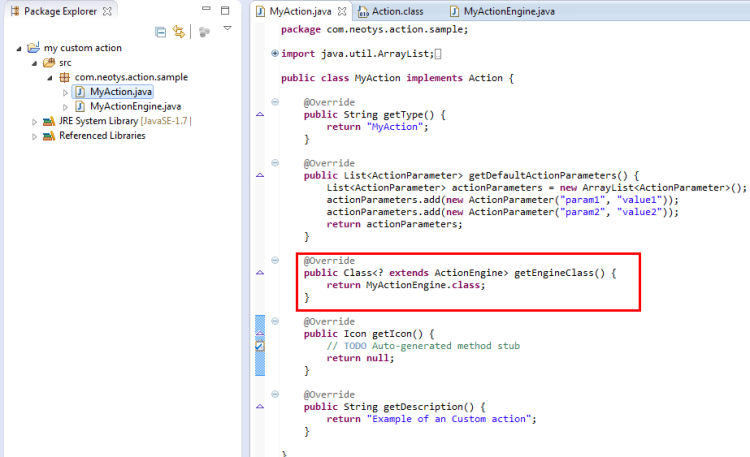
When an Action is played, the ActionEngine linked will be called.
Export the project to a JAR file
This section describes how to export the Java project that implements the Custom Action API.
-
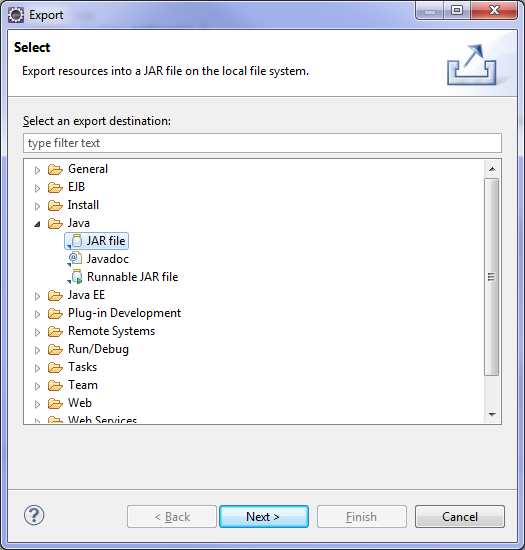
In Eclipse, right-click the Java project and select Export.
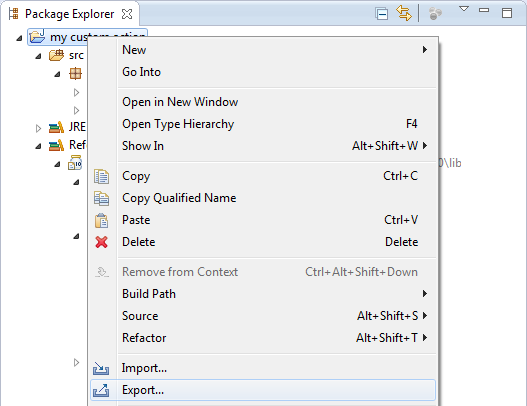
-
Browse to Java > JAR file and click Next.
-
In the JAR Export screen, browse to the JAR file where you want to export the project in Select the export destination.
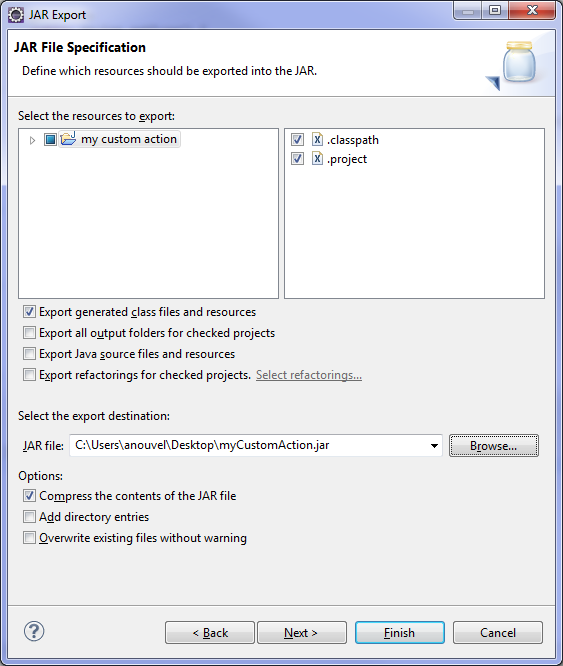
-
Click Finish to validate the export.
-
The JAR containing the Custom Action API implementation is now ready to be moved:
-
in the
lib/extlibdirectory of the NeoLoad project if the project is collaborative -
in the
extlibdirectory of your<install-dir>folder if the Custom action will be used in several projects
-
-
Restart NeoLoad to take the modifications into account.