Use Case 1: Handling an MD5 authentication
You can find the project used for this use case on GitHub here: https://github.com/ttheol/NeoLoadTutorials/tree/master/neotys-custom-action-md5-hash
To create a Maven project, follow these steps:
-
Open Eclipse.
-
Select File > New > Project.
-
Choose the Maven Project wizard and click on Next.
-
Click on Next until you reach the Select an Archetype step.
-
Choose neotys-custom-action-archetype and click on Next.
-
Specify the Archetype parameters and click on Finish.
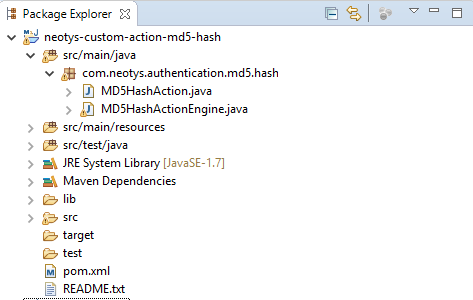
You should now have a Maven project created with the following structure.
After this step, you will be able to configure:
-
The input parameters to be provided in NeoLoad.
-
The name and path of the Advanced action in the NeoLoad actions.
-
The icon of the Advanced action.
-
The default description of the Advanced action.
Give a name and path to the Advanced action
-
Open the bundle.properties file in src/main/resources/<package name>.

-
Change the displayName and displayPath in the file as described below:
displayName=MD5 HashdisplayPath=Misc./Authentication -
Save and Close the file.
Modify the icon of the Advanced action (optional)
-
Download the icon you want to use for your Advanced action. It is recommended to use a ".png" file with a 16X16 pixel size.
-
Place your icon in the src/main/resources/<package name> directory. Name it "icon.png".
-
Open the bundle.properties file in src/main/resources/<package name>
-
Add the following text at the end of the file:
iconFile=icon.png
-
Save and close the file.
-
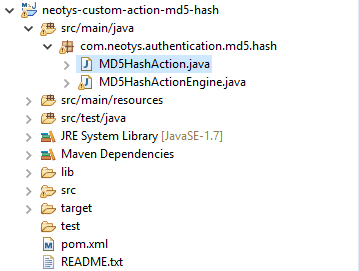
Open the MD5HashAction.java class in src/main/java/<package name>
-
Declare the icon in the class attributes:
Copyprivate static final ImageIcon DISPLAY_ICON = new ImageIcon
(MD5HashAction.class.getResource(ResourceBundle.getBundle(BUNDLE_NAME,
Locale.getDefault()).getString("iconFile")));
-
Use the icon in the getIcon() function:
Copypublic Icon getIcon() {
return DISPLAY_ICON;
}
The final files for this section can be found here:
-
bundle.properties : https://github.com/ttheol/NeoLoadTutorials/blob/master/neotys-custom-action-md5-hash/src/main/resources/com/neotys/authentication/md5/hash/bundle.properties
Set the default input parameters
-
Open the MD5HashAction.java class in src/main/java/<package name>:
As we will be hashing a message using MD5, we only need one input parameter which is the message to hash.
-
Add a message parameter to the default ones in the getDefaultActionParameters() function:
public List<ActionParameter> getDefaultActionParameters() {
    final List<ActionParameter> parameters = new ArrayList<ActionParameter>();
    parameters.add(new ActionParameter("Message",""));
    return parameters;
}
Give a description to the Advanced action (optional yet highly recommended)
-
Open the MD5HashAction.java class.
-
Append your text to the description parameter in the
getDescription()function:public String getDescription() {
final StringBuilder description = new StringBuilder();
description.append("This advanced action uses MD5 to hash a message.\n\n");
description.append("Possible parameters are:\n");
description.append(" - Message (required): message to hash.\n");
return description.toString();
}
You can find the final version of the MD5HashAction.java file on GitHub here:
The bundle.properties file can be found here:
Install the Advanced action in NeoLoad
Now that we have set up our Advanced action for NeoLoad, we will need to install it in order to display it.
-
Right click on your project name.
-
Select Run As > Maven install.
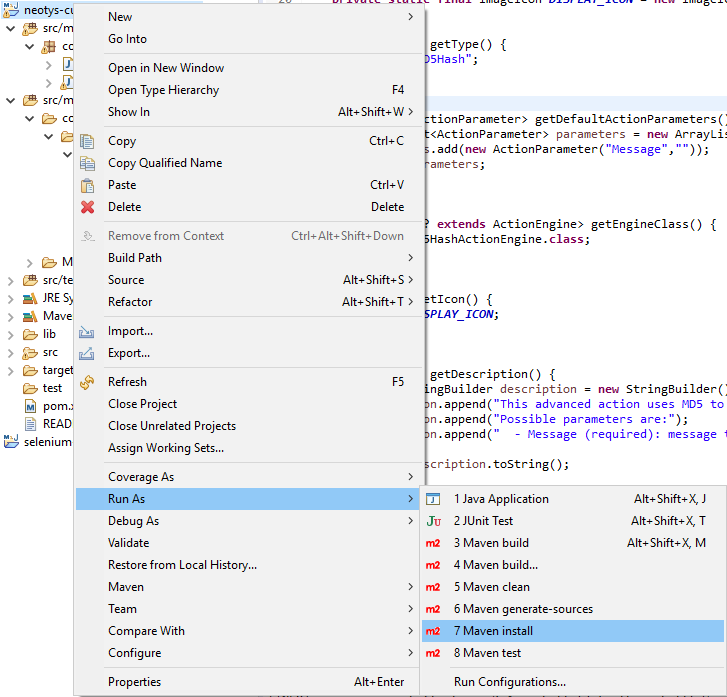
-
Wait for the Advanced action to finish building.
Check the configuration in NeoLoad
-
Open NeoLoad (or restart it if already open).
-
Open an existing project or create a new one.
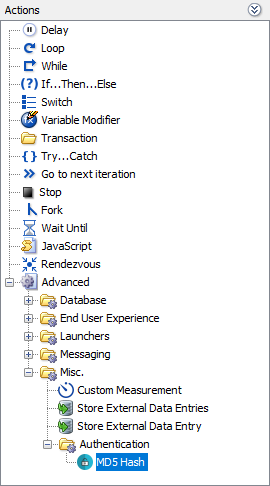
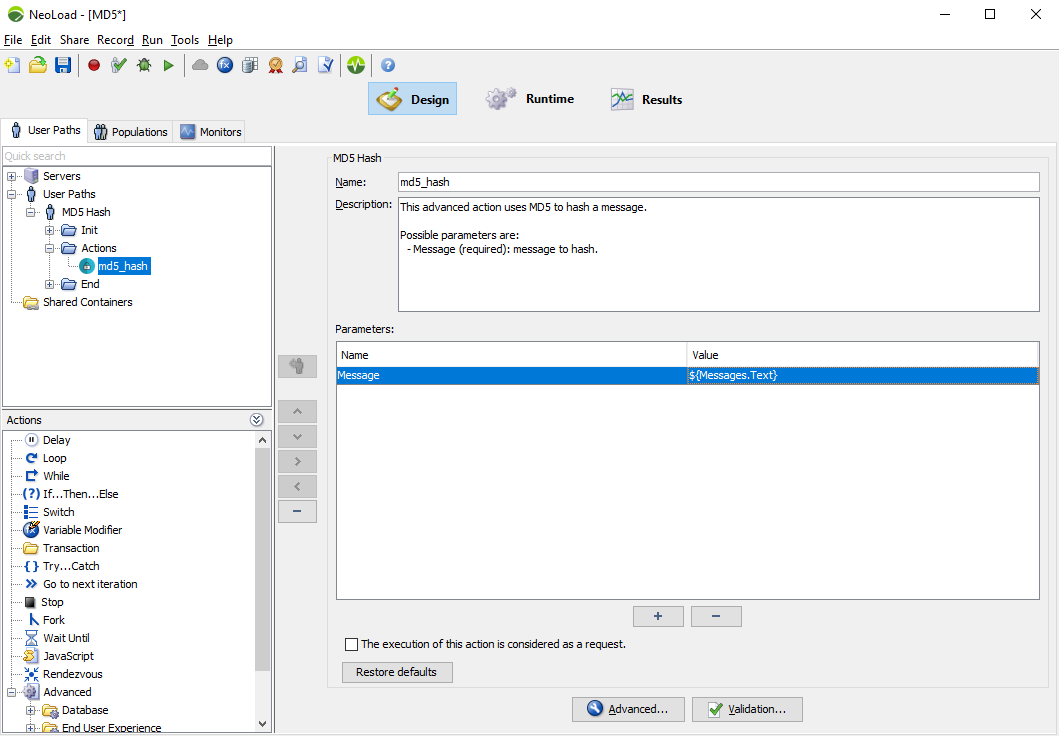
The Advanced action now appears in the Actions section of NeoLoad. You can check that the name, icon and path are configured as defined in your Eclipse project.
-
Right click on User Paths.
-
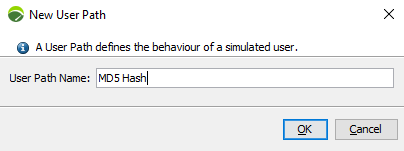
Select New User Path.
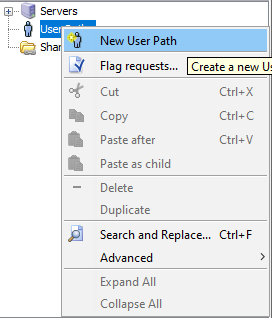
-
Type a name for your User Path.
-
Drag and drop the Advanced action in the Actions section of the User Path.
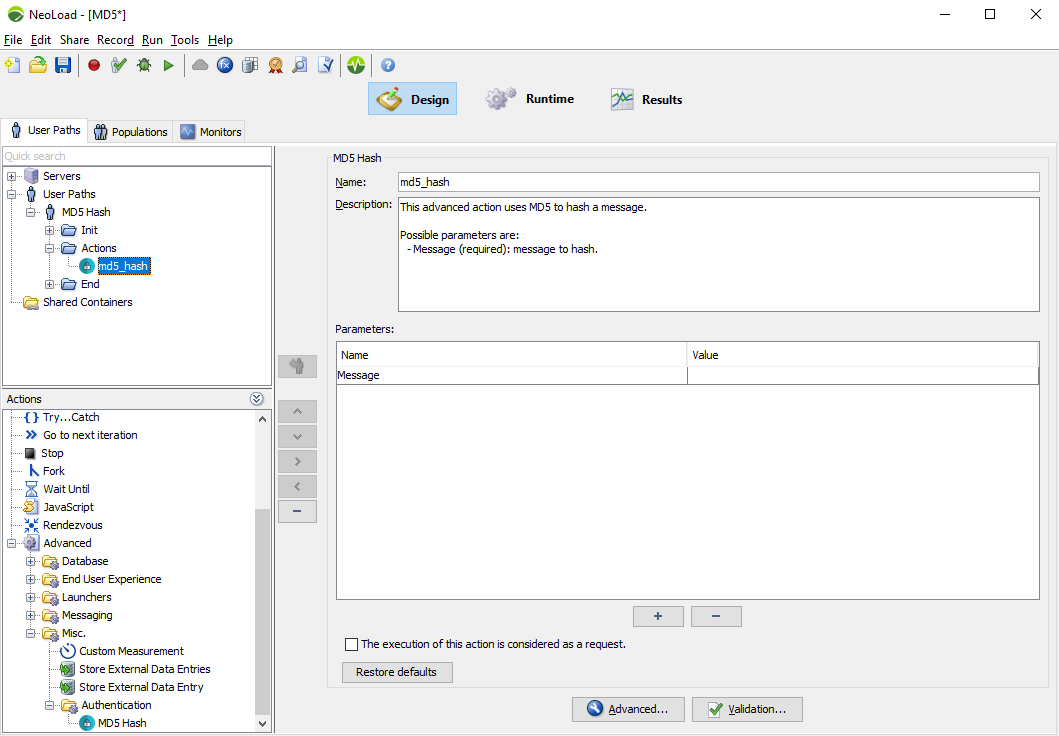
You can now see the description you have entered in Eclipse, as well as the message parameter added to the getDefaultActionParameters() function.
We have now finished interfacing our Advanced action with NeoLoad. Let’s get into the code and hash the message with MD5. We will now be working with the MD5HashActionEngine.java class in src/main/java/<package name>.
This tutorial section consists in 5 steps:
-
Parse the input parameters.
-
Log the input parameters for debug purposes.
-
Execute the MD5 Hash.
-
Provide the result to NeoLoad.
-
Check that the Advanced action works as expected.
Parse the input parameters
-
Define the variables that will be used in the Advanced action. We will use a message and a hashed message. This can be done in the attributes of the Engine class:
private static String message; //Message to hash
-
Parse the input in the MD5HashActionEngine.java class:
//Go through all the parameters listed in the NeoLoad GUI
for (ActionParameter temp:parameters) {
    switch (temp.getName().toLowerCase()) {
    case "message":            //If the current parameter is a message
        message = temp.getValue();        //Initialize the message value
        break;
    default :
        break;
    }
}
Log the input parameters
This section shows how you can have your Advanced action display the values of your variables in the NeoLoad interface.
We will be doing the logging while parsing the input with the following line:
appendLineToStringBuilder(requestBuilder,
    String.format("%s: %s",temp.getName(),temp.getValue()));
We now have a section that does the parsing and the logging at the same time:
//List and initialize all the parameters
for (ActionParameter temp:parameters) {
    appendLineToStringBuilder(requestBuilder,
            String.format("%s: %s",temp.getName(),temp.getValue()));
    switch (temp.getName().toLowerCase()) {
    case "message":            //If the current parameter is a message
        message = temp.getValue();    //Initialize the message value
        break;
    default :
        break;
    }
}
Execute the MD5 Hash
For this step, we will be using standard Java methods. The function to return a message with an MD5 hash is the following:
private static String MD5Hash(String message) {
//Hashes a messages through MD5
try {
    MessageDigest md = MessageDigest.getInstance("MD5");
    byte[] array = md.digest(message.getBytes());
    StringBuffer sb = new StringBuffer();
    for (int i = 0; i < array.length; ++i) {
        sb.append(Integer.
            toHexString((array[i] & 0xFF) | 0x100).substring(1,3));
}
    return sb.toString();
} catch (NoSuchAlgorithmException e) {
    e.printStackTrace();
    return null;
}}
Let’s now call that function in the execute() function. We will simply call it with:
String hashedMessage = MD5Hash(message);
Provide the result to NeoLoad
Now that we have hashed the message, we need to provide the result to NeoLoad. This can be done with the line:
appendLineToStringBuilder(responseBuilder,
                String.format("Hashed message: %s", hashedMessage));
The final MD5HashActionEngine.java file is here:
Check the behavior of the Advanced action
-
Install the Advanced action as described in Install the Advanced action in NeoLoad.
-
Restart NeoLoad.
-
Open the previously used project as described in Check the configuration in NeoLoad.
-
Type a value for the message:

-
Click on Run > Start Checking.
-
Click on Start Checking.
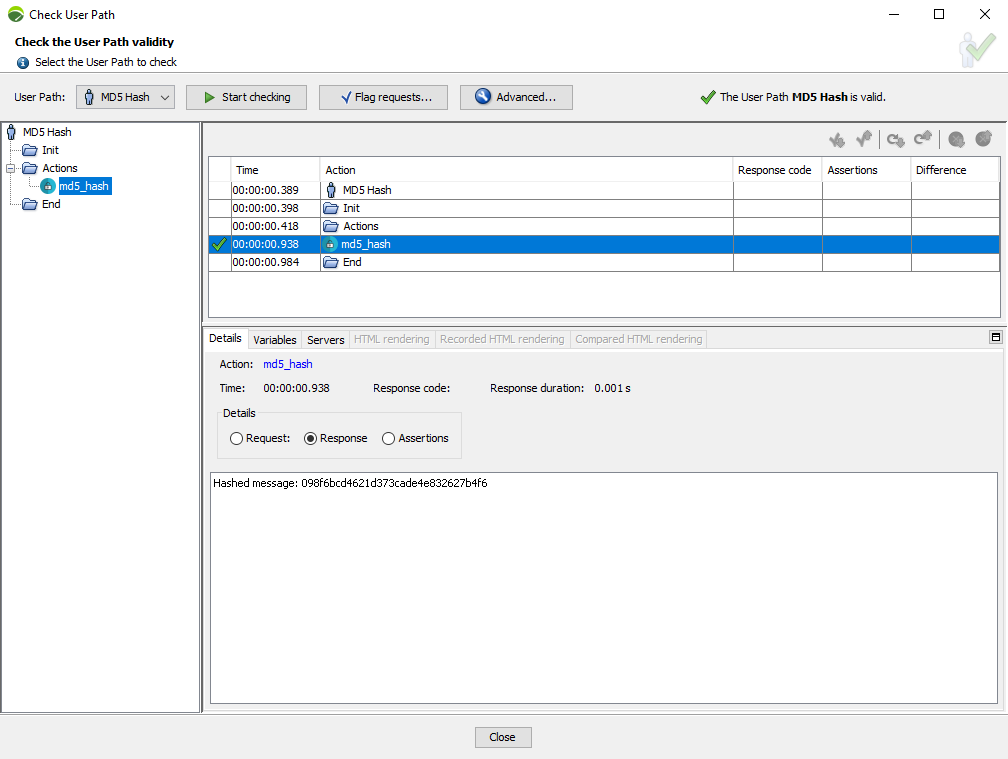
Now that we have checked our Advanced actions works as expected, we can use it in NeoLoad as any other request. We will see how to:
-
Use variables for the message
-
Extract the response from the Advanced action
-
Get statistics for the Advanced action executions
Using the variable
-
Create a variable. For more information, see Create a variable.
We will create here a list called "Message" with:
-
One column called "Text"
-
3 lines:
-
test1
-
test2
-
test3
-
-
Value change policy set to On each iteration
-
All other values as default
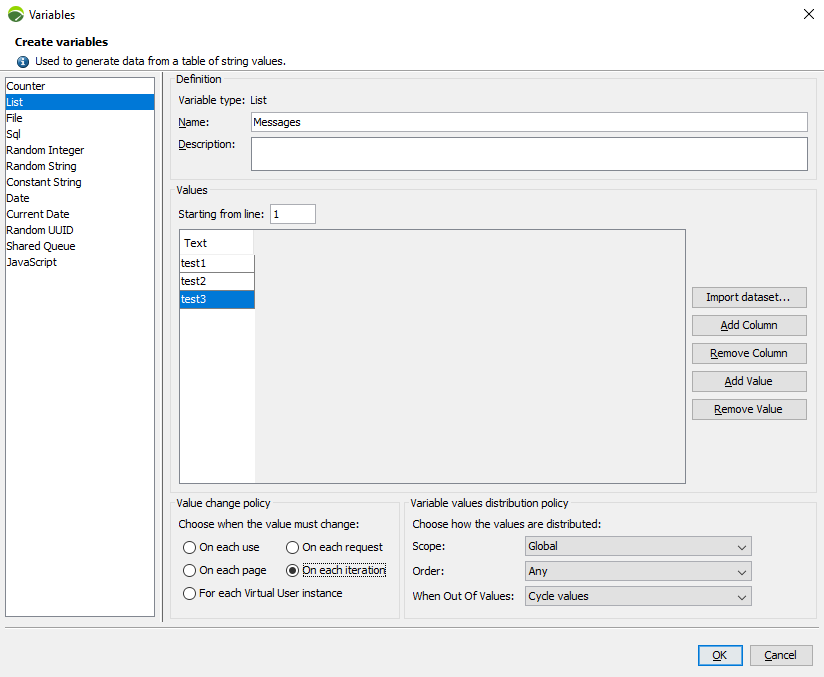
-
Use it with the
${variableName}syntax.

Extracting the response
As we are performing an MD5 Hash on a message, we will probably need to use the result in a script. In order to do that, we will need to extract that result in NeoLoad variable, which we will be able to use later on.
-
Click on Run > Start Checking.
-
In the Check User Path dialog, click on Start Checking.
-
Update the recorded content as documented in Update recorded content.
-
Right-click on your Advanced action in the replay tree and click on Select in Design.
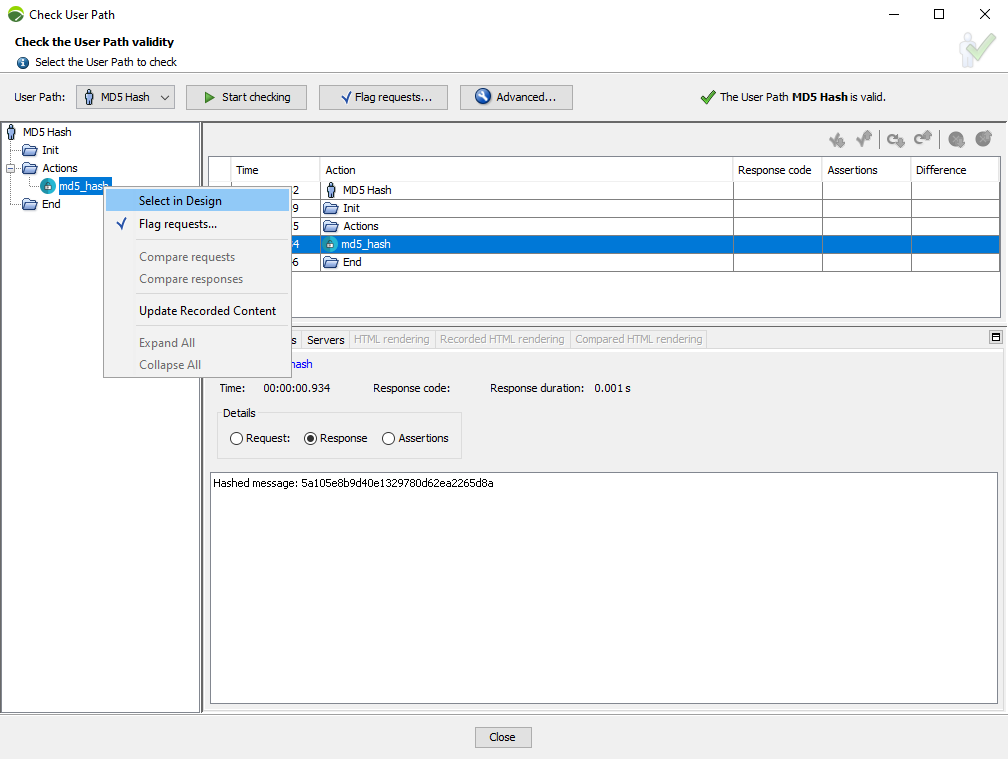
-
Click on Advanced to get the advanced settings of your action:
You can now create a variable extractor as explained in Variable extractors.
Get statistics from the Advanced action executions
For more information about using Advanced actions see Use an Advanced action.