Create an Encoder/Decoder
This tutorial describes how to implement the Data Format Extension API to handle data format extensions.
To learn more about the implementation of the Data Format Extension API in NeoLoad, see Data Format Extension requests. Or get more details about the Data Format Extension API architecture.
Use case environment
The use case presented in this tutorial was performed in the following environment:
-
Computer on Windows 7 with an Administrator account
-
Java Development Kit version 7
-
Eclipse for Java developers launched with Administrator privileges
-
NeoLoad 5.0 and above
Create a Java project to implement the Data Format Extension API
This section describes how to create a Java project with Eclipse to implement the Data Format Extension API provided by Neotys.
To create a Java project to implement the Data Format Extension API, follow these steps:
-
Create a workspace in Eclipse.
-
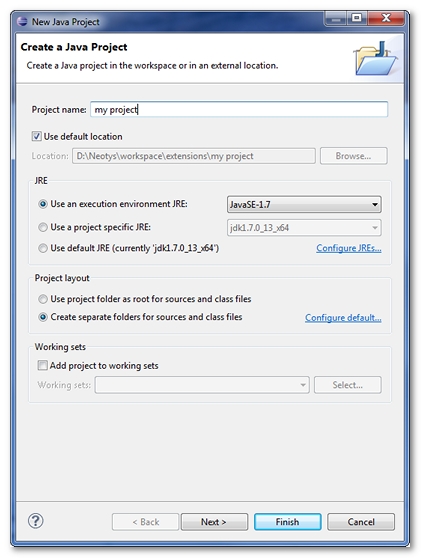
Select the New > Java Project command.
The New Java Project dialog appears.
-
Enter a name for the project in Project name and click Finish.
-
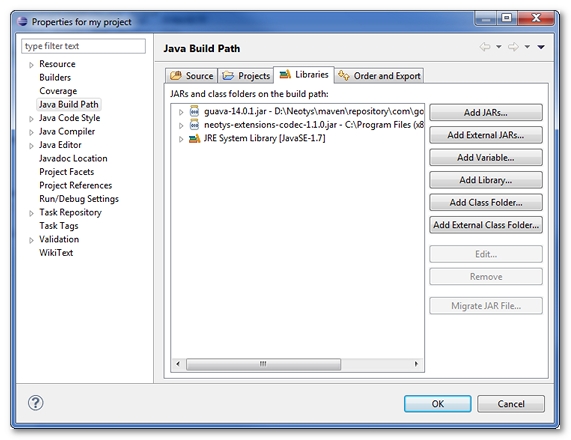
Open the Properties for my project dialog.
-
Select the Java Build Path property.
-
Click the Add JARs button and browse to the JAR files available in the NeoLoad installation directory:
-
<install-dir>\api\Data Format Extension API\Java\neotys-codec-api-1.0.4.jar -
the files in the
<install-dir>\api\Common\Javafolder
-
-
Click OK to save the project.
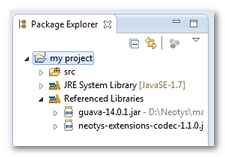
The Java project is ready to create an implementation of the Data Format Extension API.
Attach the API source in Eclipse
This section describes how to attach the sources of the public API provided. The sources are provided in the NeoLoad installation directory as a JAR file:
<install-dir>\api\Data Format Extension API\Java\neotys-codec-api-1.0.4-sources.jar
To , follow these steps:
-
Open the Java project in Eclipse.
-
Right-click the
neotys-codec-api-1.0.4.jarfile and select Properties.
-
Select the Java Source Attachment property.
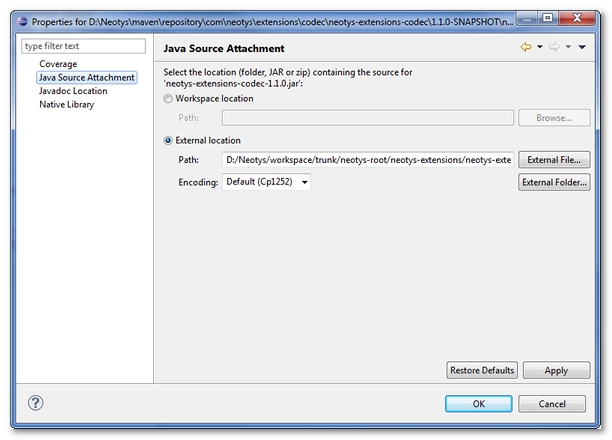
-
Check the External location option and click the External File button to select the file
<install-dir>/api\Data Format Extension API\Java\neotys-codec-api-1.0.4-sources.jar. -
Click OK to validate the attachment.
The sources are attached and you can read the Javadoc and the API source code.
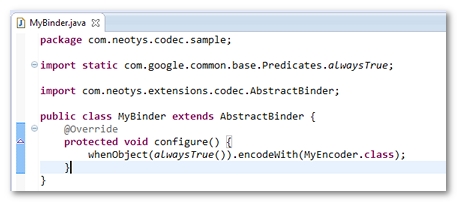
Implement and declare the binder in a Java project
This section describes how to implement and declare the binder of the Data Format Extension API in a Java project.
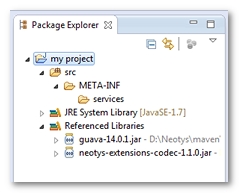
In Eclipse, a new Java project must be created to implement the public Codec API. A new META-INF/services sub-directory must be created in the src directory.
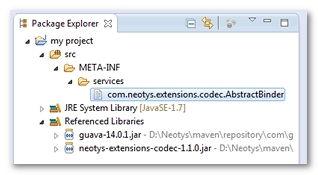
In the META-INF/services sub-directory, a file called com.neotys.extensions.codec.AbstractBinder must be created.
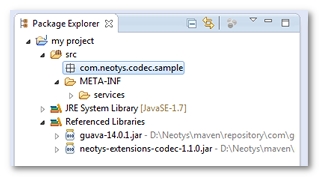
Below src, a Java package must be created with a custom name, e.g. com.neotys.codec.sample.
An implementation of the com.neotys.extensions.codec.AbstractBinder abstract class must be created in the new Java package.
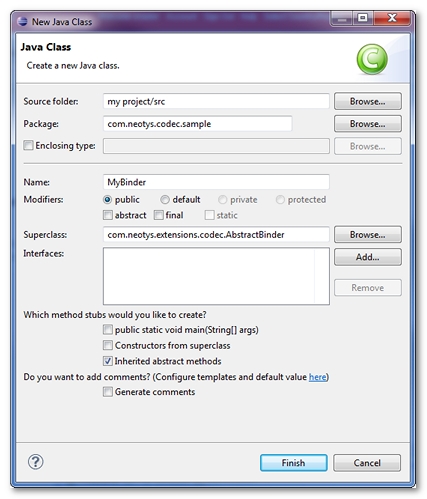
The Name of the new Java Class is free, e.g. MyBinder.
A click on Finish validates the project.
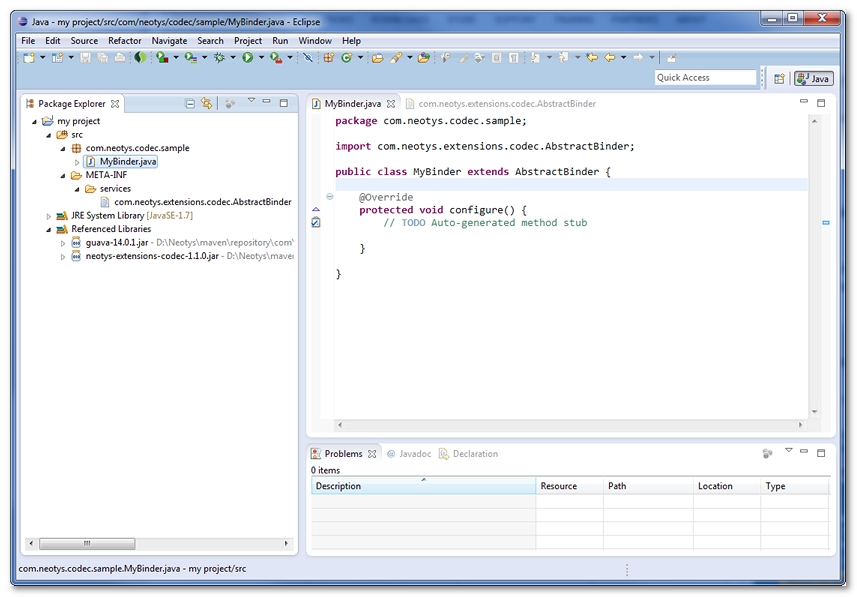
For more information about the implementation of the class com.neotys.extensions.codec.AbstractBinder, it is useful to read its Javadoc.
The com.neotys.extensions.codec.AbstractBinder must be declared in META-INF/services/com.neotys.extensions.codec.AbstractBinder. The file must be edited and the line com.neotys.codec.sample.MyBinder must be inserted.
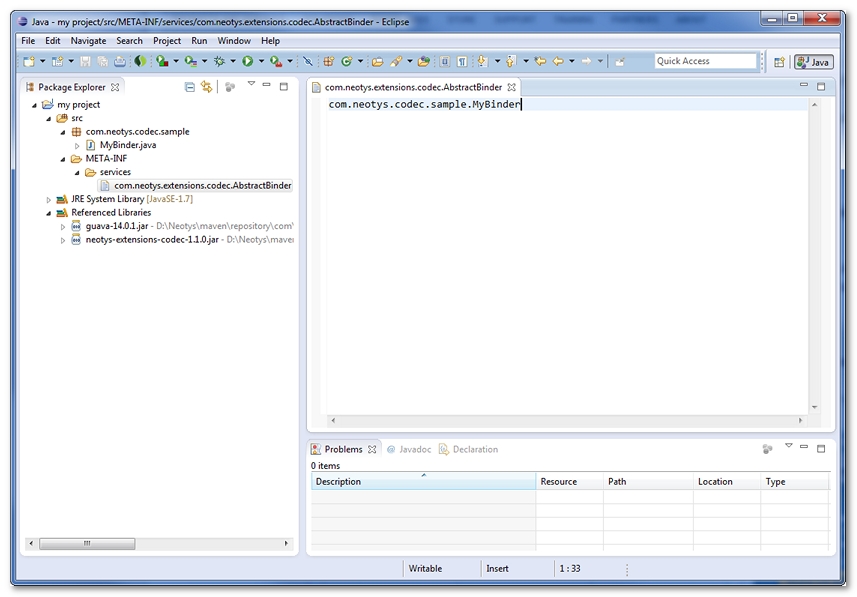
The MyBinder declaration is finished. MyBinder can be detected now by NeoLoad as an implementation of com.neotys.extensions.codec.AbstractBinder. The bindings defined in MyBinder can be used by NeoLoad.
To implement and declare the Binder in a Java project, follow these steps:
-
Create a Java project to implement the API.
-
In the
srcdirectory, create aMETA-INF/servicessub-directory. -
In
META-INF/services, create a filecom.neotys.extensions.codec.AbstractBinder. -
Create a Java package.
-
In the Java package, create an implementation of the abstract class
com.neotys.extensions.codec.AbstractBinder. -
To declare the class, edit the file
com.neotys.extensions.codec.AbstractBinderand insert a line with the name of the Java package.NeoLoad can now detect the
Binderas a implementation ofcom.neotys.extensions.codec.AbstractBinder.
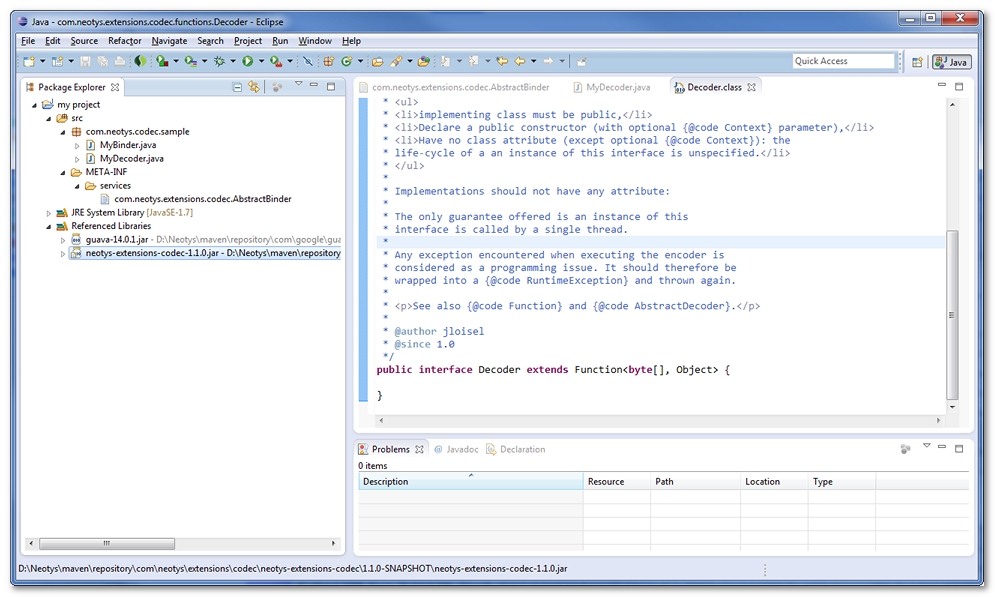
Create a decoder and link it to the binder
This section describes how to create a Decoder and link it to the Binder.
In Eclipse, a class must be created to implement the interface com.neotys.extensions.codec.functions.Decoder.
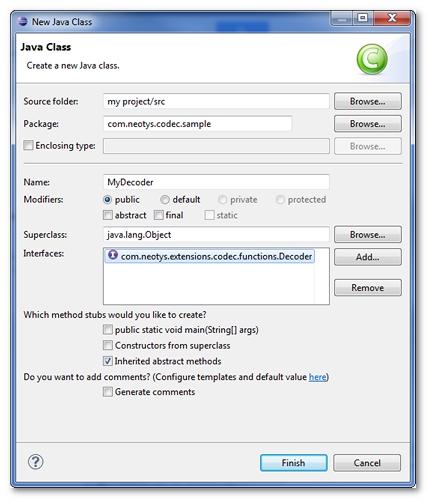
The Name of the Java class can be a custom one, e.g. MyDecoder.
A click on Finish validates the new MyDecoder class.
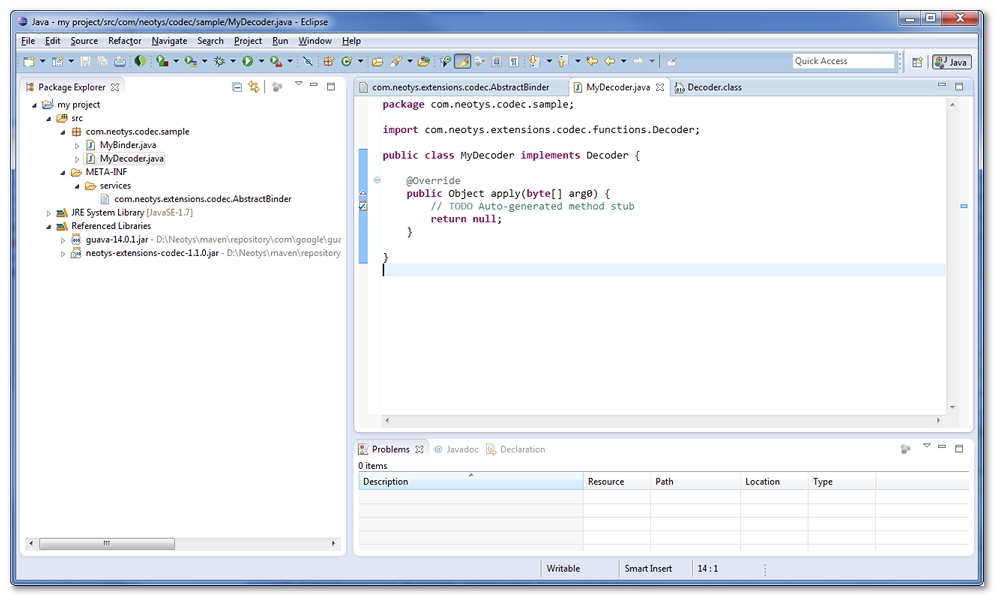
It is now necessary to link MyDecoder to MyBinder.
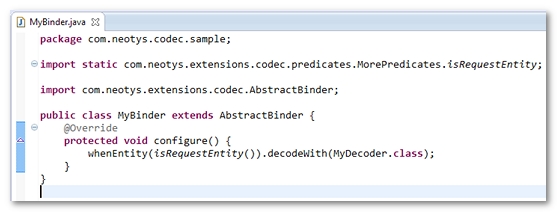
For example, when a request is received while recording, the contenu of the request body is decoded with MyDecoder.
To create a Decoder and link it to the binder, follow these steps:
-
In New Java Class, create a class to implement
com.neotys.extensions.codec.functions.Decoder. -
Click Finish.
-
Link the
Decoderclass to theBinder.
Create and link an Encoder
This section describes how to create and link a Encoder.
In Eclipse, a class must be created to implement the interface com.neotys.extensions.codec.functions.Encoder.
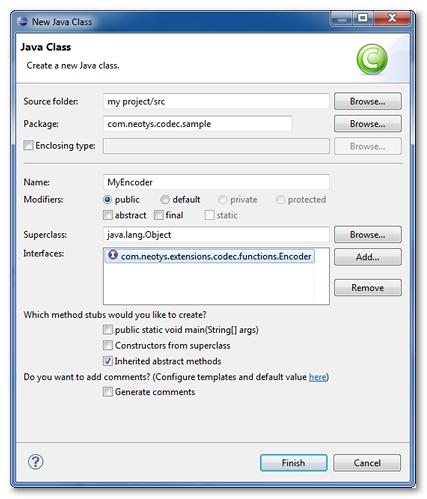
The Name of the Java class can be a custom one, e.g. MyEncoder.
Clicking on Finish validate the new MyEncoder class.
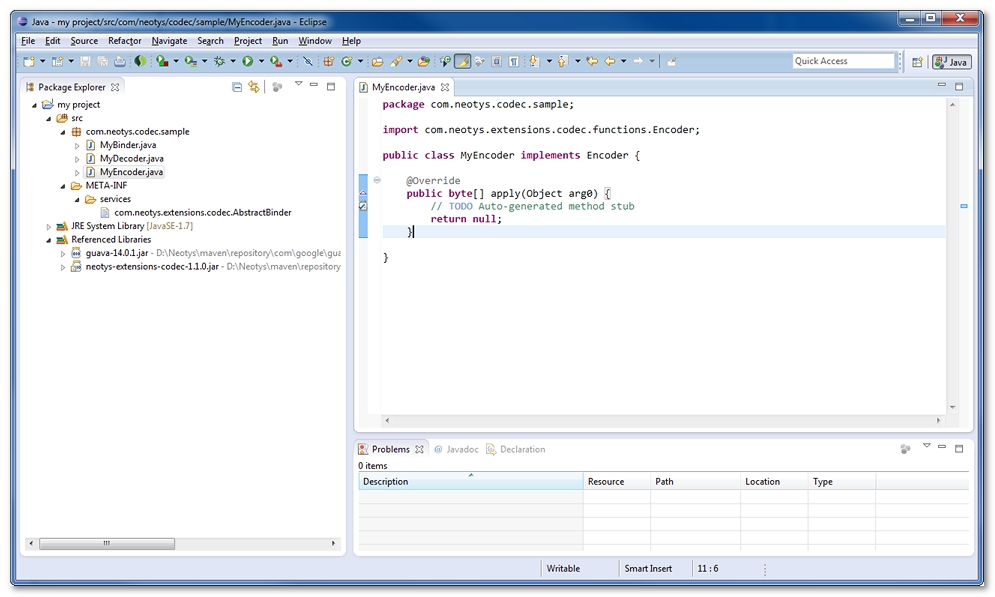
It is now necessary to link MyEncoder to MyBinder.
For example, every object generated by the decoders is encoded by MyEncoder.
To create and link an Encoder, follow these steps:
-
In New Java Class, create a class to implement
com.neotys.extensions.codec.functions.Encoder. -
Click Finish.
-
Link the
Encoderclass to theBinder.
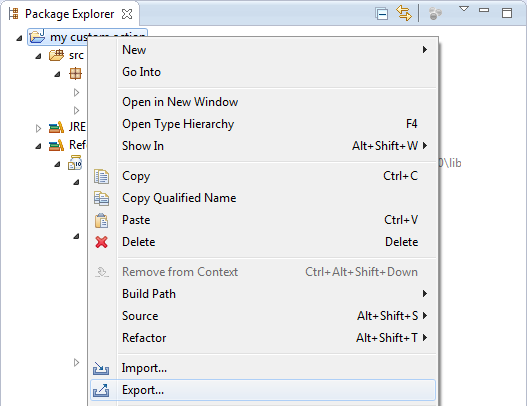
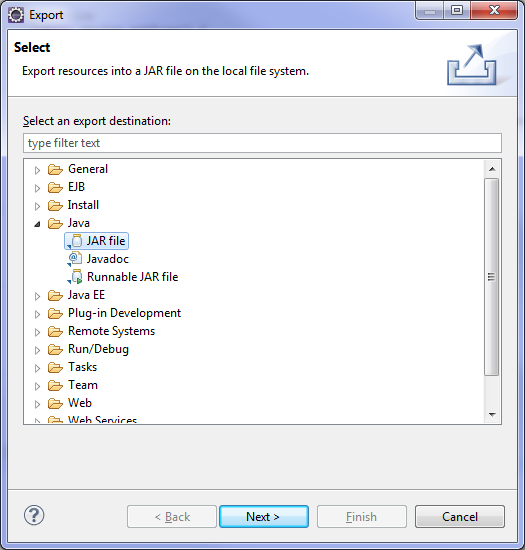
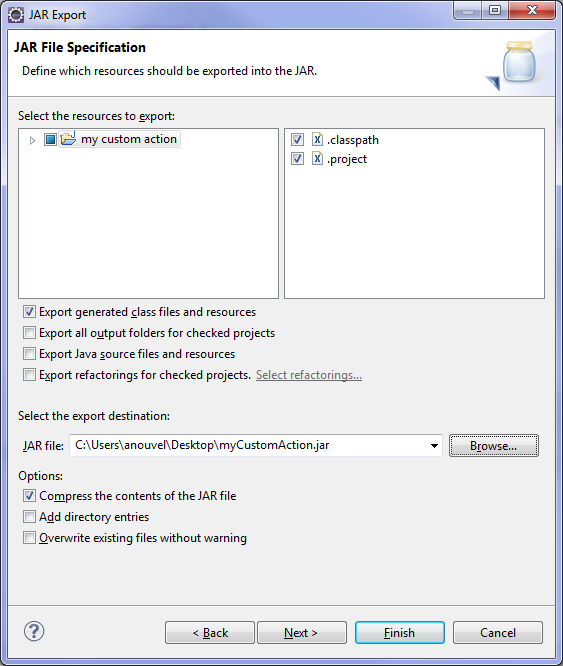
Export a project in a JAR file
This section describes how to create a Java project to implement the Data Format Extension API.
-
In Eclipse, right-click the Java project and select Export.
-
Browse to Java > JAR file and click Next.
-
In the JAR Export screen, browse to the JAR file where you want to export the project in Select the export destination.
-
Click Finish to validate the export.
The JAR which contains the API implementation is now exported and ready to be used in NeoLoad. For more information, see Data Format Extensions.
To create a Java project and implement the Data Format Extension API, follow these steps:
-
In Eclipse, right-click the Java projet and select Export.
-
Select Java, then JAR file, and click Next.
-
Select the target directory, and click Finish.
-
You can specify the JAR file in NeoLoad.
Debug the API implementation in Eclipse
To debug the API implementation in Eclipse, it is necessary to have:
-
Eclipse, Java JDK, and NeoLoad installed on the machine,
-
the JAR including the compiled sources of the Java project to debut specified in NeoLoad, as described in Data Format Extensions.
The following procedures require advanced Java programming skills. If the configuration is inaccurate, NeoLoad may not start properly.
To debug the NeoLoad recording, follow these steps:
-
Under Windows, insert a new line with
-Xdebug-Xrunjdwp:server=y,transport=dt_socket,address=8000,suspend=y
at the end of the file:-
NeoLoad 2024.3/bin/NeoLoadGUI.vmoptionswhen NeoLoad is started withNeoLoadGUI.exe.
-
-
In Eclipse, click on the Debug icon, then Debug configuration.
-
Select Remote Application, and click + (plus).
-
Select the project.
-
Start the NeoLoad Controller.
-
In Eclipse, click Debug.
-
In the Java project code, locate the breakpoints.
-
Start the NeoLoad recording.
To debug the NeoLoad load generation, follow these steps:
-
In the file
NeoLoad 2024.3/conf/agent.properties, go to the linelg.launch.vm.parameters=… -
At the end of the line, insert a space and
-Xdebug -Xrunjdwp:server=y,transport=dt_socket,address=8001,suspend=y -
Start the NeoLoad Controller.
-
In Eclipse, click on the Debug icon, then Debug configuration.
-
Select Remote Application, and click + (plus).
-
Update the Port field from
8000to8001. -
Select the project.
-
In the Java project code, locate the breakpoints.
-
Start the NeoLoad load generation. You are advised to use one Virtual User only in this mode.
-
In Eclipse, click Debug, then select the starter already created.