Manage Advanced actions
Install a Custom Advanced action
To install a Custom Advanced action, follow these steps:
Put the JAR file in:
-
The
<project>/lib/extlibdirectory of the NeoLoad project if the project is collaborative, will be run on other machines or executed through NeoLoad Web (recommended). -
The
<install-dir>/extlibdirectory of your installation folder. In this case you must install the Action on each NeoLoad that will run the Project.The JAR is automatically sent to Load Generators.
Reload the project (close the project and re-open it).
Note: If you have several versions of the same Advanced Action, the one with the latest version is taken into account.
Use an Advanced action
Note: Refer to the relevant page in this section for more details on a specific Advanced action.
To use an Advanced action, follow these steps:
-
Insert the Advanced action in your User Path.
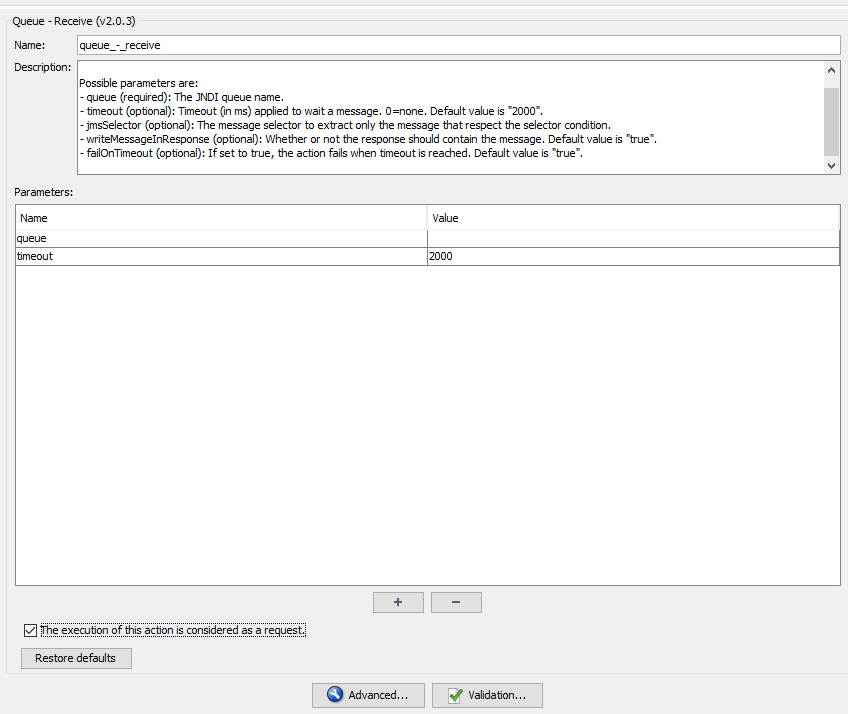
The main panel indicates the name of the Advanced action and its version.
-
Click the pencil icon
 to edit a parameter value on several rows.
 -
Use the [+] button to add a parameter line.
-
Use the [ -] button to remove a parameter line.
Note: Copy (CTRL+C), Cut (CTRL-X), and Paste (CTRL-V) actions are available in the parameter table.
Consider the executions of an Action as requests in the statistics
If you want NeoLoad to consider the executions of an Action as requests in the calculation of the statistics and graphs displayed in Runtime and Results sections
-
Check the box The execution of this action is considered as a request.
View the responses of an Advanced action
To view the responses of an Advanced action, follow these steps:
-
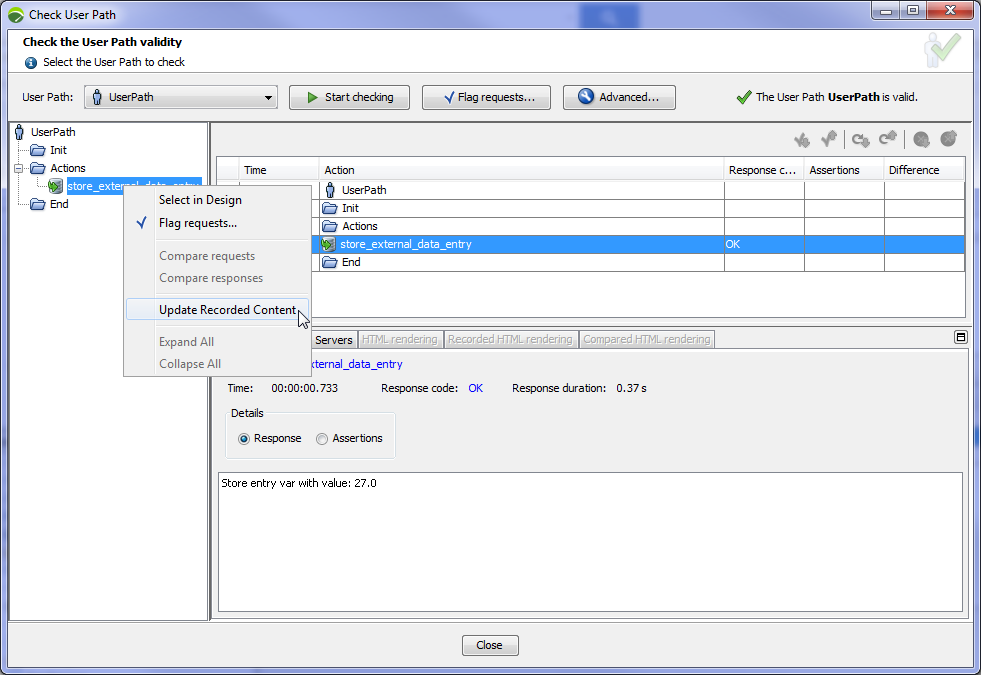
Open the Check User Path dialog.
-
Click the Start checking button.
-
Select the Advanced action you want to check.
-
See the response in the Details tab.
Note: To facilitate the variable extraction, use the Update Recorded Content option in order to get a response.
For more information on the Check User Path dialog, refer to Check a user path.
By default, Global Validation does not apply to Advanced actions. To enable it, check the Apply global validations on advanced action responses in Edit > Preferences > Project Settings > Runtime parameters.
Note: The Details tab uses the charset defined in the charset parameter. The charset used by default depends on your operating system. In Windows configurations distributed in Europe, the charset is Cp850 (Western Latin character sets).
Note: JARs and resources copied under the ‘custom-resources’ folder of the project are automatically copied to all Load Generators. Use the variable ${NL-CustomResources} to access the synchronized folder on the Load Generator.