Filter test results
Filter in the GUI
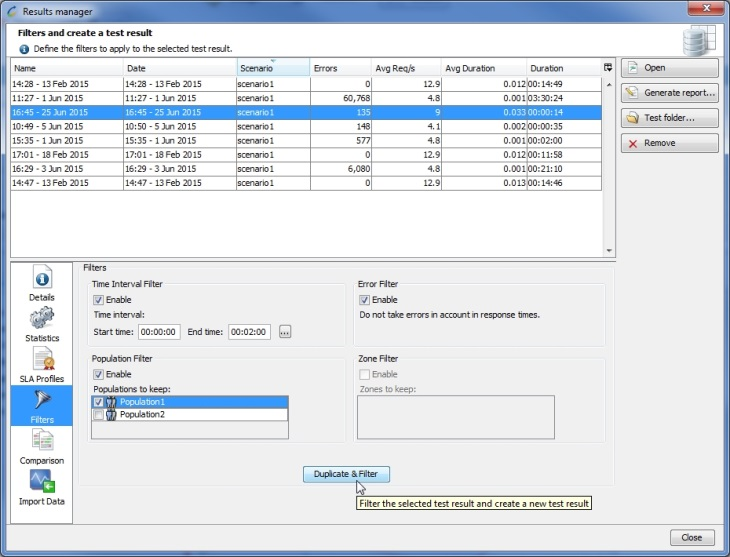
NeoLoad allows filtering the results of a test. Applying the filter creates a new set of results, which can be viewed and used as if they had been produced by a test run that had just been completed.
The GUI displaying the test results allows viewing a filtered test result in the same way as for any other result.
Available filters
Several filters may be applied, either separately or jointly. Details of the filters and their effects are set out as follows.
Time period filter
This filter allows defining a time period in the test to save. The purpose of the filter is to reduce the time span for analysis; the start and end date of the filtered test are readjusted to take into account the filter period.
This filter has two settings:
-
Start date sets the start date for the time period to be saved in
hh:mm:ssformat. -
End date sets the end date for the time period to be saved in
hh:mm:ssformat.
Note: The hh:mm:ss date format is detailed as follows:
- hh = hours from 00 to 23.
- mm = minutes from 00 to 59.
- ss = seconds from 00 to 59.
The start and end dates for the filtered test results generated are calculated based on the selected time period.
Time period selection wizard
To select the time period for the test to be saved, follow these steps:
-
If it is not already enabled, enable time period filtering by checking the appropriate Enable box.
-
Click the selection button.
-
The wizard displays a graphic view of the test, including graphs for user load, average response times and errors.
To set the start or end date for the filtered test, follow these steps:
-
At the bottom of the panel, click either the Start or End radio button.
-
Place the mouse on the graph at the required start or end point, then click the left mouse button while holding down the CTRL key.
-
To validate the new dates, click on the OK button.
Application example
In a test with a peak load policy, it may be useful to concentrate on one particular load peak. This filter reduces the time frame to be analyzed to a single peak.
Population filter
This filter specifies which populations to save among those run during the test.
The Population filter is considered to be active when at least one of the Populations run during the test to be filtered has been un-checked.
Application example
In a test containing several Populations, it may be necessary to concentrate on one particular Population. It may be interesting for example to see what buyers at an on-line store experience when, at the same time, a simply-browsing Population is browsing through the products on offer.
Zone filter
This filter specifies which zones to save among all the Generators used during the load test.
The zone filter is available when the statistics have been saved for each zone during the test. This can be enabled in the project preferences, Runtime parameters section. For more information, see General.
Application example
In a test that uses several Load Generators located in different geographic locations, it may be useful to obtain zone-specific, and thus location-specific, statistics. This highlights any performance glitches due to the user's geographical location with regard to the tested web application.
Error filter
This filter specifies whether or not errors should be taken into account in the filtered results statistics.
Application Example
When a server returns errors under a high load ( HTTP 500 errors for example), the server may respond more quickly, since it is quicker to return an HTML page with the HTTP 500 error. In these cases, the statistics will be distorted: the response times are better than in cases where there is no error. Therefore, the results returning an error must be excluded in order to obtain more realistic statistics.
Apply filters to test results
To apply filters to a set of test results, follow these steps:
-
Go to the Test Summary tab in the Results section.
-
Select the test results to be filtered in the drop-down list of results, or open the results manager and select the test results to filter.
-
Click the Filter button. The Test Results Filter Wizard is displayed.
-
Select and configure the filters you wish to apply to the test results.
-
Check or clear the Save filtered results check box. When the box is checked, the filtered results are saved; if it is cleared, the filtered results are deleted when:
-
the NeoLoad application is shut down;
-
the project is closed.
-
-
Click OK to generate the filtered results.
Note: The filters applied to a set of test results are displayed in the test Results Summary.
Generate a filtered test report
Generating a filtered test report is done in the same way as for a standard test report. The filters applied to the results are also shown in the reports.
For more information, see Publish a test report.