Install the LiveCompare server software
To install the LiveCompare server software you will need physical or remote-control access to the machine, and you will need to sign in using an account that is a member of the local Administrators group.
Create a Windows account for LiveCompare
Before installing LiveCompare for the first time, you should create a Windows account that will be used to run the LiveCompare server application. The account should be local to the LiveCompare server machine and be a member of the local Administrators group.
Download the SAP NetWeaver RFC SDK
If you're using LiveCompare with SAP, LiveCompare requires the latest patch of NetWeaver RFC SDK 7.50 for Windows on X64 64BIT, which is available from the SAP ONE Support Launchpad. You will need to download the following to a temporary directory on your LiveCompare server.
-
NetWeaver RFC SDK 7.50 latest patch for Windows on X64 64BIT.
-
See SAP NOTE 2573790 (opens in new tab) for download links.
-
Configure LiveCompare behind a reverse proxy
A reverse proxy is a machine than directs traffic to a LiveCompare server that’s normally installed behind a security system. This allows the reverse proxy to be the only point of access to the LiveCompare server. We recommend the following if you're configuring LiveCompare behind a reverse proxy.
Set the root component of the reverse proxy
Make sure that the root component of the reverse proxy matches the LiveCompare server’s IIS application name, for example:
https://external.tricentis.com/livecompare/ => https://internal.tricentis.com/livecompare/
Notice that /livecompare/ is the same in both the reverse proxy root component and the LiveCompare server URL.
Set the ReportBaseUrl
After you’ve installed LiveCompare, do the following on the LiveCompare server.
-
Sign in to as a user with Administrator permissions and click
 to go to the LiveCompare studio.
 -
Navigate to the Administration > Configuration > Reports folder.
-
Set the ReportBaseUrl field to the reverse proxy URL, for example https://external.tricentis.com/livecompare/.
Set the InternalApiEndpoint
Create a registry setting on the to allow the reverse proxy server to access the studio. Do the following on the LiveCompare server:
-
Run regedit and navigate to the HKEY_LOCAL_MACHINE\SOFTWARE\Tricentis\LiveCompare\2026.1\Settings folder.
-
Create a new String Value named InternalApiEndpoint and set its value to LiveCompare server URL, for example https://internal.tricentis.com/livecompare/. Be sure to include a trailing /.
Run the SETUP program
The SETUP program does the following:
-
Installs and configures the LiveCompare Windows software.
-
Installs LiveCompare’s apps and templates, and their required resources.
To start the installation of LiveCompare, run SETUP.EXE from the distribution directory. LiveCompare displays the following screen:
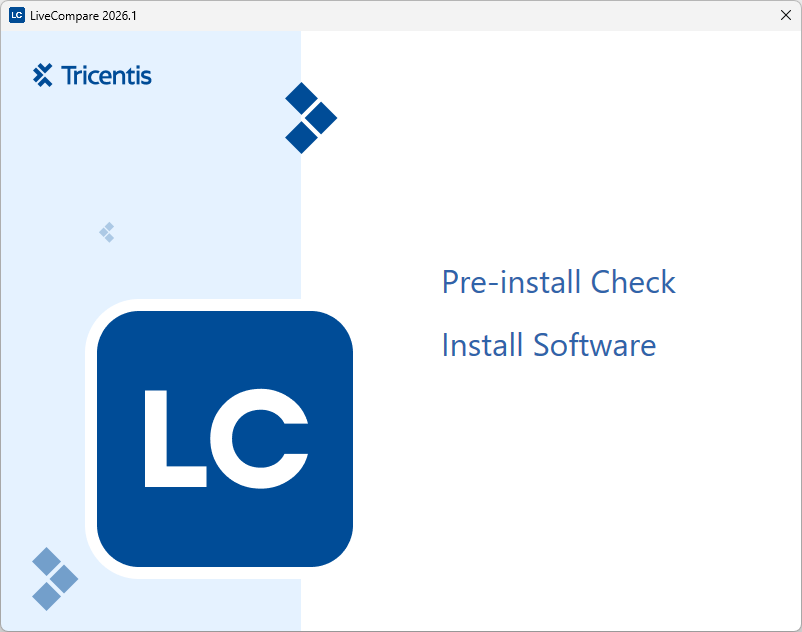
Run the LiveCompare Pre-install Check
The Pre-install Check utility checks that the target system meets LiveCompare’s configuration requirements. Select Pre-install Check to display the following screen:
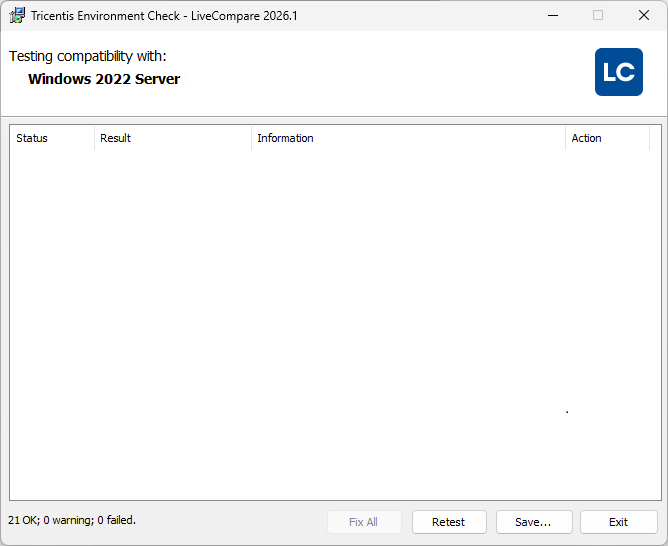
The Environment Check screen reports a summary of the test results, but it only lists the tests that have failed. To see the results of all the tests, select the results window’s background, then select Show All from the context menu.
Each test reports one of the following statuses:
-
 OK: The test passed:
 -
 High: The test failed. You must correct these issues before you continue with the installation.
 -
 Warning: The test failed, but you can still install LiveCompare.
If the Pre-install Check utility lists any tests with a High status, the installation program won’t run. Here are your options for these tests:
-
Fix: Select the a Fix link in the Action column next to the test you want to resolve to have the Pre-install Check utility try to automatically resolve the issue. This feature will try to install any missing Windows features, such as the IIS Web Server Role.
-
Override: You can override some test results marked with
High, for example Disk Freespace. To override test results, select the test in the results window, then select Override from the context menu. -
Help: To see how you can manually resolve an issue, select the Help link in the Action column next to the test you want to resolve.
Select any of the following in the Tricentis Environment Check screen:
-
Fix All to have the Pre-install Check utility try to resolve all issues that have a Fix link.
-
Retest to rerun each of the Pre-install Check tests.
-
Save… to save a report that includes all the test results.
Install LiveCompare
To install LiveCompare, select the Install Software link in the Setup screen. If you’ve installed an earlier version of LiveCompare, you must uninstall the earlier version before you install this release.
Follow the instructions on the installation Wizard to install LiveCompare. Here's what you'll need to decide during installation:
-
Where you want to install LiveCompare. Note that you can’t install LiveCompare to a mapped network drive.
-
Where you want to install the User Data Directory. The User Data directory is the location for all LiveCompare’s user data, including workspace databases, apps, templates, user accounts and SAP connections. Note that you can’t specify a mapped drive for the User Data directory.
The SETUP program displays the following screens:
-
License Agreement.
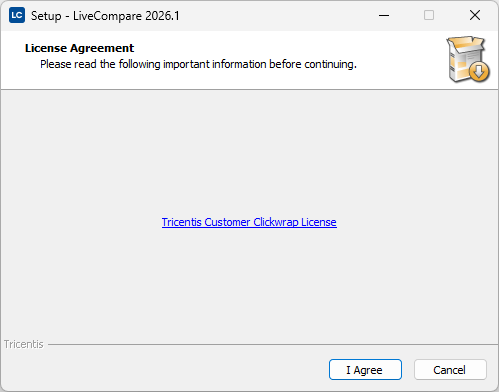
Read the License Agreement, and if you agree to its terms, click I Agree to continue.
-
Select Destination Location.
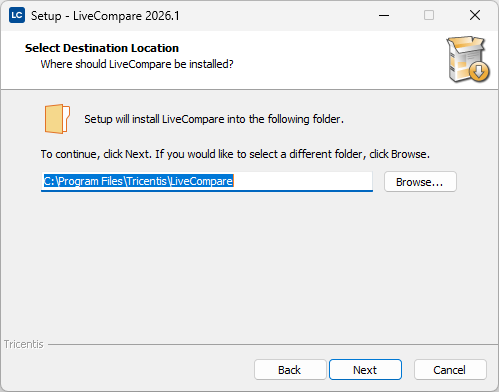
Select Browse… to specify an installation directory for LiveCompare other than the default, then select Next to continue.
-
Select User Data directory.
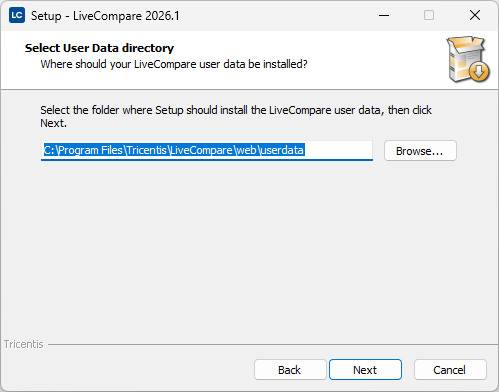
The User Data directory is the location for all LiveCompare’s user data, including workspace databases, apps, templates, user accounts and SAP connections. Select Browse… to specify a location that isn't the default, such as a separate drive with more available disk space.
When the installation has finished, LiveCompare displays the following screen:
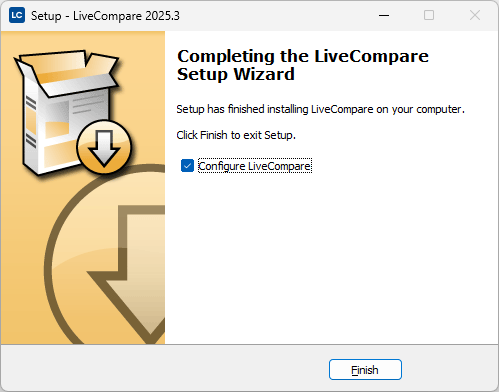
Select the Configure LiveCompare option to configure LiveCompare to run on your web server.
Run the LiveCompare Configuration Wizard
The Configuration Wizard It configures LiveCompare to run on your web server, and installs LiveCompare’s apps and templates. You must run the Configuration Wizard before you can use LiveCompare.
You can run the Wizard at the end of the installation procedure by selecting the Configure LiveCompare checkbox. Alternatively, you can run it by selecting Configure LiveCompare from the Windows Apps screen. You should use this option if the SETUP program asked you to restart the LiveCompare server.
The Configuration Wizard displays the following screens. Complete the necessary setup and select Next > to continue to each one.
SAP RFC Library screen
If you’re using LiveCompare with SAP, follow these steps:
-
Browse for the directory where you downloaded the latest patch for NetWeaver RFC SDK 7.50 for Windows on X64 64BIT.
-
Navigate to the nwrfcsdk\lib directory, select the sapnwrfc.dll file, and then select Open.
If you're using LiveCompare to run the Smart Impact Learning app or the Test Quality Audit Learning app, which don't require connections to SAP systems, you don't need to install any SAP RFC libraries. Select the Skip. LiveCompare Learning Experience - no RFC connections to SAP systems. checkbox to skip this screen.
If you’re using LiveCompare with SAP, the SAP RFC Library screen looks like this:
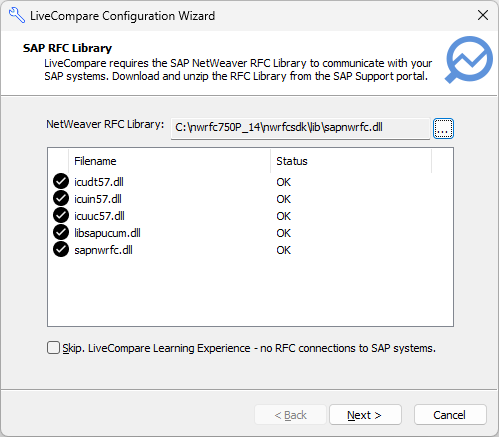
Service Configuration screen
Enter the name and password for the user account created for LiveCompare as described here.
Account Rights screen
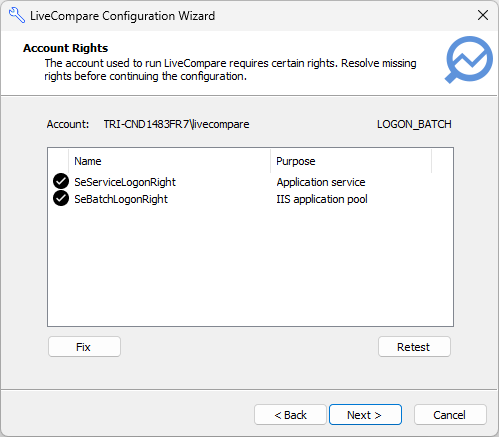
This screen lists the access rights that the LiveCompare account requires. indicates a right is present, and indicates a right is missing. If any rights are missing, select Fix to apply the missing rights to the LiveCompare account.
To apply any missing rights manually, follow these steps.
-
Run the Local Security Policy applet on the LiveCompare server.
-
Select the Security Settings > Local Policies > User Rights Assignment folder.
-
If the SeServiceLogonRight right is missing, display the properties for Log on as a service, and add the LiveCompare account.
-
If the SeBatchLogonRight right is missing, display the properties for Log on as a batch job, and add the LiveCompare account.
-
Click Retest and check that there are no missing rights.
LiveCompare Web Site screen
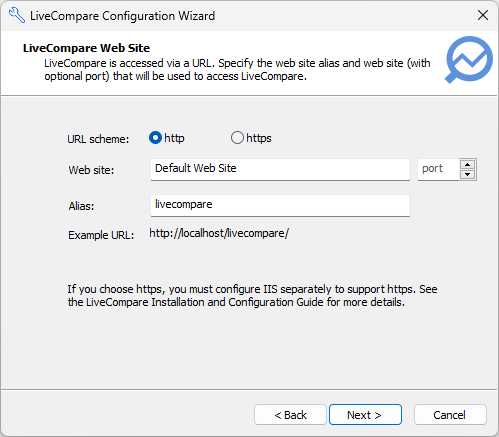
From the Live Compare Web Site screen, do the following:
-
Select the URL scheme that LiveCompare will use. If you select https, you must configure IIS to support https. If you're upgrading from an earlier release and have changed the URL scheme, the Configuration Wizard will adjust the URLs of any existing URL-based reports to reflect the new scheme.
-
To run LiveCompare using a different port, specify it in the port field. By default, LiveCompare runs using port 80.
Advanced Application Settings screen
Select the checkbox next to each of the following options you want to set:
-
Administrators Only Edit External Data Sources: This option allows External Data Sources to be created, modified or deleted only by users with LiveCompare Administrator permissions.
-
Administrators Only Edit Pipelines: This option allows Pipelines to be created, modified or deleted only by users with LiveCompare Administrator permissions.
-
Administrators Only Edit RFC Destinations: This option allows RFC Destinations to be created, modified or deleted only by users with LiveCompare Administrator permissions.
-
Administrators Only Edit Test Repositories: This option allows Test Repositories to be created, modified or deleted only by users with LiveCompare Administrator permissions.
-
Administrators Only Edit ServiceNows: This option allows ServiceNows to be created, modified or deleted only by users with LiveCompare Administrator permissions.
-
Administrators Only Delete Workflow Archives: This option allows workflow archives to be deleted only by users with LiveCompare Administrator permissions.
-
Strong Passwords: This option is set by default. It sets a requirement for strong passwords on all LiveCompare user accounts. Strong passwords have a minimum of ten characters, with at least one uppercase character, one lowercase character, one non-alphanumeric character and one number. If you set this option, the requirement for strong passwords takes effect when a user sets or changes their password. If you're upgrading from an earlier release, use the LiveCompare administrator account to set the User must change password at next logon option for each of your existing users.
Completing LiveCompare Configuration
From the Completing LiveCompare Configuration screen, select Finish to complete the installation.
LiveCompare Configuration
The LiveCompare Configuration screen provides a log of the configuration steps.
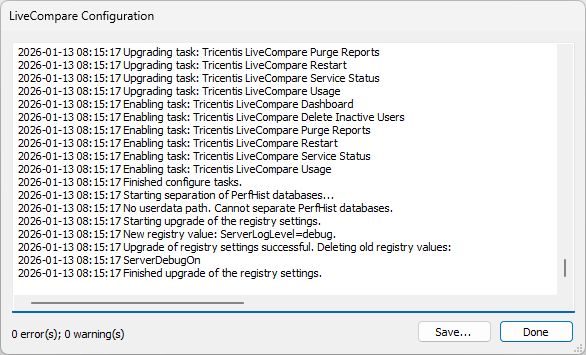
Select Done to close the screen, or Save... to save the configuration log to a text file. If necessary, you can send the log file to Tricentis support for analysis.
Connect to SAP Solution Manager
If you plan to create a LiveCompare Test Repository that connects to SAP Solution Manager, you will need to install SAP Connector for Microsoft .NET 3.1 on your LiveCompare server. follow these steps on your LiveCompare server machine.
-
Go to the SAP Connector for Microsoft .NET 3.1 page at https://support.sap.com/en/product/connectors/msnet.html.
-
In the Downloads and Documentation > Compiled with .NET Framework 4.6.2 section, click the SAP Connector for Microsoft .NET 3.1.1.0 for Windows 64bit (x64) link.
-
Sign in using your SAP Service marketplace ID to download the ZIP file.
-
Extract the ZIP file to a temporary directory.
-
In the extracted folder, run the setup program.
-
Proceed through the Wizard screens by clicking Next > in each screen.
Update the database configuration, LiveCompare service account or URL scheme
The Update LiveCompare Service Configuration Wizard may be used to do one or more of the following:
-
Encrypt, re-encrypt or decrypt SQLite databases.
-
Set a new password for the LiveCompare service account.
-
Change the LiveCompare URL scheme, for example from http: to https:.