Make Fiori data available to an RFC Destination
The Convert SAP Objects Test Search action processes a set of Fiori application objects, and returns the following details for each Fiori application.
-
The Fiori application’s URL
-
The Fiori application’s Title
-
The title of the Fiori application’s Navigation Target
These details may be used by the Search Test Repository action to find matching test assets in the specified Test Repository.
The details are obtained from Fiori data downloaded from either a production or QA system (in that order of priority). To make Fiori launchpad data available to an RFC Destination, carry out the following steps. Note that if Fiori launchpad data is not available for an SAP system (for example because the required transaction does not exist), LiveCompare’s Impact Analysis workflows and app will still run. However, the caches associated with your Test Repositories will not include any Fiori tile data.
Step 1: Download Fiori Launchpad data
-
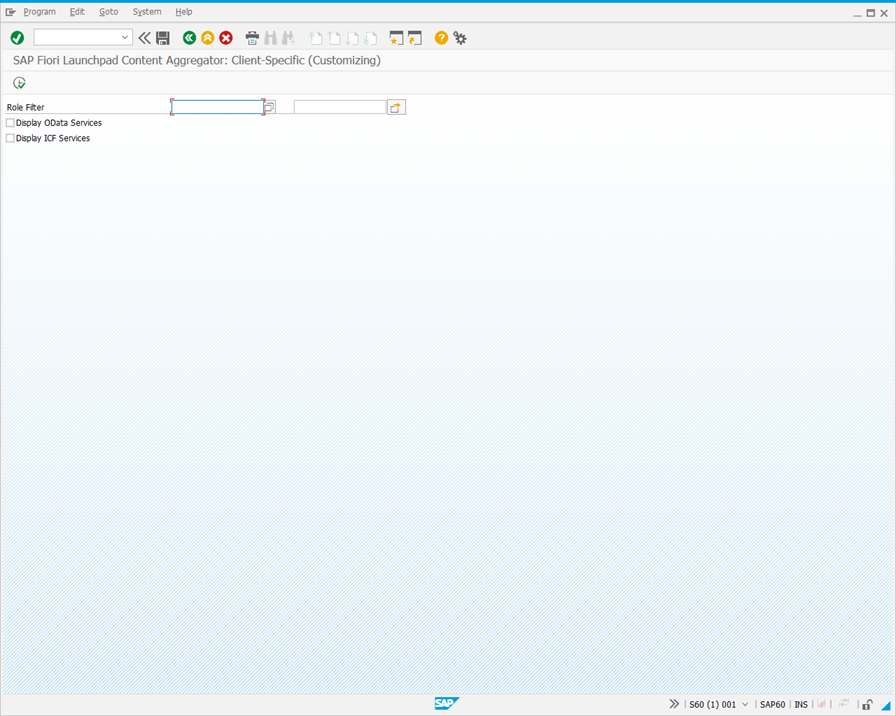
Log in to the production or QA system and run transaction /UI2/FLPCA. The following screen is displayed.
-
Select the Display OData Services check box and click
 . The following screen is displayed.
 screen.")
-
Click
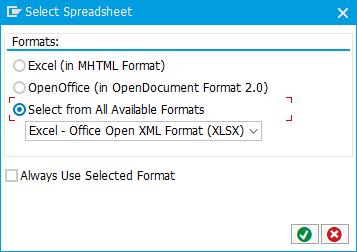
 and select ‘Spreadsheet’. The following dialog is displayed.
-
Click ‘Select from All Available Formats’, and select ‘Excel - Open Office XML Format (XLSX)’.
-
Click
 and export the results to an Excel file with an .xlsx extension.
Step 2: Create an External Data Source for the Fiori Launchpad data
-
Log in to LiveCompare as a user with Administrator privileges.
-
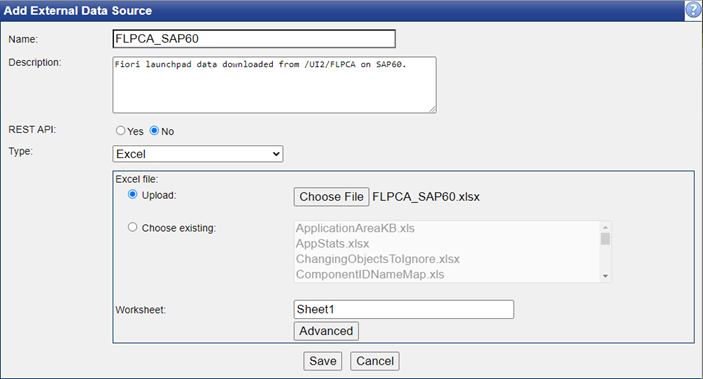
Select the Data/External Data Sources folder in the LiveCompare hierarchy, and choose New External Data Source… from the context menu.
-
Complete the Add External Data Source screen, specifying an Excel External Data Source using the .xlsx file downloaded in Step 1.
-
Click ‘Save’ to create the External Data Source.
-
In the External Data Source screen, click ‘Show Sample Data’ and verify that the Fiori Launchpad data can be retrieved.
Step 3: Set the Fiori Launchpad field names
-
Select the Configuration/General folder in the LiveCompare hierarchy.
-
Set the following fields as required:
| Field | Description |
|---|---|
| FioriLaunchpadFioriIdFieldNames | Specifies the possible column names in the /UI2/FLPCA export that contains the Fiori application Id. Multiple columns may be specified by separating each column name with a ';'. If blank, LiveCompare will use Application Ressource as the default setting (note that the spelling of ‘Resource’ is intentional as it matches the output from SAP). |
| FioriLaunchpadSearchTermFieldNames | Specifies the /UI2/FLPCA columns that LiveCompare will use as search terms when converting SAP objects to Test search terms. Multiple columns may be specified by separating each column name with a ';'. If blank, LiveCompare will use Catalog Title; Tile Title; Tile Subtitle; Tile Keywords as the default setting. |
| FioriLaunchpadTransactionFieldNames | Specifies the possible column names in the /UI2/FLPCA export that contain transaction codes (for example, VA01). Multiple columns may be specified by separating each column name with a ';', for example, Application Ressource;Transaction (note that the spelling of ‘Resource’ is intentional as it matches the output from SAP). If blank, LiveCompare will use its default setting. |
Step 4: Associate the External Data Source with an analysis system
-
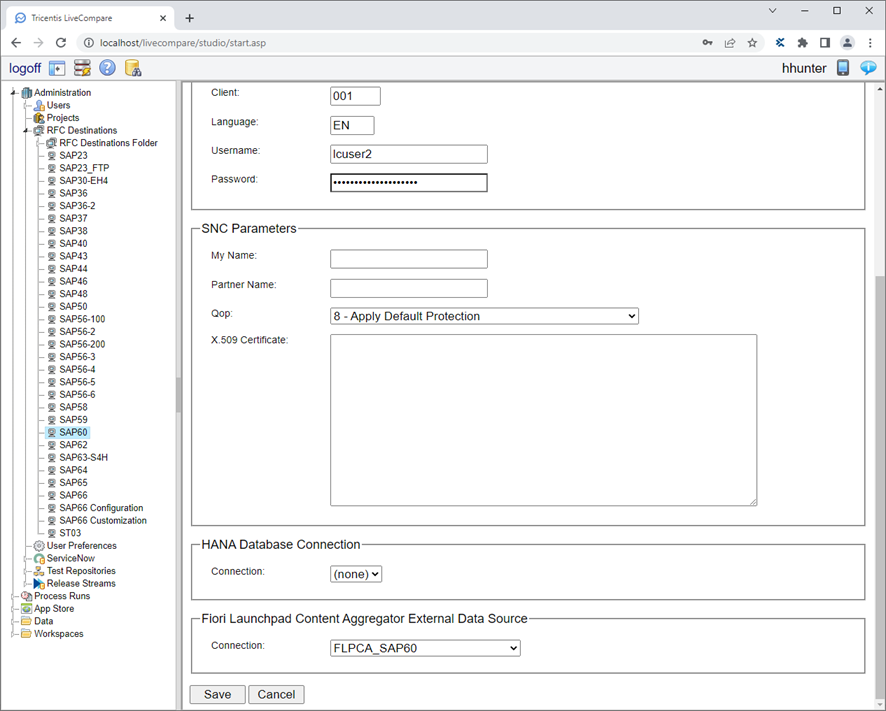
Expand the Administration/RFC Destinations folder in the LiveCompare hierarchy, and select the RFC Destination for the Analysis system.
-
Click ‘Edit’ in the RFC Destination’s General tab.
-
Enter the password for the RFC Destination’s user account in the Password field.
-
In the Fiori Launchpad Content Aggregator External Data Source section at the bottom of the screen, select the External Data Source created in Step 2 in the Connection drop-down list.
-
Click ‘Save’ to save the RFC Destination.